1. Introduction
Spring Security AuthorizationManager is part of Spring Security that is an extension of the Spring Framework that supports common application security. It includes mandatory authentication for URLs, default login and logout forms, and default users. There are four key concepts:
- Principal: an application request. It could be a user or web service.
- Authentication: the process of verifying principals. It can be knowledge based authentication (username/password), possession based authentication (access token), or multi-factor authentication.
- Authorization: the process of verifying a principal has access to the resource.
- Authority: a logical name representing permissions. A principal may have zero or more authorities.
In this example, I will configure the Spring Security AuthorizationManager to protect Rest APIs in a spring boot application with the following steps:
- Add Spring Security dependencies.
- Configure and enable Spring Security.
- Secure Rest APIs with role-based authorization
- Secure Rest APIs with customized
AuthorizationManager.
2. What Is Spring Security AuthorizationManager
The AuthorizationManager is an interface that checks if an authenticated principal has access to a secured resource. AuthorizationManager instances are used by Spring Security to make final access control decisions and Spring Security provides several built-in implementations of AuthorizationManager, such as RoleHierarchyAuthoritiesMapper and RoleHierarchyImpl. It also provides custom access control mechanisms.
AuthorizationManager is often used in conjunction with other Spring Security components, such as method security annotations, web security configuration, etc. In this example, I will use role-based authorization and configure a web security configuration to protect the “custom” Rest API resource.
3. Implementations of AuthorizationManager
In this step, I will create three Rest API resources and protect the API access with Spring Security AuthorizationManager.
| API Resource | Authority |
| /adminonly/** | ADMIN |
| /rolebased/** | USER |
| /anonymous | authenticated user |
I will configure four application users so we can use them to demonstrate the API resources are secured.
| Principal | Authority | Allowed API Resource |
| admin | ADMIN | /adminonly |
| user1, user 2 | USER | /rolebased |
| guest | GUEST | /anonymous |
3.1 Add Dependencies
Add “spring-boot-starter-security” and “spring-security-core” dependencies to the pom.xml to protect the Spring boot application with Spring Security feature.
pom.xml
 <?xml version="1.0" encoding="UTF-8"?>
<project xmlns="http://maven.apache.org/POM/4.0.0"
	xmlns:xsi="http://www.w3.org/2001/XMLSchema-instance"
	xsi:schemaLocation="http://maven.apache.org/POM/4.0.0 http://maven.apache.org/xsd/maven-4.0.0.xsd">
	<modelVersion>4.0.0</modelVersion>
	<artifactId>spring-security-authmanager-demo</artifactId>
	<version>0.1-SNAPSHOT</version>
	<name>spring-security-authorizationmanager-demo</name>
	<packaging>war</packaging>

	<parent>
		<groupId>org.springframework.boot</groupId>
		<artifactId>spring-boot-starter-parent</artifactId>
		<version>3.0.5</version>
	</parent>

	<properties>
		<start-class>com.zheng.SpringSecurityApplication</start-class>
	</properties>

	<dependencies>
		<dependency>
			<groupId>org.springframework.boot</groupId>
			<artifactId>spring-boot-starter-web</artifactId>
		</dependency>
		<dependency>
			<groupId>org.springframework.boot</groupId>
			<artifactId>spring-boot-starter-security</artifactId>
		</dependency>
		<dependency>
			<groupId>org.springframework.security</groupId>
			<artifactId>spring-security-core</artifactId>
		</dependency>
		<dependency>
			<groupId>org.springdoc</groupId>
			<artifactId>springdoc-openapi-starter-webmvc-ui</artifactId>
			<version>2.0.0</version>
		</dependency>
	</dependencies>

	<build>
		<finalName>spring-security-authorizationmanager-demo</finalName>
		<resources>
			<resource>
				<directory>src/main/resources</directory>
				<filtering>true</filtering>
			</resource>
		</resources>
		<plugins>
			<plugin>
				<groupId>org.apache.maven.plugins</groupId>
				<artifactId>maven-war-plugin</artifactId>
			</plugin>
		</plugins>
	</build>


</project>
3.2 Create a Demo API Resource
Create a demo API Resource RestDemoController class which contains four API resources: “/custom“, “/adminonly“, “/rolebased“, and “/anonymous“.
RestDemoController.java
package com.zheng.controller;

import org.springframework.web.bind.annotation.GetMapping;
import org.springframework.web.bind.annotation.RestController;

@RestController
public class RestDemoController {
    @GetMapping("/anonymous")
    public String anonymousResource() {
        return "anonymous, no security";
    }

    @GetMapping("/adminonly")
    public String adminResource() {
        return "admin only";
    }

    @GetMapping("/rolebased")
    public String authorOrEditorResource() {
        return "author or editor";
    }

    @GetMapping("/custom")
    public String customResource() {
        return "custom security";
    }

}
3.3 Configure and Enable Spring Security
Create a SecurityConfig class which configures and enables Spring Security to protect the four Rest API resources created at step 3.2.
- The “
adminonly” API is authorized for the user who has the “ADMIN” role. - The “
rolebased” API is authorized for the user who has either “USER” or “ADMIN” role. - The “
custom” API is authorized with customizedAuthorizationManager. - The valid user is authorized to any other API resources. In this example, a valid user with “ADMIN” not “USER” role can access the “
anonymous” API.
SecurityConfig.java
package com.zheng.config;

import static org.springframework.security.config.Customizer.withDefaults;

import java.util.Random;

import org.apache.logging.log4j.LogManager;
import org.apache.logging.log4j.Logger;
import org.springframework.context.annotation.Bean;
import org.springframework.context.annotation.Configuration;
import org.springframework.security.authorization.AuthorizationDecision;
import org.springframework.security.authorization.AuthorizationManager;
import org.springframework.security.config.annotation.web.builders.HttpSecurity;
import org.springframework.security.config.annotation.web.configuration.EnableWebSecurity;
import org.springframework.security.core.userdetails.User;
import org.springframework.security.core.userdetails.UserDetails;
import org.springframework.security.crypto.bcrypt.BCryptPasswordEncoder;
import org.springframework.security.crypto.password.PasswordEncoder;
import org.springframework.security.provisioning.InMemoryUserDetailsManager;
import org.springframework.security.web.SecurityFilterChain;
import org.springframework.security.web.access.intercept.RequestAuthorizationContext;

@Configuration
@EnableWebSecurity
public class SecurityConfig {
	private static final Logger logger = LogManager.getLogger(SecurityConfig.class);

	@Bean
	SecurityFilterChain securityFilterChain(HttpSecurity http) throws Exception {
		http.authorizeHttpRequests(authorize -> authorize
				.requestMatchers("/custom/**").access(customAuthManager())
				.requestMatchers("/adminonly/**").hasRole("ADMIN")
				.requestMatchers("/rolebased/**")
				.hasAnyRole("ADMIN", "USER")
				.anyRequest().authenticated())
			.formLogin(withDefaults())
			.apply(clientErrorLogging());

		return http.build();
	}

	@Bean
	public ClientErrorLoggingConfigurer clientErrorLogging() {
		return new ClientErrorLoggingConfigurer();
	}

	@Bean
	public InMemoryUserDetailsManager userDetailsService() {
			UserDetails admin = User.withUsername("admin").password(passwordEncoder().encode("admin")).roles("ADMIN")
				.build();
		UserDetails author = User.withUsername("user1").password(passwordEncoder().encode("user1")).roles("USER")
				.build();
		UserDetails editor = User.withUsername("user2").password(passwordEncoder().encode("user2")).roles("USER")
				.build();
		UserDetails guest = User.withUsername("guest").password(passwordEncoder().encode("guest")).roles("GUEST")
				.build();
    return new InMemoryUserDetailsManager(admin, author, editor, guest);
	}

	@Bean
	PasswordEncoder passwordEncoder() {
		return new BCryptPasswordEncoder();
	}

	@Bean
	AuthorizationManager customAuthManager() {
		return (authentication, object) -> {
			boolean nextBoolean = new Random().nextBoolean();
			logger.info("nextBoolean=" + nextBoolean);
			return new AuthorizationDecision(nextBoolean);
		};
	}

}
- line 24: annotation
@EnableWebSecurityenables Spring Security. - line 31: secure the “
/custom/” URL with a customized authorization manager. - line 32: secure the “
/adminonly/” URL with “ADMIN” role. - line 33, 34: secure the “
/rolebased/” URL with either “USER” or “ADMIN” role. - line 35: secure all other URLs with valid users.
- line 66-71: configure a customized
AuthorizationManagerwhich secures “custom” API. It uses a random boolean generator to return a AuthorizationDecision which allows or rejects the request at random.
3.4 Configure an Error Handling for Invalid Logging User
3.4.1 Configure a Filter
Create LoggingErrorFilter which extends from GenericFilterBean to handle logging errors. The override doFilter method gets the Authentication object from Spring Security Context and logs the error message for invalid user’s request.
LoggingErrorFilter.java
package com.zheng.config;

import jakarta.servlet.FilterChain;
import jakarta.servlet.ServletException;
import jakarta.servlet.ServletRequest;
import jakarta.servlet.ServletResponse;
import jakarta.servlet.http.HttpServletResponse;
import org.apache.logging.log4j.LogManager;
import org.apache.logging.log4j.Logger;
import org.springframework.http.HttpStatus;
import org.springframework.security.core.Authentication;
import org.springframework.security.core.context.SecurityContextHolder;
import org.springframework.web.filter.GenericFilterBean;

import java.io.IOException;
import java.util.List;

public class LoggingErrorFilter extends GenericFilterBean {

	private static final Logger logger = LogManager.getLogger(LoggingErrorFilter.class);

	private List<HttpStatus> errorCodes;

	public LoggingErrorFilter(List<HttpStatus> errorCodes) {
		this.errorCodes = errorCodes;
	}

	@Override
	public void doFilter(ServletRequest request, ServletResponse response, FilterChain chain)
			throws IOException, ServletException {

		Authentication auth = SecurityContextHolder.getContext().getAuthentication();

		if (auth == null) {
			chain.doFilter(request, response);
			return;
		}
		int status = ((HttpServletResponse) response).getStatus();
		if (status < 400 || status >= 500) {
			chain.doFilter(request, response);
			return;
		}

		if (errorCodes == null) {
			logger.info("User " + auth.getName() +  " encountered error " + status);
		} else {
			if (errorCodes.stream().anyMatch(s -> s.value() == status)) {
				logger.info("User " + auth.getName() + " encountered error " + status);
			}
		}

		chain.doFilter(request, response);
	}

}
- line 32: access the
authenticationobject associated with the current session’s Spring Security Context. - line 44-50: log the authentication error message for invalid users.
3.4.2 Create a Logging Error Handler
Configure the LoggingErrorConfigurer class which extends from the AbstractHttpConfigurer base class provided from Spring Security for configuring HTTP security so we can use the log message to explain why the user is rejected the access.
LoggingErrorConfigurer.java
package com.zheng.config;

import org.springframework.http.HttpStatus;
import org.springframework.security.config.annotation.web.builders.HttpSecurity;
import org.springframework.security.config.annotation.web.configurers.AbstractHttpConfigurer;
import org.springframework.security.web.access.intercept.AuthorizationFilter;

import java.util.List;

public class LoggingErrorConfigurer extends AbstractHttpConfigurer<LoggingErrorConfigurer, HttpSecurity> {

    private List<HttpStatus> errorCodes;

    public LoggingErrorConfigurer(List<HttpStatus> errorCodes) {
        this.errorCodes = errorCodes;
    }

    public LoggingErrorConfigurer() {

    }

    @Override
    public void init(HttpSecurity http) throws Exception {
        // initialization code
    }

    @Override
    public void configure(HttpSecurity http) throws Exception {
        http.addFilterAfter(new LoggingErrorFilter(errorCodes),  AuthorizationFilter.class);
    }

}
- line 10: extends from
AbstractHttpConfigurerto configure HTTP security. - line 29: add
LoggingErrorFilterto the filter chain in a Spring Security application.
4. Launch SpringSecurityApplication
Launch the SpringSecurityApplication and confirm the application is started with the server log.
SpringSecurityApplication.java
package com.zheng;

import org.springframework.boot.SpringApplication;
import org.springframework.boot.autoconfigure.SpringBootApplication;

@SpringBootApplication
public class SpringSecurityApplication {

    public static void main(String[] args) {
        SpringApplication.run(SpringSecurityApplication.class, args);
    }
}
Confirm the application is started with server log.
server.log
2024-04-30T08:24:12.406-05:00  INFO 22252 --- [           main] o.s.b.w.embedded.tomcat.TomcatWebServer  : Tomcat started on port(s): 8080 (http) with context path ''
2024-04-30T08:24:12.416-05:00  INFO 22252 --- [           main] com.zheng.SpringSecurityApplication      : Started SpringSecurityApplication in 2.912 seconds (process running for 3.305)
5. Demo Rest APIs are Protected
In this step, I will demonstrate how the API resources created at step 3.2 are secured via Swagger UI.
5.1 Configure an OpenAPI Swagger UI
In this step, I will configure an OpenAPI Swagger UI for the spring boot project so the three API resources created at step 3.2 can be tested in browser with the following steps:
- Add springdoc-openapi-starter-webmvc-ui dependency.
- Configure an
OpenAPIbean.
5.1.1 Add OpenAPI Dependencies
Add springdoc-openapi-starter-webmvc-ui dependency to the pom.xml.
pom.xml dependency
		<dependency>
			<groupId>org.springdoc</groupId>
			<artifactId>springdoc-openapi-starter-webmvc-ui</artifactId>
			<version>2.0.0</version>
		</dependency>
5.1.2 Configure OpenAPI
Configure an OpenAPI Spring bean so it will enable the OpenAPI documentation for the API resources created at step 3.2.
SwaggerConfig.java
package com.zheng.config;

import org.springframework.context.annotation.Bean;
import org.springframework.context.annotation.Configuration;

import io.swagger.v3.oas.models.OpenAPI;
import io.swagger.v3.oas.models.info.Info;

@Configuration
public class SwaggerConfig {

	@Bean
	public OpenAPI api() {
		return new OpenAPI().info(new Info().title("DEMO Rest API").description("Demo Rest API").version("v1.0.0"));
	}

}
5.1.3 Launch Open API Swagger UI
Open a browser and launch the http://localhost:8080/swagger-ui/index.html. It will pop up the default login form provided by Spring Security for the first time. Once entered a valid username and password, then it displays the swagger UI index.html page as the following screenshot.

After the SpringSecurityApplication is started, login into http://localhost:8080/swagger-ui/index.html?continue with “user1“, “admin“, “guest” users, and click the “Try it out” button for the 4 API to confirm the resources are secured.
5.2 Demo Admin User
As the SecurityConfig outlined at step 3.3, the “admin” user can access all resources. Executing the API resources in Swagger UI page as showing here, the “admin” user should get 200 ok response for “adminonly“, “rolebased“, and “anonymous” APIs as the screenshot.

5.3 Demo User1 User
User1 has “USER” role and can access “/rolebased” API with 200 ok response. It will get 403 forbidden error when accessing the “/adminonly” resource.
Forbidden Response
{
  "timestamp": "2024-04-30T14:23:46.007+00:00",
  "status": 403,
  "error": "Forbidden",
  "path": "/adminonly"
}
Confirmed the API protection by viewing the server log and looking for “User user1 encountered error 403” log message.
user 1 server.log
com.zheng.config.LoggingErrorFilter : User user1 encountered error 403
5.4 Demo Guest User
The “guest” user does not have “USER” nor “ADMIN”role and can access only “/anonymous” API. It may get 200 ok response if the nextBoolean=true when accessing the “/custom” resource.
guest server log
2024-04-30T11:14:27.753-05:00  INFO 30264 --- [nio-8080-exec-6] com.zheng.config.SecurityConfig          : nextBoolean=false
2024-04-30T11:14:27.753-05:00  INFO 30264 --- [nio-8080-exec-6] com.zheng.config.LoggingErrorFilter      : User guest encountered error 403
2024-04-30T11:16:08.964-05:00  INFO 30264 --- [nio-8080-exec-1] com.zheng.config.SecurityConfig          : nextBoolean=true
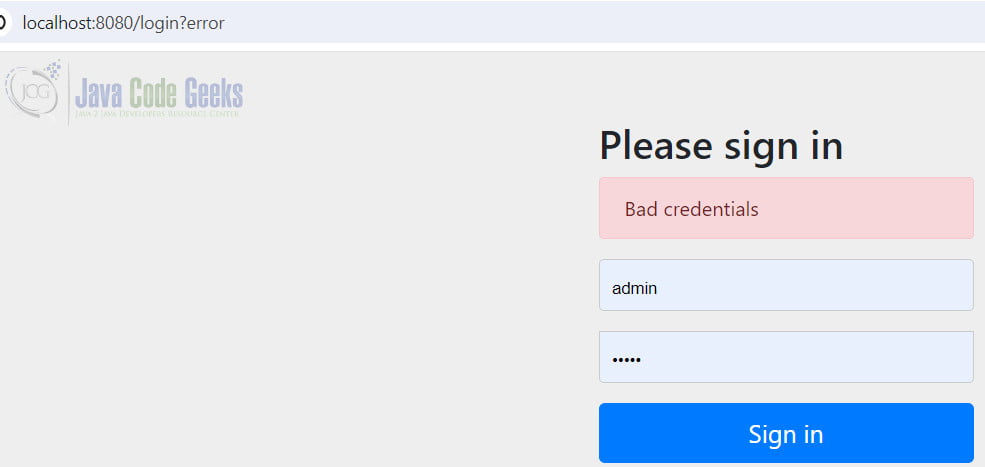
5.5 Demo Invalid User
It will display a “Bad credentials” error message to protect the resources when entering an invalid username and password.
6. Conclusion
In this example, I demonstrated how to configure and enable Spring Security AuthorizationManager to protect Rest APIs in a spring boot application. It protects the Rest APIs with role-based authorization and customized AuthorizationManager.
7. Download
You can download the source code for this spring boot security demo project.
You can download the full source code of this example here: Spring Security AuthorizationManager
