Android Full App, Part 7: Using options menus and customized dialogs for user interaction
This is the seventh part of the “Android Full Application Tutorial” series. The complete application aims to provide an easy way of performing movies/actors searching over the internet. In the first part of the series (“Main Activity UI”), we created the Eclipse project and set up a basic interface for the main activity of the application. In the second part (“Using the HTTP API”), we used the Apache HTTP client library in order to consume an external HTTP API and integrate the API’s searching capabilities into our application. In the third part (“Parsing the XML response”) we saw how to parse the XML response using Android’s built-in XML parsing capabilities. In the fourth part (“Performing the API request asynchronously from the main activity”), we tied together the HTTP retriever and XML parser services in order to perform the API search request from our application’s main activity. The request was executed asynchronously in a background thread in order to avoid blocking the main UI thread. In the fifth part (“Launching new activities with intents”), we saw how to launch a new Activity and how to transfer data from one Activity to another. In the sixth part, (“Customized list view for data presentation”) we created a custom list view in order to provide a better data visual presentation. In this part, we are going to create options menus and custom dialogs in order to facilitate better user interaction.
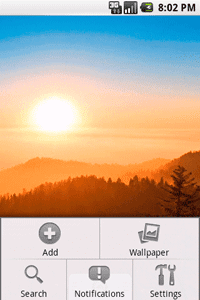
When developing applications for mobile devices which are rather limited in terms of resources (either CPU, memory or screen size), we should strive to make the most out of the available screen real-estate. In Android, one way of taking full advantage of the screen dimensions is using an options menu when the available options have to be presented to the user. As you can see in the following image, under normal operations, the options are not visible to the user, and only after he prompts for them shall they appear. When that happens, the menu is placed to the foreground, meaning that it “hides” any other UI element that exists underneath it.
One particular aspect of creating and using Android menus is that they provide a familiar interface for the user to access application functions and settings. In other words, don’t re-invent the wheel, just use the built-in functionality when you wish to create a menu. The official Android documentation page includes a comprehensive guide to Creating Menus. In this tutorial, we will see the fastest and most straightforward way to create menus and populate them with the appropriate options.
The main class around which the options menus are built is, not surprisingly, named Menu. It is actually an interface for managing the items in a menu. By default, every Activity supports an options menu of actions or options. More specifically, the Android Activity class provides a method named onCreateOptionsMenu, which can be used to initialize the contents of the activity’s standard options menu. When overriding that method, we typically use the add method in order to add new items to the menu. Notice that the add method, and its variations, return a MenuItem object, which is an interface for direct access to a previously created menu item. A MenuItem can contain both a title and an icon.
The itemId argument of the add method is the one that will allow us to figure out what options has been selected. In general, to handle events such as the user selecting a menu option, we need to override the onOptionsItemSelected method of our Activity. That method contains a reference to the MenuItem that was selected and we can use the getItemId method in order to find its identifier. Thus, we are now in position to know what the user has selected.
In our application, we will use an options menu in order to allow the user to either visit the IMDB page of a specific movie, or to view its poster image in a new window. We first define the Ids of the available items and then create the menu by adding menu items to the menu. Note that we use both a title and an icon for our menu items. Finally, when an option is selected, we check the menu item ID in order to find out what action has to be performed. Here are some code snippets for all the above:
01 02 03 04 05 06 07 08 09 10 11 12 13 14 15 16 17 18 19 20 21 22 23 24 | private static final int ITEM_VISIT_IMDB = 0;private static final int ITEM_VIEW_FULL_IMAGE = 1;...@Overridepublic boolean onCreateOptionsMenu(Menu menu) { menu.add(Menu.NONE, ITEM_VISIT_IMDB, 0, getString(R.string.visit_imdb)).setIcon(android.R.drawable.ic_menu_set_as); menu.add(Menu.NONE, ITEM_VIEW_FULL_IMAGE, 0, getString(R.string.view_full_image)).setIcon(android.R.drawable.ic_menu_zoom); return super.onCreateOptionsMenu(menu);}...@Overridepublic boolean onOptionsItemSelected(MenuItem item) { switch (item.getItemId()) { case ITEM_VISIT_IMDB: visitImdbMoviePage(); return true; case ITEM_VIEW_FULL_IMAGE: viewFullImagePoster(); return true; } return false;} |
Here is an image of what our options menu is going to look like:

The second topic of this tutorial is the creation and usage of dialogs which help interacting with the application’s users. The most straightforward way to do that is to directly use the Dialog class. The Dialog constructor requires a Context object as argument, and that is going to be the Activity within which the dialog is created. Just like as with an Activity, dialog objects provide a setContentView method, which accepts a layout resource ID and sets the screen content from that layout resource. Similarly, the findViewById method allows us to find a reference of the view that was identified by the id attribute from the XML layout. The internal views can then be manipulated as usual. In two words, it is just like building a View for an Activity.
After we are done with creating the dialog, a call to the show method will start the dialog and display it on screen. In that case, the window is placed in the application layer and opaque. After we are done with the specific dialog, we have to call the dismiss method in order to remove it from the screen. Note that this method can be invoked safely from any thread. A final note on Dialogs is that you can either define a title for it (via the setTitle method) or indicate that no title is needed for it (via the requestWindowFeature method and the FEATURE_NO_TITLE feature).
In our application we are going to create two different kind of dialogs: one for showing a movie’s poster image and one for presenting the movie’s overview. Let’s see the code snippets for those.
For the poster image dialog we have:
01 02 03 04 05 06 07 08 09 10 11 12 13 14 15 16 | final Dialog dialog = new Dialog(this);dialog.requestWindowFeature(Window.FEATURE_NO_TITLE);dialog.setContentView(R.layout.full_image_layout);...final Button closeDialogButton = (Button) dialog.findViewById(R.id.close_full_image_dialog_button);imageView = (ImageView) dialog.findViewById(R.id.image_view); closeDialogButton.setOnClickListener(new OnClickListener() { @Override public void onClick(View v) { dialog.dismiss(); }});final ImageDownloaderTask task = new ImageDownloaderTask();task.execute(imageUrl); dialog.show(); |
Note that the image is retrieved asynchronously with the ImageDownloaderTask (extends the AsyncTask class) and the ImageView is populated in the onPostExecute method. For that dialog, the layout XML is named “full_image_layout.xml” and it is the following:
01 02 03 04 05 06 07 08 09 10 11 12 13 14 15 16 17 18 19 20 21 22 23 24 25 26 27 28 29 30 31 32 33 34 | <?xml version="1.0" encoding="utf-8"?><LinearLayout android:orientation="vertical" android:layout_width="fill_parent" android:layout_height="fill_parent"> <ImageView android:id="@+id/image_view" android:layout_width="wrap_content" android:layout_height="wrap_content" android:layout_gravity="center" android:layout_marginLeft="5dip" android:layout_marginRight="5dip" android:layout_marginTop="5dip" android:layout_marginBottom="5dip" /> <Button android:id="@+id/close_full_image_dialog_button" android:layout_width="wrap_content" android:layout_height="wrap_content" android:text="@string/close" android:layout_weight="0.5" android:layout_marginLeft="10dip" android:layout_marginRight="10dip" android:layout_marginTop="5dip" android:layout_marginBottom="5dip" android:layout_gravity="center" /> </LinearLayout> |
When hitting the appropriate menu button, here is what you are going to get for the poster image dialog:

For the movie overview dialog, we have the following:
01 02 03 04 05 06 07 08 09 10 11 12 13 14 15 16 17 18 | final Dialog dialog = new Dialog(this);dialog.setContentView(R.layout.movie_overview_dialog);dialog.setTitle(title);final TextView overviewTextView = (TextView) dialog.findViewById(R.id.movie_overview_text_view);overviewTextView.setText(overview); final Button closeButton = (Button) dialog.findViewById(R.id.movie_overview_close_button); closeButton.setOnClickListener(new OnClickListener() { @Override public void onClick(View v) { dialog.dismiss(); }}); dialog.show(); |
Respectively, the XML layout file is named “movie_overview_dialog.xml” and it is the following:
01 02 03 04 05 06 07 08 09 10 11 12 13 14 15 16 17 18 19 20 21 22 23 24 25 26 27 28 29 30 31 32 33 34 35 36 37 38 39 40 41 42 43 | <?xml version="1.0" encoding="utf-8"?> android:orientation="vertical" android:layout_width="fill_parent" android:layout_height="fill_parent" > <ScrollView android:layout_width="fill_parent" android:layout_height="fill_parent"> <LinearLayout android:orientation="vertical" android:layout_width="fill_parent" android:layout_height="fill_parent" android:paddingLeft="5px" android:paddingRight="5px" android:paddingBottom="10px" > <TextView android:id="@+id/movie_overview_text_view" android:layout_width="wrap_content" android:layout_height="wrap_content" android:layout_centerHorizontal="true" android:layout_marginBottom="5dip" android:layout_marginLeft="5dip" android:layout_marginRight="5dip" /> <Button android:id="@+id/movie_overview_close_button" android:text="@string/close" android:layout_width="wrap_content" android:layout_height="wrap_content" /> </LinearLayout> </ScrollView> </LinearLayout> |
An example of the movie overview dialog is the following (note that this dialog appears when the user clicks on one of the movies of the list):

All in all, the “MoviesListActivity” class is now as follows:
001 002 003 004 005 006 007 008 009 010 011 012 013 014 015 016 017 018 019 020 021 022 023 024 025 026 027 028 029 030 031 032 033 034 035 036 037 038 039 040 041 042 043 044 045 046 047 048 049 050 051 052 053 054 055 056 057 058 059 060 061 062 063 064 065 066 067 068 069 070 071 072 073 074 075 076 077 078 079 080 081 082 083 084 085 086 087 088 089 090 091 092 093 094 095 096 097 098 099 100 101 102 103 104 105 106 107 108 109 110 111 112 113 114 115 116 117 118 119 120 121 122 123 124 125 126 127 128 129 130 131 132 133 134 135 136 137 138 139 140 141 142 143 144 145 146 147 148 149 150 151 152 153 154 155 156 157 158 159 160 161 162 163 164 165 166 167 168 169 170 171 172 173 174 175 176 177 178 179 180 181 182 183 184 185 186 187 188 189 190 191 192 193 194 195 196 197 198 199 200 201 202 203 204 205 206 207 208 209 210 211 212 213 214 215 216 217 218 219 220 221 222 223 224 225 226 227 228 229 230 231 232 233 234 235 236 237 | package com.javacodegeeks.android.apps.moviesearchapp;import java.io.InputStream;import java.util.ArrayList;import android.app.Dialog;import android.app.ListActivity;import android.app.ProgressDialog;import android.content.DialogInterface;import android.content.Intent;import android.content.DialogInterface.OnCancelListener;import android.graphics.Bitmap;import android.graphics.BitmapFactory;import android.net.Uri;import android.os.AsyncTask;import android.os.Bundle;import android.view.Menu;import android.view.MenuItem;import android.view.View;import android.view.Window;import android.view.View.OnClickListener;import android.widget.Button;import android.widget.ImageView;import android.widget.ListView;import android.widget.TextView;import android.widget.Toast;import com.javacodegeeks.android.apps.moviesearchapp.io.FlushedInputStream;import com.javacodegeeks.android.apps.moviesearchapp.model.Movie;import com.javacodegeeks.android.apps.moviesearchapp.services.HttpRetriever;import com.javacodegeeks.android.apps.moviesearchapp.ui.MoviesAdapter;import com.javacodegeeks.android.apps.moviesearchapp.util.Utils;public class MoviesListActivity extends ListActivity { private static final int ITEM_VISIT_IMDB = 0; private static final int ITEM_VIEW_FULL_IMAGE = 1; private ArrayList<Movie> moviesList = new ArrayList<Movie>(); private MoviesAdapter moviesAdapter; private HttpRetriever httpRetriever = new HttpRetriever(); private ProgressDialog progressDialog; private ImageView imageView; @SuppressWarnings("unchecked") @Override public void onCreate(Bundle savedInstanceState) { super.onCreate(savedInstanceState); setContentView(R.layout.movies_layout); moviesAdapter = new MoviesAdapter(this, R.layout.movie_data_row, moviesList); moviesList = (ArrayList<Movie>) getIntent().getSerializableExtra("movies"); setListAdapter(moviesAdapter); if (moviesList!=null && !moviesList.isEmpty()) { moviesAdapter.notifyDataSetChanged(); moviesAdapter.clear(); for (int i = 0; i < moviesList.size(); i++) { moviesAdapter.add(moviesList.get(i)); } } moviesAdapter.notifyDataSetChanged(); } @Override public boolean onCreateOptionsMenu(Menu menu) { menu.add(Menu.NONE, ITEM_VISIT_IMDB, 0, getString(R.string.visit_imdb)).setIcon(android.R.drawable.ic_menu_set_as); menu.add(Menu.NONE, ITEM_VIEW_FULL_IMAGE, 0, getString(R.string.view_full_image)).setIcon(android.R.drawable.ic_menu_zoom); return super.onCreateOptionsMenu(menu); } @Override public boolean onOptionsItemSelected(MenuItem item) { switch (item.getItemId()) { case ITEM_VISIT_IMDB: visitImdbMoviePage(); return true; case ITEM_VIEW_FULL_IMAGE: viewFullImagePoster(); return true; } return false; } @Override protected void onListItemClick(ListView l, View v, int position, long id) { super.onListItemClick(l, v, position, id); final Movie movie = moviesAdapter.getItem((int)position); showMovieOverviewDialog(movie.name, movie.overview); } private void viewFullImagePoster() { final Movie movie = retrieveSelectedMovie(); if (movie==null) { longToast(getString(R.string.no_movie_selected)); return; } String imageUrl = movie.retrieveCoverImage(); if (Utils.isMissing(imageUrl)) { longToast(getString(R.string.no_imdb_id_found)); return; } final Dialog dialog = new Dialog(this); dialog.requestWindowFeature(Window.FEATURE_NO_TITLE); dialog.setContentView(R.layout.full_image_layout); final Button closeDialogButton = (Button) dialog.findViewById(R.id.close_full_image_dialog_button); imageView = (ImageView) dialog.findViewById(R.id.image_view); closeDialogButton.setOnClickListener(new OnClickListener() { @Override public void onClick(View v) { dialog.dismiss(); } }); final ImageDownloaderTask task = new ImageDownloaderTask(); task.execute(imageUrl); dialog.show(); progressDialog = ProgressDialog.show(MoviesListActivity.this, "Please wait...", "Retrieving data...", true, true); progressDialog.setOnCancelListener(new OnCancelListener() { @Override public void onCancel(DialogInterface dialog) { if (task!=null) { task.cancel(true); } } }); } private void visitImdbMoviePage() { final Movie movie = retrieveSelectedMovie(); if (movie==null) { longToast(getString(R.string.no_movie_selected)); return; } String imdbId = movie.imdbId; if (Utils.isMissing(imdbId)) { longToast(getString(R.string.no_imdb_id_found)); return; } String imdbUrl = IMDB_BASE_URL + movie.imdbId; Intent imdbIntent = new Intent(Intent.ACTION_VIEW, Uri.parse(imdbUrl)); startActivity(imdbIntent); } private void showMovieOverviewDialog(final String title, final String overview) { final Dialog dialog = new Dialog(this); dialog.setContentView(R.layout.movie_overview_dialog); dialog.setTitle(title); final TextView overviewTextView = (TextView) dialog.findViewById(R.id.movie_overview_text_view); overviewTextView.setText(overview); final Button closeButton = (Button) dialog.findViewById(R.id.movie_overview_close_button); closeButton.setOnClickListener(new OnClickListener() { @Override public void onClick(View v) { dialog.dismiss(); } }); dialog.show(); } private class ImageDownloaderTask extends AsyncTask<String, Void, Bitmap> { @Override protected Bitmap doInBackground(String... params) { String url = params[0]; InputStream is = httpRetriever.retrieveStream(url); if (is==null) { return null; } return BitmapFactory.decodeStream(new FlushedInputStream(is)); } @Override protected void onPostExecute(final Bitmap result) { runOnUiThread(new Runnable() { @Override public void run() { if (progressDialog!=null) { progressDialog.dismiss(); progressDialog = null; } if (result!=null) { imageView.setImageBitmap(result); } } }); } } private Movie retrieveSelectedMovie() { int position = getSelectedItemPosition(); if (position==-1) { return null; } return moviesAdapter.getItem((int)position); } private void longToast(CharSequence message) { Toast.makeText(this, message, Toast.LENGTH_LONG).show(); } } |
That’s all guys. You can find here the Eclipse project created so far. Cheers!
- “Android Full Application Tutorial” series
- Android Text-To-Speech Application
- Android Reverse Geocoding with Yahoo API – PlaceFinder
- Android Location Based Services Application – GPS location
- Install Android OS on your PC with VirtualBox
- Embracing the Android awesomeness: A quick overview

I don’t see the option menu with distributed source code, worse, the onCreateOptionsMenu() did not seem invoked. Am I missing something?
Detailed explained. I was looking for setting this menus after reading this article for this blog;http://javaopensourcecode.blogspot.hk/2014/11/android-app-development-welcome-page.html. Unfortunately they only wrote two articles about developing until now.