Android: Multi-touch gestures controller
What is a multitouch controller?
The term is not general. What we refer to as ‘multitouch controller’ is a piece of code that makes the process of implementing manipulative operations over entities which are shown on the screen (views, bitmaps, etc.) convinient. That means that the multi-touch controller wraps the logics behind the user’s input through the touch-screen. So when the user puts down one finger and starts moving it over the touch-screen the controller should ‘point’ to part of the code where the developer is supposed to put his logic on what he wants to happen then. The controller ‘knows’ that it’s one-finger touch, pinch-gesture or rotate-gesture, or all of them at once (wherever possible). To be more precise, the multi-touch controller would not make your graphics move over the screen magically by linking a library or code to your app. Think of it as interface that you need to implement so that you make your objects move, but you’ll need to figure out how to make it.
The already mentioned multitouch controller of our choice is, well Android Multitouch Controller. What you need to do first as preparation is create empty Android project and download the MultiTouchController.java file. 90% of what we need for this tutorial is here.
Necessities
So far the examples for the Android Multitouch Controller are given by using batch of resources (Drawables) which can later be modified over a Canvas. Our idea is to simplify this process and make only one movable object over a canvas. So we’ll go with simple Bitmap that would be drawn over the canvas which can later on be moved/scaled/rotated from its initial position. So we need two things at first, a View that implements the MultiTouchObjectCanvas interface and then a custom object/entity/widget which would contain the logics for its drawing. This object is the ‘manipulative’ one and it contains the Bitmap that it represents it.
So when we say the Canvas we think of a custom View that you need to create, that would implement the MultiTouchObjectCanvas interface (where T is the Pinch object that is to be modified). This interface tells us whether we have an object (draggable object) or widget at the point where the user has touched the screen. If so, the implementation will return the relevant object, otherwise null. So to use this interface we need to implement couple of methods without which we cannot achive results. Anyway, the IDE will tell you what you must implement, these are the methods (among the constructors from the parent View class etc.):
1 2 3 4 | @Overridepublic T getDraggableObjectAtPoint(PointInfo touchPoint) { return null; } |
This method as you can see, returns the object of interest from the place where the user has made the touch input. Meaning, if the user touched x:120;y:100 point, this method should check if this point is in the area occupied by the widget. When you see the full implementation you’ll know how this is done.
1 2 3 4 | @Overridepublic void getPositionAndScale(T obj, PositionAndScale objPosAndScaleOut) {} |
This method operates over the PositionAndScale object for the widget that is touched. The widget is passed as first argument, the PositionAndScale as second and that is pretty much self-descriptive: when the ‘obj’ object is touched, apply the ‘objPosAndScaleOut’ attributes for the position, scale and angle. But this is only for the initial position of the screen, what actually makes the motion is the next obligatory method.
1 2 3 4 5 | @Overridepublic boolean setPositionAndScale(T obj, PositionAndScale newObjPosAndScale, PointInfo touchPoint) { return false;} |
Again, we have the widget as first argument, the new object’s position/scale/angle properties and a helper object from PointInfo which tells is whether it’s multi-touch or single (drag) gesture.
1 2 3 | @Overridepublic void selectObject(T obj, PointInfo touchPoint) {} |
This method takes care of informing the controller which object is being selected. The ‘obj’ object has the selected object. So when we implement this methods and we have set the multitouch controller object, we can implement the widget logics which holds the data behind the item(s) that is/are drawn over the canvas. Yes, in that case we need a MultiTouchController object which needs to be defined like this:
1 2 3 4 5 | private MultiTouchController mMultiTouchController = new MultiTouchController (this); |
And what to do with this? Well, when the touch event happens, we need to pass ‘everything’ to this controller. And that is done by overriding the onTouchEvent for the custom View/Canvas:
1 2 3 4 | @Overridepublic boolean onTouchEvent(MotionEvent ev) { return mMultiTouchController.onTouchEvent(ev);} |
And with this and few other staff, we have the essential Canvas that takes care of the objects it draws. So we need one more thing, the logics for the Pinch widget with its Bitmap, coordinates, etc. So we create a PinchWidget object which is modification from some of the examples that go with the Multitouch Controller. The essence of this object are these two methods:
01 02 03 04 05 06 07 08 09 10 11 12 13 14 15 16 | public boolean setPos(PositionAndScale newImgPosAndScale, int uiMode, int uiModeAnisotropic, boolean isMultitouch) { boolean ret = false; float x = newImgPosAndScale.getXOff(); float y = newImgPosAndScale.getYOff(); if(isMultitouch) { x = mCenterX; y = mCenterY; } ret = setPos(x, y, (uiMode & uiModeAnisotropic) != 0 ? newImgPosAndScale.getScaleX() : newImgPosAndScale.getScale(), (uiMode & uiModeAnisotropic) != 0 ? newImgPosAndScale.getScaleY() : newImgPosAndScale.getScale(), newImgPosAndScale.getAngle()); return ret;} |
and
01 02 03 04 05 06 07 08 09 10 11 12 13 14 15 | private boolean setPos(float centerX, float centerY, float scaleX, float scaleY, float angle) { float ws = (mImage.getWidth() / 2) * scaleX, hs = (mImage.getHeight() / 2) * scaleY; float newMinX = centerX - ws, newMinY = centerY - hs, newMaxX = centerX + ws, newMaxY = centerY + hs; mCenterX = centerX; mCenterY = centerY; mScaleFactor = scaleX; mAngle = angle; mMinX = newMinX; mMinY = newMinY; mMaxX = newMaxX; mMaxY = newMaxY; return true;} |
These two methods make the movement possible since they give information on the coordinates, scale factor and the angle of the PinchWidget. They are in a way coupled, meaning the first method makes calculations regarding the data it gets from the second one. So now we have the coordinates of the object, its scale and angle. We just need to draw it by using its draw(Canvas) method:
01 02 03 04 05 06 07 08 09 10 11 12 13 14 15 16 17 18 19 20 21 | public void draw(Canvas canvas) { Paint itemPaint = new Paint(); itemPaint.setAntiAlias(true); itemPaint.setFilterBitmap(true); float dx = (mMaxX + mMinX) / 2; float dy = (mMaxY + mMinY) / 2; canvas.save(); canvas.translate(dx, dy); canvas.rotate(mAngle * 180.0f / (float) Math.PI); canvas.translate(-dx, -dy); Rect srcRect = new Rect(0, 0, mImage.getWidth(), mImage.getHeight()); Rect dstRect = new Rect((int) mMinX, (int) mMinY, (int) mMaxX, (int) mMaxY); canvas.drawBitmap(mImage, srcRect, dstRect, null); canvas.restore();} |
mImage is the Bitmap of the item/widget we draw. It must be drawn to see something. And to draw it we need its source and destination rects (in this kind of implementation). The source is the size of the image (in our case Rect[0,0,300,300]) and the destination (where to be drawn) which is calculated from the init and setPos methods of PinchWidget. Then the image is drawn the same way any other Bitmap is drawn, by using drawBitmap(…) method. Now a bit back to the MultiTouchView implementation. As mentioned before, having in mind that we have declared this View in XML, we’ll make use of the:
1 | public MultiTouchView(Context context, AttributeSet attrs) |
constructor. There we initialize the Context. Also we have this method:
1 2 3 4 | public void setPinchWidget(Bitmap bitmap) { mPinchWidget = new PinchWidget(bitmap); mPinchWidget.init(mContext.getResources());} |
This method tells the MultiTouchView what is our PinchWidget. It is where it’s created, and by calling init() (Resources here is passed just to calculate display’s width and height), we call the whole machanism that will draw the widget. And from this View that happens in its onDraw() method:
1 2 3 4 5 6 7 | @Overridepublic void onDraw(Canvas canvas) { super.onDraw(canvas); canvas.drawColor(Color.WHITE); mPinchWidget.draw(canvas);} |
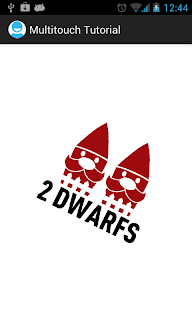
Pretty simple ain’t it? So if everything goes as explained and you get the idea behind this kind of implementation, you’ll see something like this on the screen:
Conclusion
MultiTouch operations in Android are basically the same math you’ll need to do on other platforms. But when you need time this kind of projects, the Android Multitouch Contoroller is time-saving tool, and when you download it do read the documented methods, do see the elegant and nice code and don’t forget to thank the developer for what he had done.
Maybe worth mentioning that our research took almost 1 year (9 months to be precise) about which Multitouch Controller we need to use in our present and future apps.
The sources of the sample app are available on our GitHub repository. Next we’ll try to cover what needs to be done to show many Bitmaps over the Canvas view. Or if you figure it out yourself, don’t hesitate to write a tutorial and we’ll be happy to publish it here.
Happy coding and don’t forget to share!
Reference: Android: Multi-touch gestures controller from our JCG partner Aleksandar Balalovski at the 2dwarfs blog.


is it possible to set max and min zoom limit?
U r did great work ….
whether is it possible to fix zoom in and zoom out size?
Hey… u done good work.
I need some help…. i am try to make College Photo Editor. i am make three frame in one screen and its work but i want to set that frame dynamic i don’t know how to do that.. how to make MultiTocuView Dynamic?? please help me…..
Nice blog! I have learnt more information from the blog. Keep sharing, Nice work. I will share the information on my social media site’s.
Excellent information! Thanks for sharing the blog. Looks very informative and Beautiful.
Excellent blog! It looks very informative and interesting. I Look forward to read more.
Some technical Article this is.
Nice article and some technical stuff too.