Android Header and Footer layout example
In this article we are going to see how you can create a simple Android Layout that includes a header part, a footer part and the content area. It is relatively easy to do that in the Android platform. The important bit is to try to make your layouts reusable and independent from one another, so you can use it anywhere in your application, not just in one Activity. So that’s what are we going to do in this example.
For this tutorial, we will use the following tools in a Windows 64-bit platform:
- JDK 1.7
- Eclipse 4.3 Kepler
- Android SKD 4.3
1. Create a new Android Project
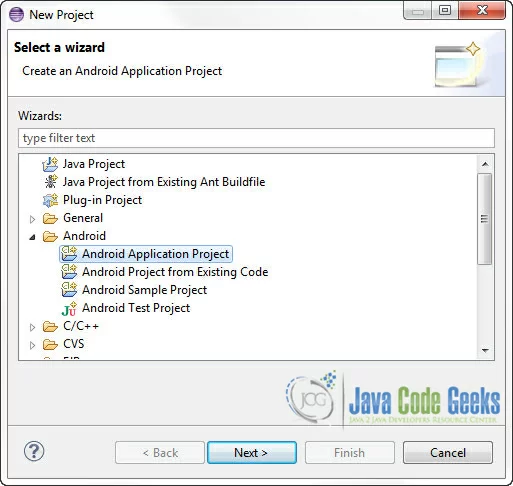
Open Eclipse IDE and go to File -> New -> Project -> Android -> Android Application Project.
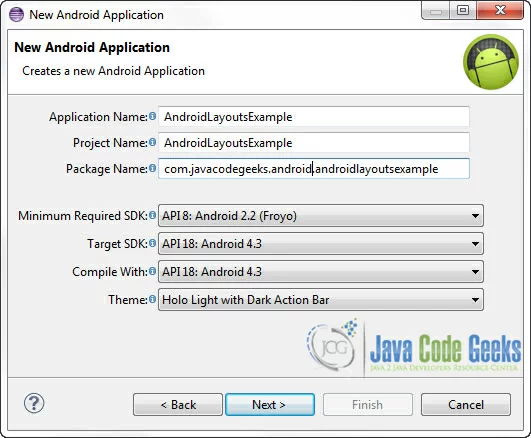
You have to specify the Application Name, the Project Name and the Package name in the appropriate text fields and then click Next.
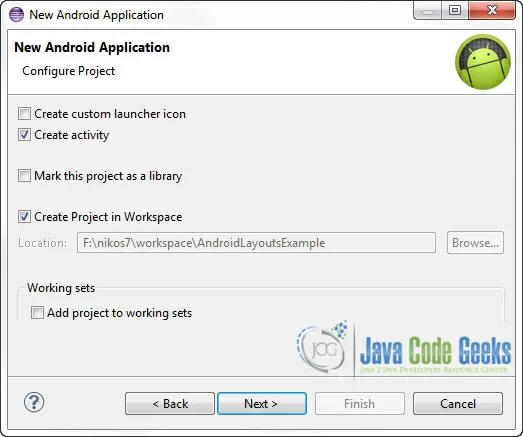
In the next window make sure the “Create activity” option is selected in order to create a new activity for your project, and click Next. This is optional as you can create a new activity after creating the project, but you can do it all in one step.
Select “BlankActivity” and click Next.

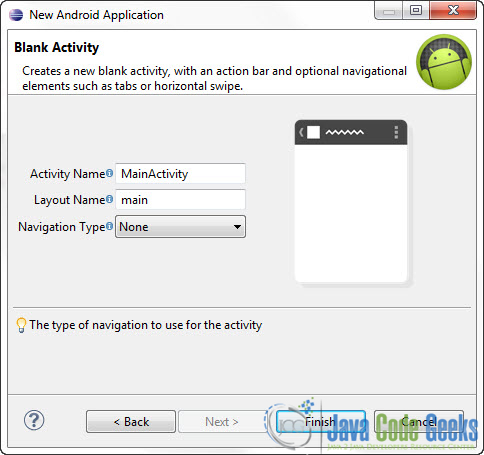
You will be asked to specify some information about the new activity. In the Layout Name text field you have to specify the name of the file that will contain the layout description of your app. In our case the file res/layout/main.xml will be created. Then, click Finish.
2. Creating the layout of the Main Activity
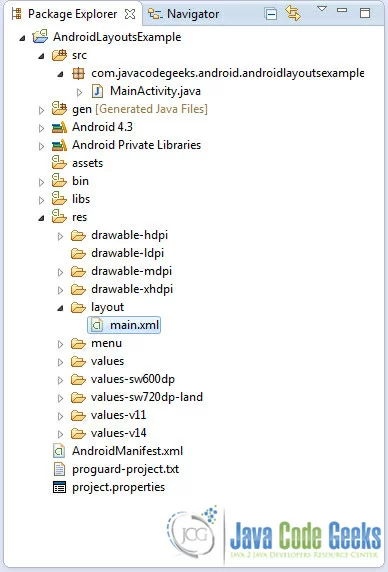
Open res/layout/main.xml file :
And paste the following code :
main.xml:
01 02 03 04 05 06 07 08 09 10 11 12 13 14 15 16 17 18 19 20 21 22 23 24 25 26 27 28 29 30 31 32 33 34 35 36 37 38 39 40 41 42 43 44 45 46 47 48 49 50 51 52 53 54 55 56 57 58 59 60 61 62 63 | <?xml version="1.0" encoding="utf-8"?> android:layout_width="match_parent" android:layout_height="match_parent" > <!-- Header aligned to top --> <RelativeLayout android:id="@+id/header" android:layout_width="match_parent" android:layout_height="wrap_content" android:layout_alignParentTop="true" android:background="#FC9" android:gravity="center" > <TextView android:layout_width="wrap_content" android:layout_height="wrap_content" android:layout_margin="5dp" android:text="Fixed Header" android:textColor="#000" android:textSize="20sp" /> </RelativeLayout> <!-- Footer aligned to bottom --> <RelativeLayout android:id="@+id/footer" android:layout_width="match_parent" android:layout_height="wrap_content" android:layout_alignParentBottom="true" android:background="#FC0" android:gravity="center" > <TextView android:layout_width="wrap_content" android:layout_height="wrap_content" android:layout_margin="5dp" android:text="Fixed Footer" android:textColor="#000" android:textSize="20sp" /> </RelativeLayout> <!-- Content below header and above footer --> <RelativeLayout android:id="@+id/content" android:layout_width="fill_parent" android:layout_height="fill_parent" android:layout_above="@id/footer" android:layout_below="@id/header" android:gravity="center" > <TextView android:layout_width="wrap_content" android:layout_height="wrap_content" android:text="Content" android:textColor="#33E" android:textSize="20sp" /> </RelativeLayout></RelativeLayout> |
The idea here is very simple. We have two RelativeLayouts, one aligned at the top of the screen, usingandroid:layout_alignParentTop="true" property, and one aligned at the bottom of the screen usingandroid:layout_alignParentBottom="true" property. Then we simply place a RelativeLayout between these two view using android:layout_above="@id/footer" and android:layout_below="@id/header". These properties will place our RelativeLayout with id content, representing the content area of our Layout, above the element with id footer and bellow the element with id header.
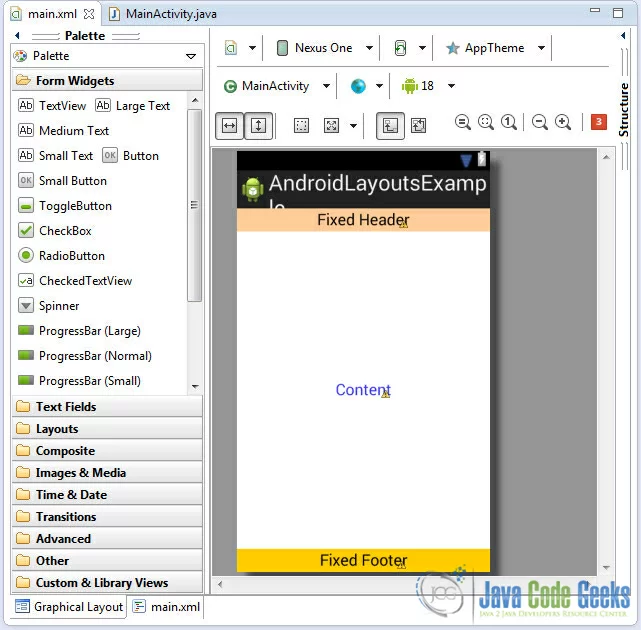
You can preview the layout you’ve created in the Graphical Layout editor:
2. Code the Main Activity
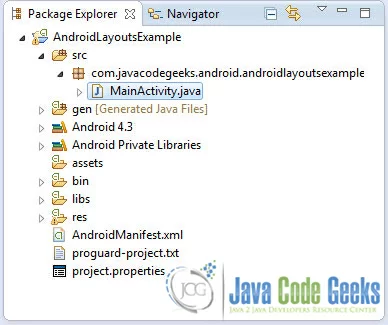
Use the Package Explorer to navigate to the Java file of the Activity you’ve created:
For this example you don’t have to change anything to the auto generated code so you can leave it as it is.
MainActivity.java:
01 02 03 04 05 06 07 08 09 10 11 12 13 14 15 16 17 18 19 20 21 | package com.javacodegeeks.android.androidlayoutsexample;import android.os.Bundle;import android.app.Activity;import android.view.Menu;public class MainActivity extends Activity { @Override protected void onCreate(Bundle savedInstanceState) { super.onCreate(savedInstanceState); setContentView(R.layout.main); } @Override public boolean onCreateOptionsMenu(Menu menu) { // Inflate the menu; this adds items to the action bar if it is present. getMenuInflater().inflate(R.menu.main, menu); return true; }} |
4. Run the application
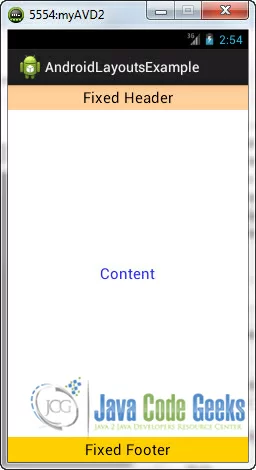
This is how our Layout looks on the emulator:
Making your Layout flexible
In the above code we sort of hard coded everything in the main layout of the activity. But you may want to inflate the contents of each layout dynamically in your code. Or, more importantly you may want to make this layout reusable to your other activities, each one having their own contents to display and may be their own headers and footers.
To achieve that, we are simply going to separate every component from the other. We are going to create the header layout to a different XML file and do the same for the footer. Now, every activity that has its own content can include the header and the footer in their own Layouts.
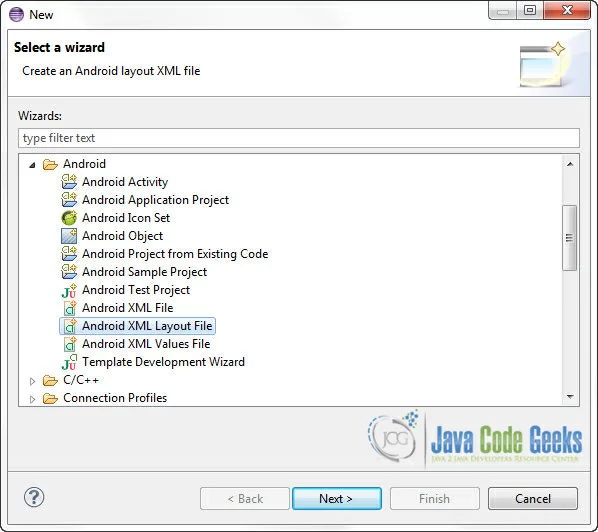
To create a new XML Layout file containing the items you want to fill your ScrollView with. To create a new layout file, go to the Package Explorer and find /res/layout folder. Right Click on the folder -> New -> Other -> Android -> Android XML Layout file:
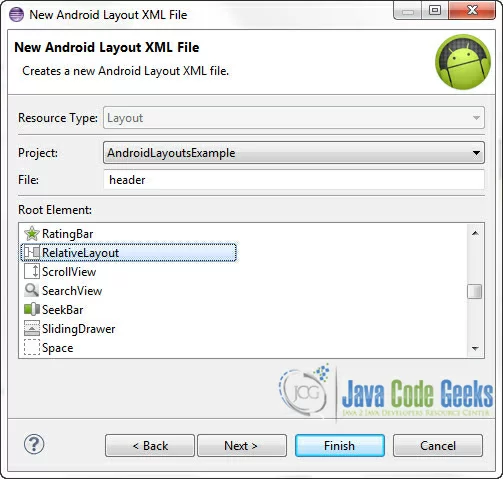
Put a name for your new layout file, and select RelativeLayout from the list (although this is not absolutely necessary) and click “Finish”:
You need to create footer.xml also.
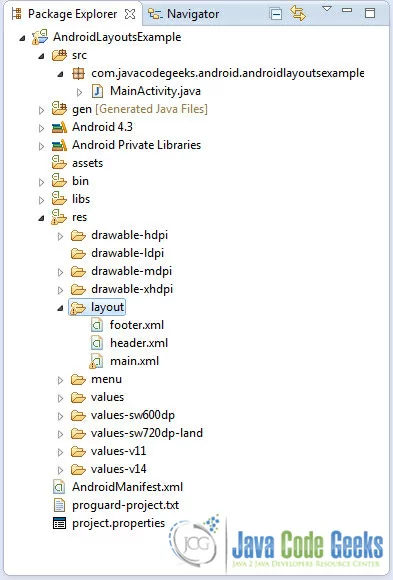
So,after the creation of the new layout XML files, this is the new Project Structure:
header.xml
01 02 03 04 05 06 07 08 09 10 11 12 13 14 15 16 | <RelativeLayout android:id="@+id/footer" android:layout_width="match_parent" android:layout_height="wrap_content" android:layout_alignParentBottom="true" android:background="#FC0" android:gravity="center" > <TextView android:layout_width="wrap_content" android:layout_height="wrap_content" android:layout_margin="5dp" android:text="Fixed Footer" android:textColor="#000" android:textSize="20sp" /> </RelativeLayout> |
footer.xml
01 02 03 04 05 06 07 08 09 10 11 12 13 14 15 16 17 18 | <?xml version="1.0" encoding="utf-8"?> android:id="@+id/footer" android:layout_width="match_parent" android:layout_height="wrap_content" android:layout_alignParentBottom="true" android:background="#FC0" android:gravity="center" > <TextView android:layout_width="wrap_content" android:layout_height="wrap_content" android:layout_margin="5dp" android:text="Fixed Footer" android:textColor="#000" android:textSize="20sp" /></RelativeLayout> |
main.xml
01 02 03 04 05 06 07 08 09 10 11 12 13 14 15 16 17 18 19 20 21 22 23 24 25 26 27 28 29 30 31 32 33 | <?xml version="1.0" encoding="utf-8"?> android:layout_width="match_parent" android:layout_height="match_parent" > <!-- Header aligned to top --> <include layout="@layout/header" /> <!-- Footer aligned to bottom --> <include layout="@layout/footer" /> <!-- Content below header and above footer --> <RelativeLayout android:id="@+id/content" android:layout_width="fill_parent" android:layout_height="fill_parent" android:layout_above="@id/footer" android:layout_below="@id/header" android:gravity="center" > <TextView android:layout_width="wrap_content" android:layout_height="wrap_content" android:text="Content" android:textColor="#33E" android:textSize="20sp" /> </RelativeLayout></RelativeLayout> |
As you can see we’ve simply separated the RelativeLayouts of the header and the footer to different XML files. So now, you can include them in any Layout you want. You can do that by writting <include layout="@layout/header" /> to include the header and <include layout="@layout/footer" /> (header and footer must correspond to the names you gave to the respective XML Layout files)
Run the application
This is how our Layout looks on the emulator:
Download Eclipse Project
This was an Android example on how to create fixed Header and Footer reusable layouts. Download the Eclipse Project of this tutorial: AndroidLayoutsExample.zip



On an unrelated note, did you compile using JDK 1.7
Thanks for the code….:D
Extreme good job done by you. I appreciate your efforts, stay blessed.
Thanks a lot. I needed this but i didn’t know how to do it. Thanks!!
Thanks for code
Thanks you very much. I need it!
There are at least 3 typos. I just wanted to copy the code without having to debug. What happened to testing these examples?
Great stuff, thanks a lot!
HI. Thanks for the cool stuff. I want to ask if there is possibility to add header and footer which is not stick and i want to add full layout with scroll view because in your example header and footer is just stick at their own place.
Thanks Alot. :D
i try with table layout but almost make me down.
Good Code with Relative Layout.
exactly what I was looking for! :D