Spring Rest API with Swagger – Exposing documentation
Once you create API documentation it is important to make it available to the stakeholders. In ideal case, this published documentation would be flexible enough to account for any last-minute changes and also be easy to distribute (in terms of costs as well as time needed to accomplish this). To make this possible we will make use of what was accomplished in my previous post detailing the process of creation of API documentation. Using Swagger UI module in combination with published API documentation in json allows us to create simple HTML documentation that may be used to interact with the APIs as well.
Integration with Swagger UI
Makers of Swagger UI describe it as a dependency-free collection of HTML, Javascript, and CSS assets that dynamically generate beautiful documentation and sandbox from a Swagger-compliant API. Because Swagger UI has no dependencies, you can host it in any server environment, or on your local machine. This being said lets take a look at how can we feed our Swagger documentation to Swagger UI. Being static collection of HTML, CSS and JS allows us to just drop it in our project with no need to modify our pom.xml or any other file within our project. Just head over to GitHub and download the latest files.
When you are done the only thing needed is to supply a link to your API listing. Just open index.html and replace the default API listing URL with your own and you are done. URL from my example looks like this: http://[hostname]:[port]/SpringWithSwagger/rest/api-docs. After saving this change and deploying both your application as well as your static Swagger UI, you should be able to browse and interact with your APIs.
API documentation
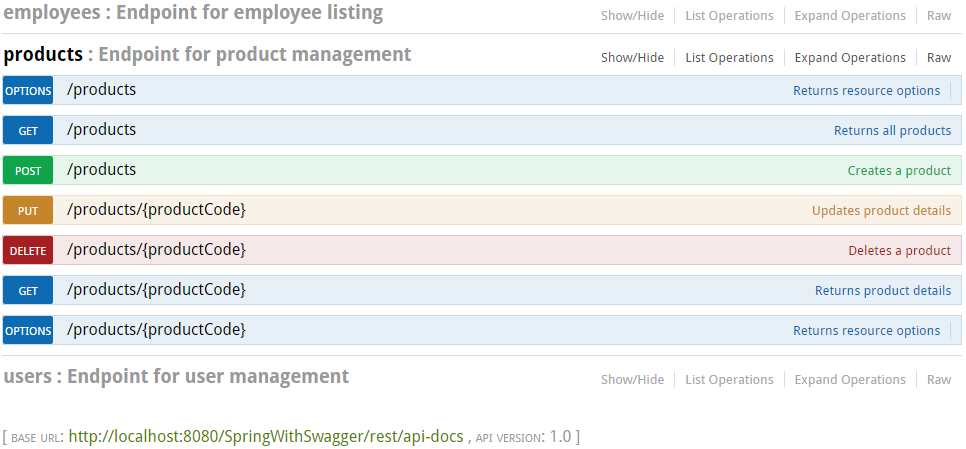
Based on my example, I am able to access my documentation on following URL http://localhost:8080/SpringWithSwagger/apidocs/ (due to the nature of deployment approach I have chosen). As you can see, Swagger UI just consumes data published in json format (discussed previously). The first thing you see is the API listing which allows you to browse your collection of published APIs.

When you want to browse operations available you are just one click away from nice colorful listing of all operations with short description so you know where to navigate next. Colors are consistent throughout the entire listing and complement the operation well.

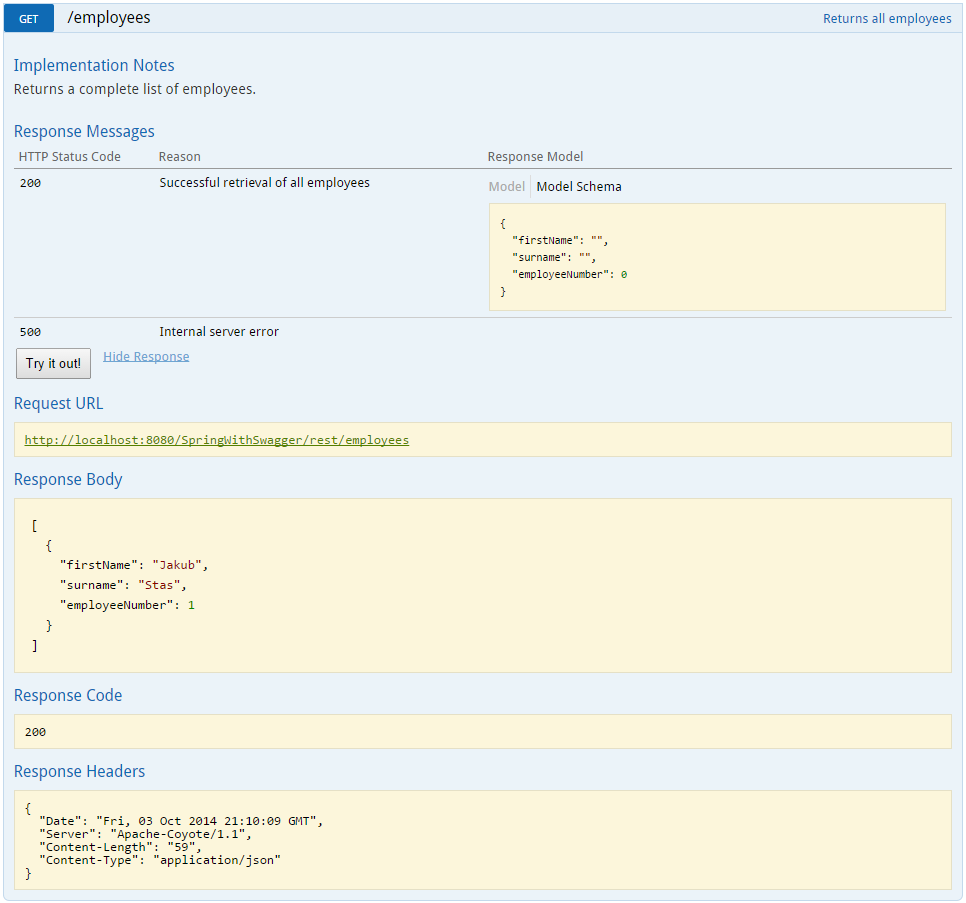
When you found the operation you were looking for, its time to get the information you were seeking in the first place. By clicking the method name you will be presented with full method description as well as parameters and response messages. But there is more because you can play around with your APIs and test your methods. By supplying all the required parameters and hitting ‘Try it out!’ button you are able to check whether your application server is up and behaves in an expected way. If your code requires some sort of file upload (just like my update users avatar logic does) Swagger UI has handy tools to make this as easy as possible.
![]()
Even though you are able to do some quick and ad-hoc tests or checks, this tool is in no way suitable for application testing. All it does is presents API documentation in a nice to read fashion with the possibility to try the method yourself if you feel the need to (in order to improve your comprehension of the documentation). I find this really nice to have there and given you need to get the feel of the operation itself and its observable behavior Swagger UI got you covered as you can see below.
Where it excels
I really like the way Swagger approaches documentation as well as the way Swagger UI presents it. Following are several points making Swagger pretty sweet solution for my API documentation needs:
- Language agnostic
- Great property to have, when working in heterogeneous environment or considering introduction of new languages and tools to your projects.
- Annotation-based documentation
- Annotations bind documentation to code creating one unit with single life cycle. This makes the whole process of managing, releasing and publishing much more easier and allows for automation to take place.
- Open for post-processing
- Having a middle step in form of json allows developers to append custom scripts and transformers to the process to produce documentation in various formats like PDF or Word document based on stakeholders needs.
- Rich ecosystem of modules and components
- If you browse available modules and components of Swagger you might be amazed how much time was invested in this tool. There are many useful components out there, so it is highly probable that you will find some extensions to Swagger that you think your project might need or benefit from.
- Visually beautiful UI tool
- Since I am not very talented when it comes to UI, I am really happy that I don’t have to bother with coming up with the way how to create, format, present and deliver my documentation. All I need is to provide relevant information right in the source code and that’s it. Framework takes care of the rest and I end up with presentable documentation in no time. Given the nature of Swagger UI it is really easy to add custom corporate identity to it, if that is required.
- Try it out! option
- It’s always the little things that make my day. But I believe that it is extremely beneficial for whole team to have this option neatly packed in the documentation (e.g. right where you need it, when you need it).
Where it comes short
I am not going to pretend that this is the silver bullet, suits all solution. There are certainly situations where tools like this are not preferred. Given its young age there are still some things to be added/improved. But it’s important to state that this project is still being developed and gains more popularity each passing day. This being said I want to point out some issues I found that required some digging around and additional work. I am going to focus on three main concerns I found troubling during my first attempts.
- Conditional access to certain model parameters
- Based on your needs (and also Swagger version used), you might find yourself in need to hide certain model parameters from Swagger UI and Swagger json. However, this requires a little bit more work, than I expected and involves modification of model properties. One can expect things to get better with the next major release of Swagger and related components, but until then you are forced to do this by hand. If you are interested in how to achieve this check out my next post called Spring Rest API with Swagger – Fine-tuning exposed documentation.
- File upload and related fields
- Some of your API operations may require file uploads (like my avatar update method). However, to get the operation detail to look like it is presented in my example requires little bit of manual work and specification filtering. To get rid of unwanted parameters related to this issue check out my next post called Spring Rest API with Swagger – Fine-tuning exposed documentation where I will detail this issue and how to get results presented here.
- API models and XML
- Swagger claims it’s friends with both json and XML. This is certainly true on operational level, however when it comes to model presentation XML comes second compared to json (due to technical complexities related to XML and its schema). Currently, all API models in Swagger UI are displayed as json entities (both json and XML), which forced me not to declare response type in
ProductsEndpointdocumentation (example of endpoint using XML format in my SpringWithSwagger example). This is something I haven’t resolved to my full satisfaction so I intentionally choose not to declare response types while dealing with XML.
- Swagger claims it’s friends with both json and XML. This is certainly true on operational level, however when it comes to model presentation XML comes second compared to json (due to technical complexities related to XML and its schema). Currently, all API models in Swagger UI are displayed as json entities (both json and XML), which forced me not to declare response type in
What is next?
If you followed all steps you should now have working API documentation / sandbox for your APIs. I will showcase how to fine-tune published documentation using Swagger in my next article called Spring Rest API with Swagger – Fine-tuning exposed documentation. The code used in this micro series is published on GitHub and provides examples for all discussed features and tools. Please enjoy!
| Reference: | Spring Rest API with Swagger – Exposing documentation from our JCG partner Jakub Stas at the Jakub Stas blog. |


