Android Google map: Add weather data
This post describes how to add weather layer to google map. We want to add weather information to a map so that we can have a look about clouds, temperature, pressure and so on.
In the previous post we talked about how to get weather information and how to parse the data to create a UI, now we want to add other weather tile to a map. To do it, we start creating a sample project that contains a map activity.
If we use Android Studio (as i suggest) it is very simple and fast.
Create Android Map project in Android Studio
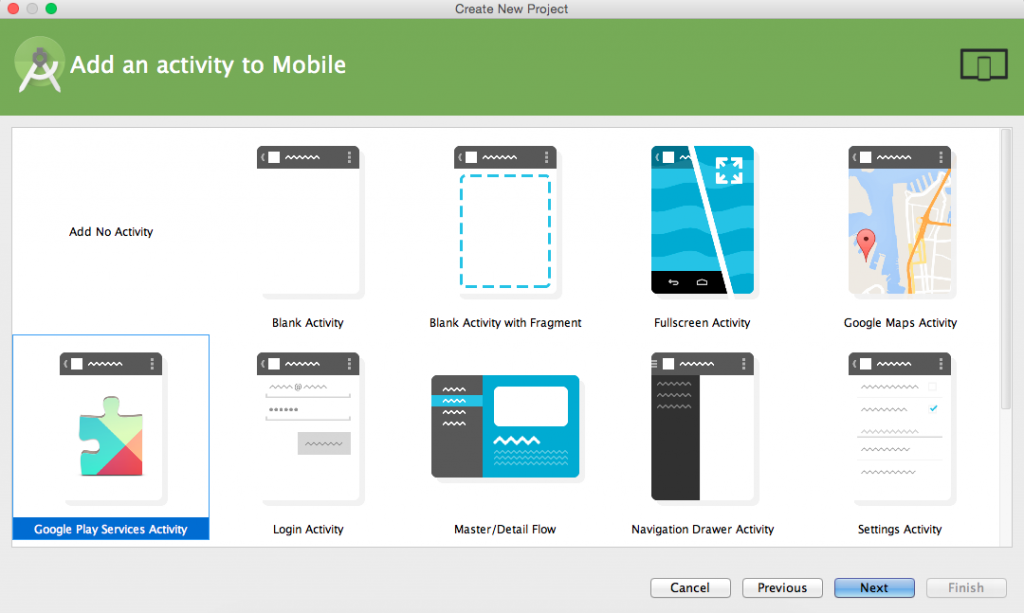
The first step is creating a google map project in Android. As always, we select File->New project and after inserting some project information we land to this page:
Now we select Google Map Activity. Android Studio will create all the things to handle google map in our project. The last thing to do is to add the key to use the map. If you look in the files inside the project you will find the way to create your debug key. Once you have the key, you are ready to use the map.
Add weather tile to Google Map
The next step is adding weather tile to google map. To this purpose, we will use Open Weather Map as weather provider, but you could use other weather providers. We modify the setUpMap inside our MapsActivity (or the name of the class you used when you created the project) and add a new TileProvider. A Tile provider is essential an interface that we have to implement in our provider so that we fetch the image that covers the map. A tile is an image that is represented over the map. In the case of OWM, the URL we have to use to retrieve the image is:
http://tile.openweathermap.org/map/%s/%d/%d/%d.png
where %s represents the type of the tile we want to use like clouds, temperature and so on while the other three integers (%d) represent the zoom and x, y coords.
In our case, we use a UrlTileProvider that can be used to retrieve tiles from an HTTP connection. Our implementation is very simple:
private TileProvider createTilePovider() {
        TileProvider tileProvider = new UrlTileProvider(256, 256) {
            @Override
            public URL getTileUrl(int x, int y, int zoom) {
                String fUrl = String.format(OWM_TILE_URL, tileType == null ? "clouds" : tileType, zoom, x, y);
                URL url = null;
                try {
                    url = new URL(fUrl);
                }
                catch(MalformedURLException mfe) {
                    mfe.printStackTrace();
                }

                return url;
            }
        } ;
Finally in our setUpMap() method we add our tile provider to the map:
tileOver = mMap.addTileOverlay(new TileOverlayOptions().
tileProvider(createTransparentTileProvider()));
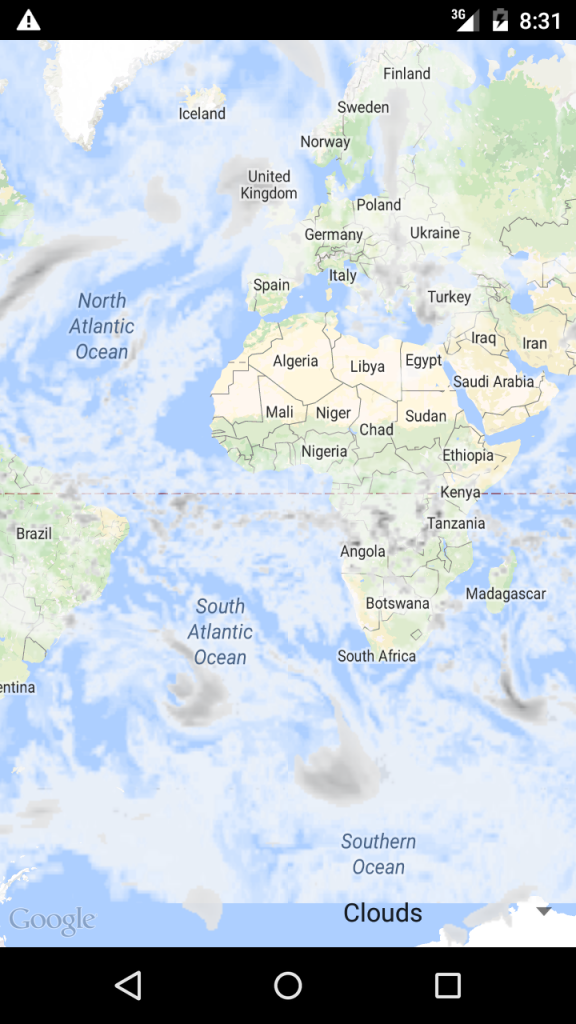
where tileOver is an instance of TileOverlay. Running the example we get:
Add weather data tiles
Now we want to add a Spinner over our map so that we can select the type of information we want to add on top of the map like temperature, wind, pressure and so on.
This is very simple because we can modify the activity_maps.xml and add our spinner:
<RelativeLayout xmlns:android="http://schemas.android.com/apk/res/android"
    xmlns:tools="http://schemas.android.com/tools"
    android:layout_width="match_parent"
    android:layout_height="match_parent">

  <fragment  android:id="@+id/map"
      android:name="com.google.android.gms.maps.SupportMapFragment"
android:layout_width="match_parent"
android:layout_height="match_parent"
      tools:context=".MapsActivity" />

  <Spinner
      android:layout_width="wrap_content"
      android:layout_height="wrap_content"
      android:layout_alignParentBottom="true"
      android:layout_alignParentRight="true"
      android:layout_marginBottom="10dp"
      android:layout_marginRight="10dp"
      android:id="@+id/tileType"/>

</RelativeLayout>
Finally in the onCreate() we add the code to handle the spinner:
spinner = (Spinner) findViewById(R.id.tileType);

        String[] tileName = new String[]{"Clouds", "Temperature", "Precipitations", "Snow", "Rain", "Wind", "Sea level press."};

        ArrayAdapter adpt = new ArrayAdapter(this, android.R.layout.simple_spinner_item, tileName);

        spinner.setAdapter(adpt);
        spinner.setOnItemSelectedListener(new AdapterView.OnItemSelectedListener() {

            @Override
            public void onNothingSelected(AdapterView parent) {

            }

            @Override
            public void onItemSelected(AdapterView parent, View view, int position, long id) {
                 // Check click
                switch (position) {
                    case 0:
                        tileType = "clouds";
                        break;
                    case 1:
                        tileType = "temp";
                        break;
                    case 2:
                        tileType = "precipitation";
                        break;
                    case 3:
                        tileType = "snow";
                        break;
                    case 4:
                        tileType = "rain";
                        break;
                    case 5:
                        tileType = "wind";
                        break;
                    case 6:
                        tileType = "pressure";
                        break;

                }

                if (mMap != null) {
                    tileOver.remove();
                    setUpMap();
                }


            }
        });
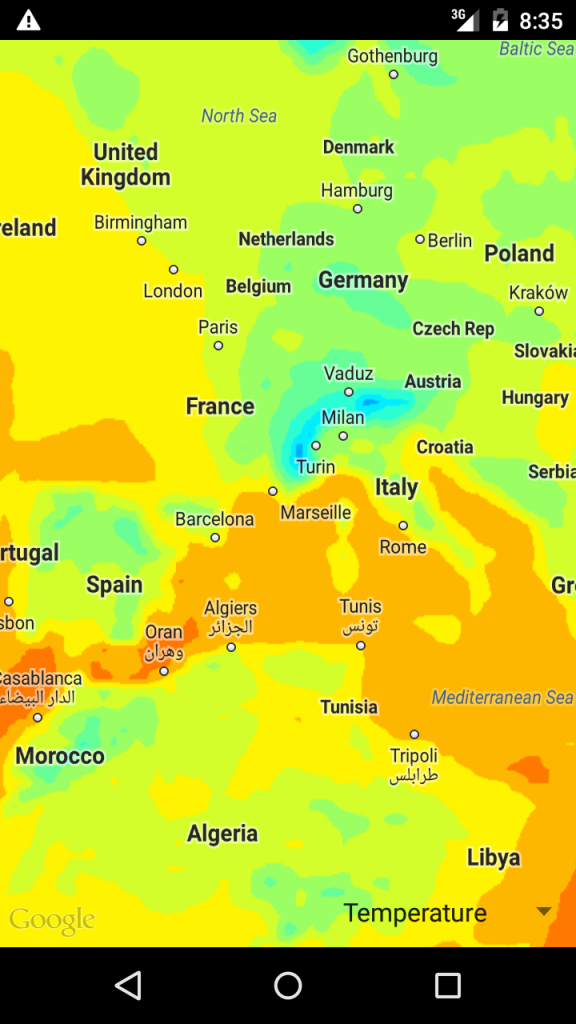
We simply list all the tile types and when the user selects one of them we show the relative images on top of the map. If we select for example the temperature map we have:
If you look the image you can notice that the tile has covered almost the map behind. This happens because we don’t have an easy way to modify the transparency of the map.
Add transparent tile to Google map
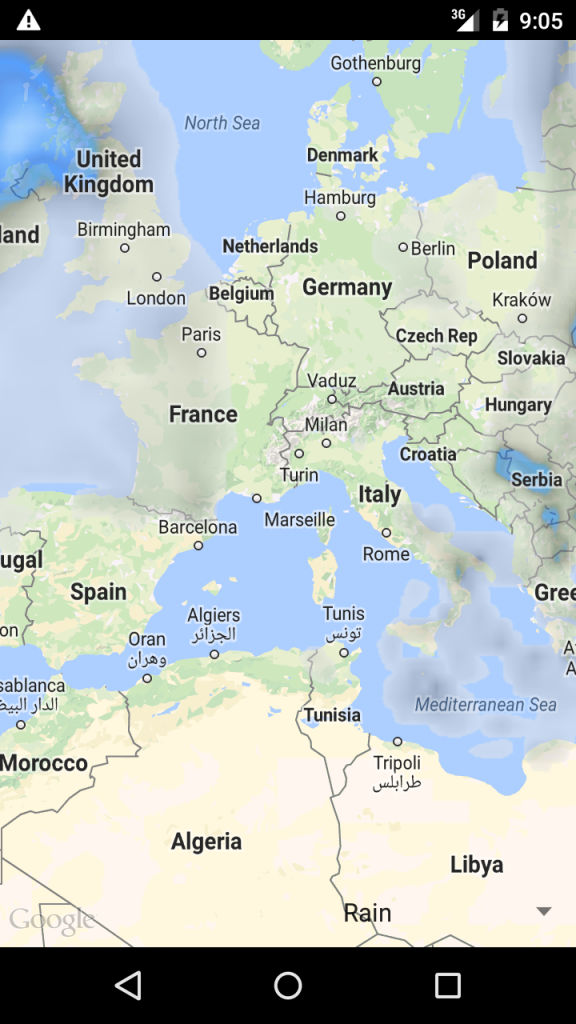
The last step, if we want that the weather data doesn’t cover the map that stands behind, is modifying our provider. This code shown below is derived from this post. We create, in other words, a custom provider so that we can change the opacity of the images we add over the map:
public class TransparentTileOWM implements TileProvider {
    //private String url;
    private Paint opacityPaint = new Paint();
    private String tileType;

    private static final String OWM_TILE_URL = "http://tile.openweathermap.org/map/%s/%d/%d/%d.png";

    /**
     * This constructor assumes the url parameter contains three placeholders for the x- and y-positions of
     * the tile as well as the zoom level of the tile. The placeholders are assumed to be {x},
     * {y}, and {zoom}. An example
     * for an OpenWeatherMap URL would be: http://tile.openweathermap.org/map/precipitation/{zoom}/{x}/{y}.png
     *
     */
    public TransparentTileOWM(String tileType)
    {
        this.tileType = tileType;
        setOpacity(50);
    }

    /**
     * Sets the desired opacity of map {@link Tile}s, as a percentage where 0% is invisible and 100% is completely opaque.
     * @param opacity The desired opacity of map {@link Tile}s (as a percentage between 0 and 100, inclusive)
     */
    public void setOpacity(int opacity)
    {
        int alpha = (int)Math.round(opacity * 2.55);    // 2.55 = 255 * 0.01
        opacityPaint.setAlpha(alpha);
    }

    @Override
    public Tile getTile(int x, int y, int zoom)
    {
        URL tileUrl = getTileUrl(x, y, zoom);

        Tile tile = null;
        ByteArrayOutputStream stream = null;

        try
        {
            Bitmap image = BitmapFactory.decodeStream(tileUrl.openConnection().getInputStream());
            image = adjustOpacity(image);

            stream = new ByteArrayOutputStream();
            image.compress(Bitmap.CompressFormat.PNG, 100, stream);

            byte[] byteArray = stream.toByteArray();

            tile = new Tile(256, 256, byteArray);
        }
        catch(IOException e)
        {
            e.printStackTrace();
        }
        finally
        {
            if(stream != null)
            {
                try
                {
                    stream.close();
                }
                catch(IOException e) {}
            }
        }

        return tile;
    }

    /**
     * Helper method that returns the {@link URL} of the tile image for the given x/y/zoom location.
     *
     * This method assumes the URL string provided in the constructor contains three placeholders for the x-
     * and y-positions as well as the zoom level of the desired tile; {x}, {y}, and
     * {zoom}. An example for an OpenWeatherMap URL would be:
     * http://tile.openweathermap.org/map/precipitation/{zoom}/{x}/{y}.png


     *
     * @param x The x-position of the tile
     * @param y The y-position of the tile
     * @param zoom The zoom level of the tile
     *
     * @return The {@link URL} of the desired tile image
     */
    private URL getTileUrl(int x, int y, int zoom)
    {
        String tileUrl = String.format(OWM_TILE_URL, tileType, zoom, x, y);
        try
        {
            return new URL(tileUrl);
        }
        catch(MalformedURLException e)
        {
            throw new AssertionError(e);
        }
    }

    /**
     * Helper method that adjusts the given {@link Bitmap}'s opacity to the opacity previously set via
     * {@link #setOpacity(int)}. Stolen from Elysium's comment at StackOverflow.
     *
     * @param bitmap The {@link Bitmap} whose opacity to adjust
     * @return A new {@link Bitmap} with an adjusted opacity
     *
     * @see htp://stackoverflow.com/questions/14322236/making-tileoverlays-transparent#comment19934097_14329560
     */
    private Bitmap adjustOpacity(Bitmap bitmap)
    {
        Bitmap adjustedBitmap = Bitmap.createBitmap(256, 256, Bitmap.Config.ARGB_8888);

        Canvas canvas = new Canvas(adjustedBitmap);
        canvas.drawBitmap(bitmap, 0, 0, opacityPaint);

        return adjustedBitmap;
    }

}
Now running the code and using this new provider we have:
| Reference: | Android Google map: Add weather data from our JCG partner Francesco Azzola at the Surviving w/ Android blog. |


Hi,
I am not getting any Image for the following url
http://tile.openweathermap.org/map/precipitation/100/30/30.png
can you please help me to find the error in the above url.
Thanks,
jenny