JBoss Fuse 6.2 released – guide how to quickly try it
At the Red Hat summit last week, it was announced that JBoss Fuse 6.2 was released.
I want to congratulate the fuse team for getting this release out. I know that they have been working very hard all this year to QA and ensure its passes the high barrier of quality expected from an enterprise product.
So with my Camel hat, its great to see a product that includes the very last Apache Camel 2.15.2 release and subscribers have enterprise support and maintenance of Camel for a very long time.
Jonathan Anstey, the great co-author of Camel in Action, wrote a blog post about the highlights of this release. You can find more details from his blog. The biggest highlight (I am biased) is of course the upgrade from Camel 2.12 to 2.15 ;)
The JBoss Fuse website has been updated with details about this new release, where you can also find the download and how to get started.
Now unfortunately as a personal taste of mine, they made the getting started guide longer and … well to much JBoss tasty. Users do not need to start with a “complicated” install procedure of installing JBoss Eclipse tooling and then starting the Fuse server from an editor.
Instead I suggest jump straight to install JBoss Fuse, which is a simple download and unzip, and run the script.
Okay so here is my alternative and simpler install procedure:
- Download JBoss Fuse 6.2.0.GA
- Unzip the download, which you can do from the shell from linux/osx and using the file explorer for windows users etc.1
unzip jboss-fuse-full-6.2.0.redhat-133.zip - From the shell change directory to where you unzipped the download:1
cdjboss-fuse-6.2.0.redhat-133/ - Start JBoss Fuse:1
bin/fuseand for windows
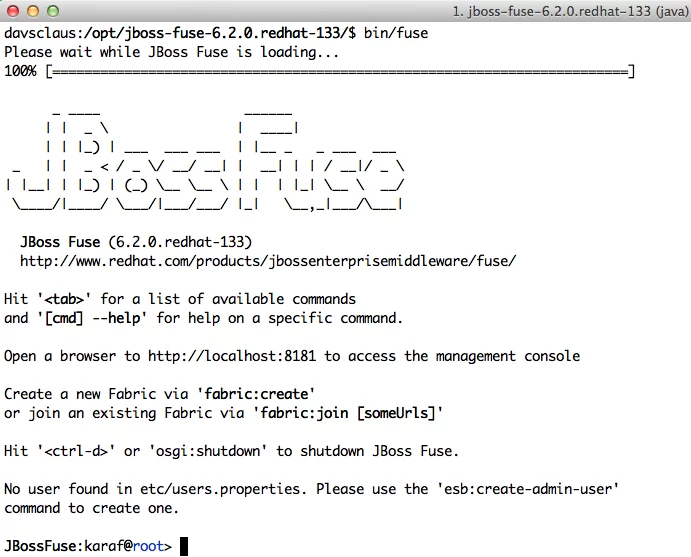
1bin/fuse.bat - Wait for Fuse to start and show the welcome screen:

JBoss Fuse 6.2 – Welcome screen - Create the administrator user (only need once).
The first time the welcome screen is presented, it shows a message about an admin user has not been created.12No user foundinetc/users.properties. Please use the'esb:create-admin-user'commandto create one.So to create such an user, you execute that command to type in the username and password of choice. For development and personal use, it may be a good idea to just use admin/admin as that is easy to remember.
12345JBossFuse:karaf@root> esb:create-admin-userPlease specify a user...New user name: adminPasswordforadmin:Verify passwordforadmin: - Open the web console and login.
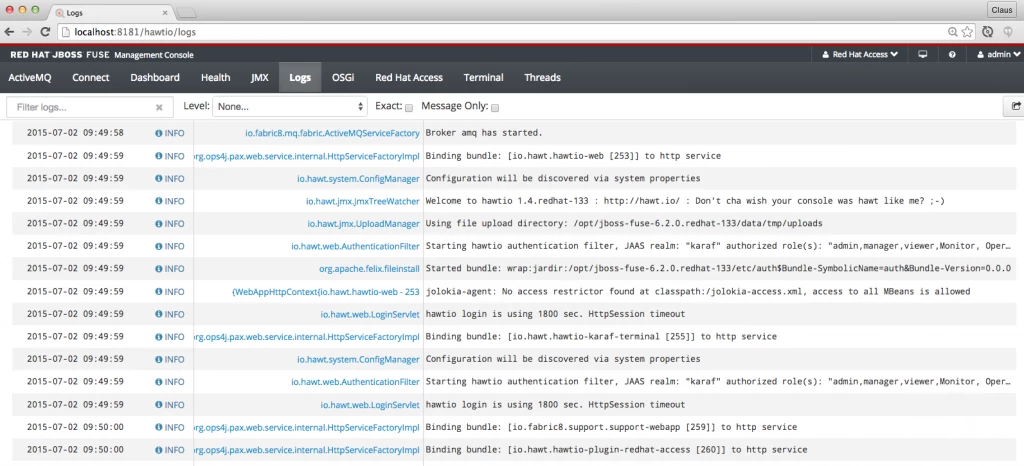
Now that we have an administrator user which has permission for the web console, we can try that. So open a web browser with http://localhost:8181 and login with the user you just created.The web console is based on the excellent hawtio, which offers a rich set of capabilities. On the screenshot we can access the server logs, or even the shell terminal, and whatnot.

Fuse web console showing the server logs - Lets build and install a Camel quickstart.
Okay we love Camel so lets build an example and deploy it to JBoss Fuse. To do so open a shell and in the quickstarts directory a number of examples is shipped.We will use camel-log as its a simple example that logs a message every 5th second. To build the example:
1cdquickstarts/beginner/camel-logAnd then run:
1mvn cleaninstallNotice each quickstart has a readme file with full instructions how to build and install (install are 2 options as standalone or with using fuse fabric). Here we use standalone mode.
You will see something along the lines of this when running:
010203040506070809101112davsclaus:/opt/jboss-fuse-6.2.0.redhat-133/quickstarts/beginner/camel-log/$ mvn cleaninstall[INFO] Scanningforprojects...[INFO][INFO] ------------------------------------------------------------------------[INFO] Building JBoss Fuse Quickstart: camel-log 6.2.0.redhat-133[INFO] ------------------------------------------------------------------------...[INFO] --- maven-bundle-plugin:2.3.7:install(default-install) @ beginner-camel-log ---[INFO] Local OBR update disabled (enablewith -DobrRepository)[INFO] ------------------------------------------------------------------------[INFO] BUILD SUCCESS[INFO] ------------------------------------------------------------------------If the build is a success, then we are ready to install it. We can do this from either the web console, or from the JBoss Fuse shell.
From the fuse shell type this a bit long command to install and start the example we just build:
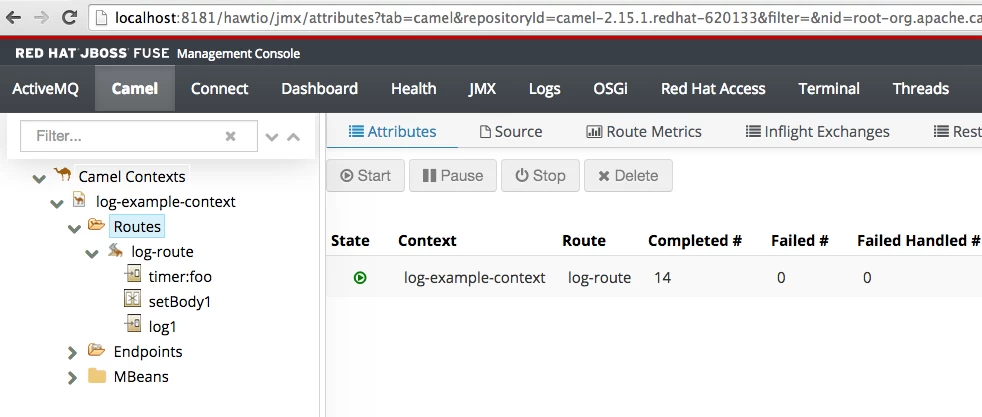
123JBossFuse:karaf@root> osgi:install-s mvn:org.jboss.quickstarts.fuse/beginner-camel-log/6.2.0.redhat-133Bundle ID: 265JBossFuse:karaf@root>And in the web console a Camel button will appear in the top, which allows you to see all the running Camel applications inside Fuse.

Fuse web console showing all the Camel applications running inside with real time metrics And if you click on the Logs button then you will see the camel application is logging a message every 5th second.
You can also see the logs from the fuse shell, if you type:
1234log:display2015-07-02 10:07:15,441 | INFO |#0 - timer://foo | log-route | ? ? | 198 - org.apache.camel.camel-core - 2.15.1.redhat-620133 | >>> Hello from Fabric based Camel route! : root2015-07-02 10:07:20,441 | INFO |#0 - timer://foo | log-route | ? ? | 198 - org.apache.camel.camel-core - 2.15.1.redhat-620133 | >>> Hello from Fabric based Camel route! : root - Where to go more.
Okay that was just an alternative getting started guide to quickly try out the new JBoss Fuse 6.2 release.
With this release there is also the JBoss Eclipse Tooling you can try. It has the impressive visual Camel debugger, and also the graphical Camel route editor. The Fuse Eclipse team has improve the tooling a lot, and continues to do so. I have previously blogged a little bit about that. To install this tooling then follow the step 1 on the official JBoss Fuse getting started guide.
| Reference: | JBoss Fuse 6.2 released – guide how to quickly try it from our JCG partner Claus Ibsen at the Claus Ibsen riding the Apache Camel blog. |


