How I created my first Open Source Android Library – Part 1
For long I’ve been thinking of creating an open – source android library. I’m a firm believer of the fact that contributing to open source and reading open source code makes one a better engineer. But I’d never had a first hand experience in creating a library of my own.
Fascinated by the fact that how an Android library is published to JCenter and how is it downloaded by placing a single line in gradle, I thought of publishing a simple Android Library.
The Idea
Since this was my first time writing an open source android library, I thought it’d be best to keep it as simple as possible. I wanted to create a library really quickly and publish it so as to get a hang of the process.
I knew that creating some kind of a SDK would take a lot of time. Hence, I decided to fiddle with UI. I wanted to create a simple animating view. This was a use-case I encountered in my job where I was required to draw user’s attention to a button.
I thought of adding some sort of animation to it. Pulse animation (growing and shrinking) seemed to be most effective and quick. Hence, I decided to proceed on that lines with my library. Just creating something that I could use in my daily work.
Also, I was somewhat aware of how I could do this simply by using ValueAnimator. Cherry on top 😉
The Execution
Step 1
I created a new Android Studio project with a Blank Activity.
After creation of the project, I created a class named Pulsating Button and extended it from LinearLayout. This would be my CustomView/Button that I would be animating.
01 02 03 04 05 06 07 08 09 10 11 12 13 14 15 16 17 | class PulsatingButton : LinearLayout { constructor(context: Context?) : super(context) { init(context) } constructor(context: Context, attrs: AttributeSet, defStyle: Int) : super(context, attrs, defStyle) { parseAttributes(context, attrs) init(context) } constructor(context: Context, attrs: AttributeSet) : super(context, attrs) { parseAttributes(context, attrs) init(context) }} |
From there on, I had to give attributes to my button such as what would be it’s pulse speed/pulse rate. What would be the size of pulse, the repeat count etc.
I wondered if I could use attributes for it, and as it turned out I could. After spending some time learning about how to add custom xml attributes, I went ahead and created 7 custom attributes for my button:
- Pulse Rate
- Pulse Count
- Horizontal Offset
- Vertical Offset
- Text
- Text color
- Background
I created a file named: attributes.xml in values package and placed my attributes inside it.
01 02 03 04 05 06 07 08 09 10 11 12 | <?xml version="1.0" encoding="utf-8"?><resources> <declare-styleable name="PulsatingButton"> <attr name="pulseDuration" format="integer" /> <attr name="horizontalOffset" format="integer" /> <attr name="verticalOffset" format="integer" /> <attr name="pulseCount" format="integer" /> <attr name="buttonColor" format="color"/> <attr name="textColor" format="color"/> <attr name="text" format="string"/> </declare-styleable></resources> |
Step 2
With the attributes in place, it was time to apply those to the Button. I added some global variables, and parsed the attributes.
It was now time to create the layout file for the button. The layout file contained a button as child. This would be the root view.
I would be extracting the button in a global variable. Once done, inside the init method of pulsating button, I went ahead and set the attributes. Also added some methods to set these variables dynamically via code.
01 02 03 04 05 06 07 08 09 10 11 12 13 14 15 16 17 18 19 20 21 22 23 24 25 26 27 28 29 30 31 32 33 34 35 36 37 38 39 40 41 42 43 44 45 46 47 48 49 50 51 52 53 54 55 56 57 58 59 60 61 62 63 64 65 66 67 68 69 70 71 72 73 74 75 76 77 78 | class PulsatingButton : LinearLayout { private var buttonText: CharSequence? = "" private var textColor: Int = ContextCompat.getColor(context, android.R.color.black) private var buttonColor: Int = ContextCompat.getColor(context, R.color.colorAccent) private var verticalOffset: Int = 40 private var horizontalOffset: Int = 40 private var repeatCount: Int = Int.MAX_VALUE private var animationDuration: Int = 1000 val set = AnimatorSet() constructor(context: Context?) : super(context) { init(context) } constructor(context: Context, attrs: AttributeSet, defStyle: Int) : super(context, attrs, defStyle) { parseAttributes(context, attrs) init(context) } constructor(context: Context, attrs: AttributeSet) : super(context, attrs) { parseAttributes(context, attrs) init(context) } private fun init(context: Context?) { LayoutInflater.from(context).inflate(R.layout.pulsating_button, this, true) setColors() setText(buttonText) } private fun parseAttributes(context: Context, attributes: AttributeSet) { val attrs = context.theme.obtainStyledAttributes(attributes, R.styleable.PulsatingButton, 0, 0) try { this.animationDuration = attrs.getInt(R.styleable.PulsatingButton_pulseDuration, 100) this.verticalOffset = attrs.getInt(R.styleable.PulsatingButton_verticalOffset, 4) this.horizontalOffset = attrs.getInt(R.styleable.PulsatingButton_horizontalOffset, 4) this.repeatCount = attrs.getInt(R.styleable.PulsatingButton_pulseCount, Int.MAX_VALUE) this.buttonColor = attrs.getColor(R.styleable.PulsatingButton_buttonColor, ContextCompat.getColor(context, R.color.colorAccent)) this.textColor = attrs.getColor(R.styleable.PulsatingButton_textColor, ContextCompat.getColor(context, R.color.colorAccent)) this.buttonText = attrs.getText(R.styleable.PulsatingButton_text) } finally { attrs.recycle() } } fun setHorizontalOffset(horizontalOffset: Int) { this.horizontalOffset = horizontalOffset } fun setVerticalOffset(verticalOffset: Int) { this.verticalOffset = verticalOffset } fun setRepeatCount(count: Int) { this.repeatCount = count } fun setAnimationDuration(duration: Int) { this.animationDuration = duration } private fun setColors() { button.setBackgroundColor(buttonColor) button.setTextColor(textColor) } fun setButtonDrawable(drawable: Drawable) { button.background = drawable } fun setText(text: CharSequence?) { if (!TextUtils.isEmpty(text)) { button.text = text } }} |
Step 3
Now it was time to create the actual animation. I planned to use a ValueAnimator to repeatedly generate values which would be used to change the width and height of my button.
I created a function named startAnimation and two value animator objects for Horizontal and Vertical scaling:
01 02 03 04 05 06 07 08 09 10 11 12 13 14 15 | class PulsatingButton : LinearLayout {... fun startAnimation() { val animator = ValueAnimator.ofInt(0, verticalOffset) animator.interpolator = AccelerateDecelerateInterpolator() animator.duration = animationDuration.toLong() val animator2 = ValueAnimator.ofInt(0, horizontalOffset) animator2.interpolator = AccelerateDecelerateInterpolator() animator2.duration = animationDuration.toLong() }...} |
Next, added update listeners to these, which would receive the intermediate values and would update the bounds of my button for each value.
01 02 03 04 05 06 07 08 09 10 11 12 13 14 15 16 17 18 19 20 21 22 23 24 25 26 27 28 29 30 31 32 33 34 | class PulsatingButton : LinearLayout {... fun startAnimation() { val animator = ValueAnimator.ofInt(0, verticalOffset) animator.repeatMode = ValueAnimator.REVERSE animator.interpolator = AccelerateDecelerateInterpolator() animator.duration = animationDuration.toLong() val animator2 = ValueAnimator.ofInt(0, horizontalOffset) animator2.repeatMode = ValueAnimator.REVERSE animator2.interpolator = AccelerateDecelerateInterpolator() animator2.duration = animationDuration.toLong() val originalheight = button.layoutParams.height val originalWidth = button.layoutParams.width animator.addUpdateListener { valueAnimator -> val params = button.layoutParams val animatedValue = valueAnimator.animatedValue as Int params.height = (originalheight + animatedValue) button.layoutParams = params } animator2.addUpdateListener { valueAnimator -> val params = button.layoutParams val animatedValue = valueAnimator.animatedValue as Int params.width = (originalWidth + animatedValue) button.layoutParams = params } }...} |
Then, I checked if repeat count was set. If not, it was default to repeat infinitely. Finally, it was time to combine those two animation objects and play them together. For this I used AnimatorSet.
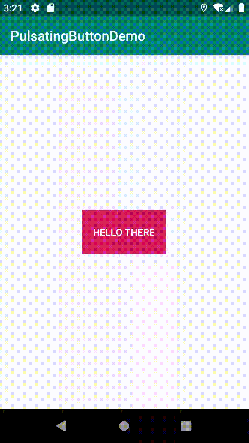
It should work right? With everything looking good, I hoped so, but to my surprise, here’s what was happening:

There’s a catch to using ValueAnimator. After spending several hours on stack overflow and official Android docs, I came to know of a property in value animator called repeatMode. It had to be set to ValueAnimator.REVERSE
What happened here is this:
By default, valueAnimator will emit values from let’s say 0 – 40 like 0, 1, 2, 3……..40 and then it’ll revert back to 0 again and will emit 0, 1, ……40.
What I wanted was 0, 1, 2……40 and then 40, 39, 38……..1, 0. This was required to make the shrinking animation work else it just shrunk in the blink of an eye.
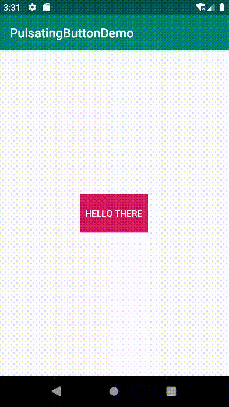
This was probably the most intense and time consuming step in the development of this library. But in the end, I finally had this:

The Release
Okay, so now I’ve completed my library. But wait! It wasn’t actually a library, it was a normal Android Studio project that I had created.
I needed to figure out how to migrate an Android Studio project into a library easily else I’d have to create a new library project and copy the code.
What I needed to do was simply change one line inside app/build.gradle file. I needed to remove com.android.application and add com.android.library.
Note that after that you won’t be able to run your project as it’s a library.
Once, that was completed, I wanted to figure out how to publish the library on some online platform so that it was easily usable for Android devs. The easiest way of doing this is to use JitPack.io
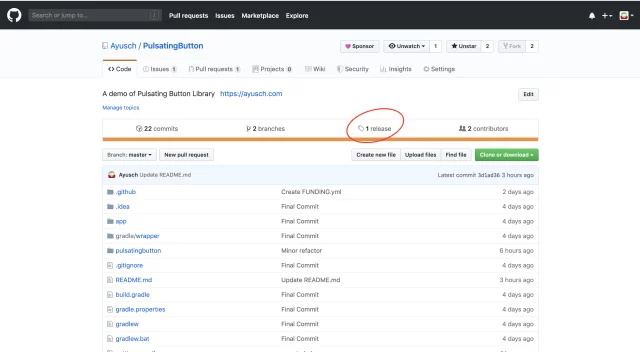
All you need to do is create a release of your GitHub repo from the release tab.

Then go ahead and copy the url of your repo and paste it in the textbox on JitPack.io This will generate the implementation “” link for adding to gradle.
But wait, it can’t be that easy right?
Actually it was until I figured out that one also has to include the maven url for jitpack inside their project level build.gradle file.
Android projects do not have this by default and only include google() and jcenter(). Hence, to minimize the friction, I decided to publish my library on JCenter.
How I published my android library on JCenter? would require a complete article on it’s own. So stay tuned for part 2.
Conclusion
This article outlines the journey of creating my first open source android library. The best way to learn is by doing. And the best way to start writing better code is by starting to read and write more open – source code usable by others!
So I urge you to go ahead and contribute to this simple open-source android project. It can be something as simple as updating the documentation. It’s the first step to getting started with open-source.
Published on Java Code Geeks with permission by Ayusch Jain, partner at our JCG program. See the original article here: How I created my first Open Source Android Library – Part 1 Opinions expressed by Java Code Geeks contributors are their own. |


Nice article, even if the project is fairly simple. I like the part where you realized that it is not a library yet