How to add maven Support to a Java Project in IntelliJ
Hello Friends
In this quick tutorial, we will see how we can add Maven support to the java project in IntelliJ.

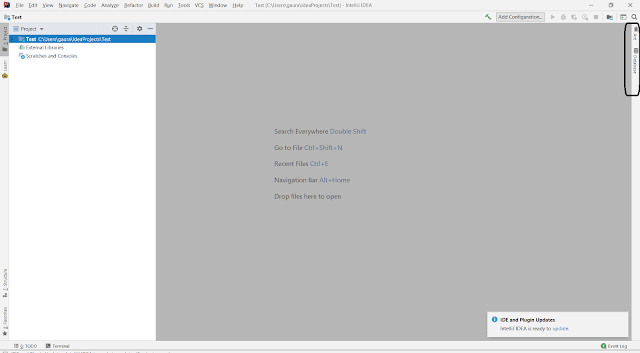
If we have a non-Maven Java project or maven project which we have just cloned in IntelliJ and we don’t see the Maven tab on the extreme right side of IntelliJ , from where we can maven build our application, then it means we need to add Maven support to our project.
How to add Maven Support to a Java Project in IntelliJ
It is really simple. You just need to do following :
– Right-click on your project in IntelliJ
– Select Option “Add Framework Support…”
– Select Maven from list of technologies/Frameworks
– Click ok.
Java Project Without Maven Support :

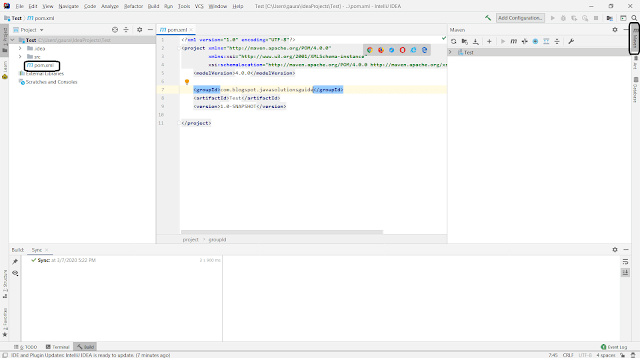
Java Project with Maven Support :
As you can see in the below screenshot, after adding Maven Support by following the above steps, IntelliJ created a pom.xml file in our project and also on the extreme right side of IntelliJ we can see Maven tab, from where we can maven build our application.

Summary :
That’s all for this post. So we saw in this post, that if we have a non-maven java project and add maven support to it, IntelliJ adds a pom.xml file in our project and also we can see a tab for Maven, using which we can run maven commands. Also if we have just checked out a maven project from a remote repository into our IntelliJ and it is not showing Maven tab, we can follow the same steps and we will be able to see the Maven tab.
Thanks for reading.
Published on Java Code Geeks with permission by Gaurav Bhardwaj, partner at our JCG program. See the original article here: How to add maven Support to a java Project in IntelliJ Opinions expressed by Java Code Geeks contributors are their own. |


