Invoking Different Secure WCF SOAP Services using SoapUI – Basic Authentication, Part II
In the first post of this series, we created a basic authentication service to be invoked using SoapUI. Therefore, in this second post, we will demonstrate step by step how to use this tool to successfully invoke this kind of service.
1-Basic WCF SOAP using SoapUI – Create New SOAP project
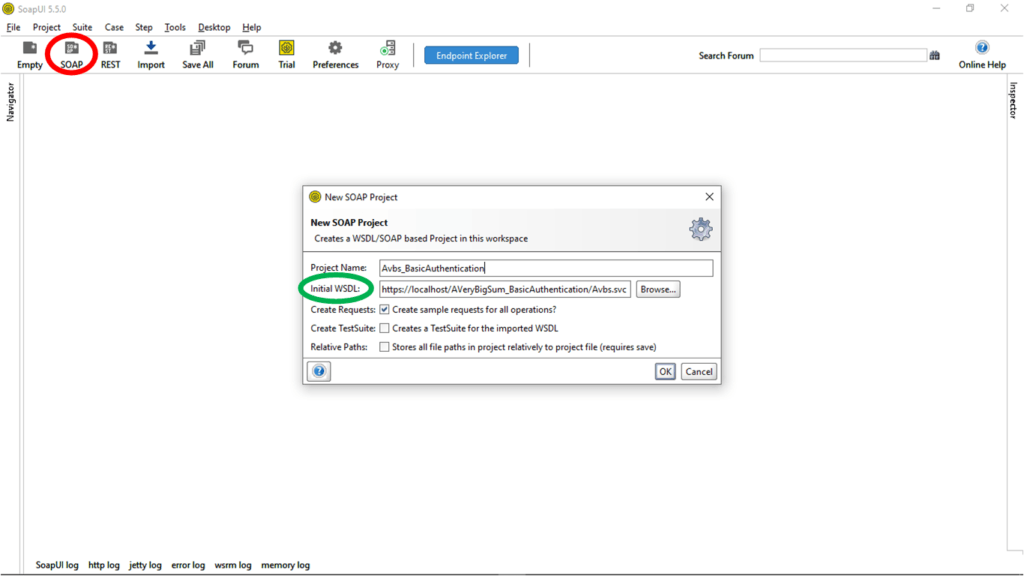
Firstly we need to create a SoapUI project and inthe “Initial WSDL”, add the URL of the WSDL service created in the first post. Also, add your desired project name. A new project is generated with a sample request for the service.
2-Basic WCF SOAP using SoapUI – Authentication and Security-related settings tab
After create successfully the new SoapUI project, collapse in until the request´s endpoint. Now double click the request or right-click of the mouse to open the “Show Request Editor”. Navigate to the “Auth (Basic)” tab in the bottom corner, surround toward a green circle.
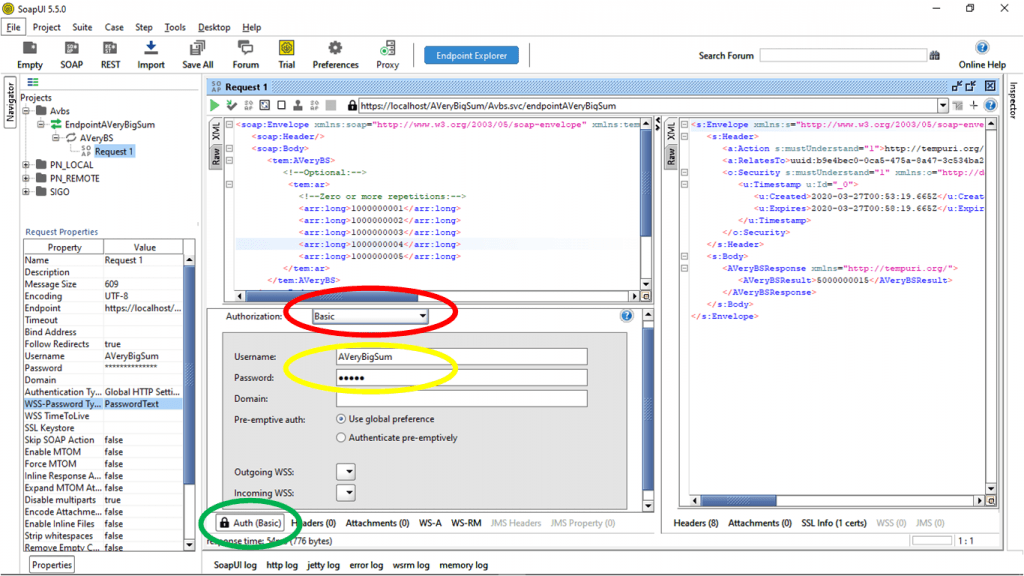
In the “Authorization” dropdown list, select “Basic”. It is the same as the service created before. Following, SoapUI shows a form when we can insert the “Username” and the “Password” service credentials “AVeryBigSum”, “12345” respectively.
3-Basic WCF SOAP using SoapUI – WS-Addressing related settings tab
Navigate to the “WS-A” Configurations tab, and enable the WS-A addressing, that defines two interoperable constructs typically provided by transport protocols (endpoint references) and messaging systems (message information headers). These constructs normalize this underlying information into a uniform format that can be processed independently of transport or application.
To instruct the service to process the crucial element in the header, we need to specify to TRUE the “Must understand” configuration. The header contains crucial data to process, and the recipient must process the headers. If the service, can’t process the header or didn’t received the header, an error will be raised.
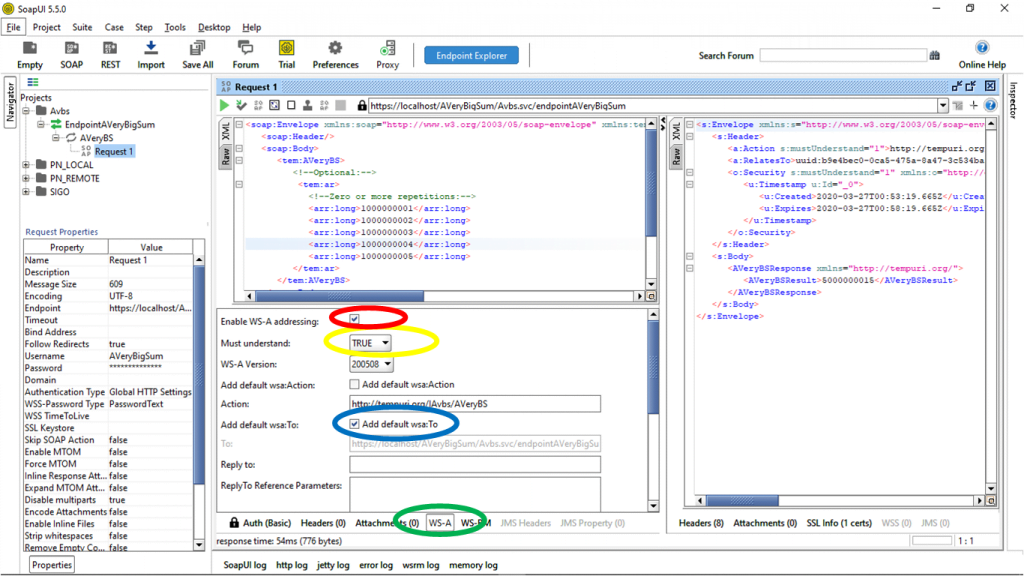
This tool allows us to enable the “Add default wsa: To” and “Add default wsa: Action” configuration. The “Add default wsa: To” provides the value for the destination property. The default anonymous value for this property is “http://www.w3.org/2005/08/addressing/anonymous“. In the above example, the default wsa: Action, wsa: To and wsa: MessageId headers have been enabled, so when we send the request we can see them in the raw request view.
4-Secure WCF SOAP using SoapUI – WS-Reliable message related settings tab
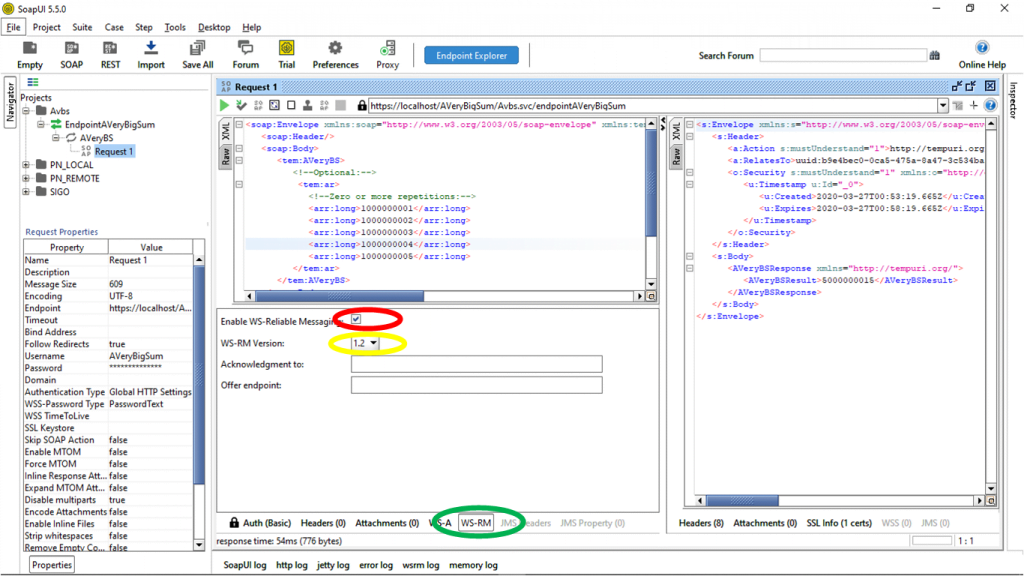
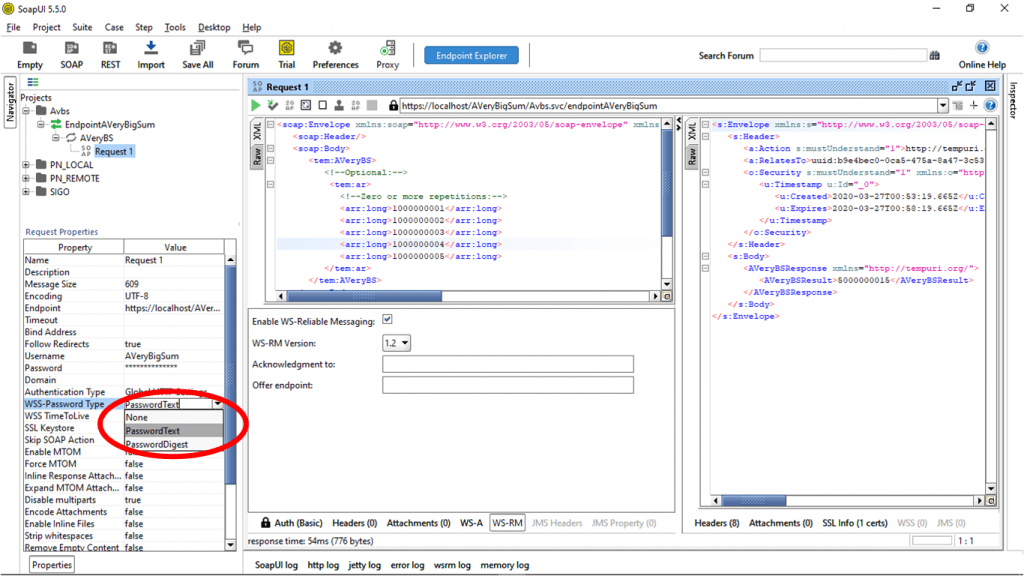
To ensure reliable communication between two systems we enable the “WS-Reliable Message” specification. The aim of this is to ensure that messages are transferred properly from the sender to the receiver in the presence of network failures. As well we select the latest version of this specification for this demonstration.
5- Request properties
Finally in the left corner “Request Properties” -> WSS-Password Type we select PasswordText. WSS-Password Type is a concept that will outline if the password in the XML payload is plain text or digest. For Digest, you can use the Require Ws-Security Password Digest Credentials which is a one to one relationship of user to assertion as we need to know the password. For Plain text, you can use the WS-Security UsernameToken Profile Credentials.
Conclusion
In this post, we demonstrate how to config a SoapUI project to invoke a WCF Basic Authentication service, we use the previous secure service created in the first post to serve as a system under test. The sample both service and the SoapUi project is accessible from the GitHub repository; to download it, please follow this link.
Our last and final demonstration in this series will show how to invoke another WCF service secured by Certificate Authentication.
Published on Java Code Geeks with permission by Jailson Evora, partner at our JCG program. See the original article here: Invoking Different Secure WCF SOAP Services using SoapUI – Basic Authentication, Part II Opinions expressed by Java Code Geeks contributors are their own. |


