How To Perform Local Website Testing Using Selenium And Java
Users expect new features and websites to be seamless and user-friendly when they go live. End-to-end website testing in local infrastructure becomes an unspoken critical requirement for this. However, if this test is performed later or after the entire website or app has been developed, the possibility of bugs and code issues increases. Such issues can do more damage than we can ever think of.
According to a report, 88% of users are less likely to return to the website after a bad user experience. As much as $2.6 Billion is lost each year due to slow-loading websites and images on them if it takes more than an average of 2 seconds. Also, up to 8 out of 10 users stop visiting a website if it is incompatible with their device.
A mere look at these numbers is terrifying due to the cost and effort involved in fixing these at a later stage, in addition to the customer base lost due to bad impressions and first experiences.
In such situations, testing the websites beforehand becomes imperative on such platforms where this cost can be reduced to a minimum.
Cloud testing platforms like LambdaTest help test such websites on various local environments by providing remote access to real browsers and operating systems. This allows you to verify the functionality and compatibility of your website across different configurations without having to set up a complex test infrastructure.
Testing a website, especially in a production environment, can be time-consuming and resource-intensive. This can slow development and make it difficult to detect bugs and issues early on, delaying developer feedback.
Local website testing tests a website on a developer’s machine using automated functional tests. These test scripts can be designed to be integrated with the CI/CD pipeline and executed for each local deployment. This saves time and resources by identifying issues early, shortening the feedback cycle, and thus increasing the ROI on development and testing.
Automated local website testing enables developers to speed up and streamline the testing process. Effective test case management is crucial in this scenario, as it allows for testing on various browser configurations and OS versions to cater to the diverse systems used by end users. A well-designed test automation framework is essential for performing local testing efficiently.
Because we will be discussing website testing in this blog, Selenium is the best choice. Furthermore, because the website will be hosted locally, we will require a platform that allows for local website testing without interfering with the local infrastructure or the developer’s machine.
In this blog on local website testing, we will learn more about local page testing and its advantages in software development and the testing cycle. It follows how we can write an automation test script for a locally hosted website and execute the same in an organized manner so as not to block local infrastructure but still get faster feedback.
So, let us get started.
What is Local Website Testing?
Local website testing allows developers to host and test the website on their computers or local infrastructure. Once the developer is confident, the website can be moved to a live testing server before making it live in production.
This website is a copy that behaves like the real one and provides a place to test it with the least threat. This includes checking cross browser compatibility, user interactions, different links or images on the page, etc.
This configuration is ideally different from a staging or pre-prod test environment where any app or website is usually tested in a testing cycle by the QA team before it is made available on production. This is because in a staging or pre-prod environment, more stable services are running, or features are being tested at a later stage of development and require more regression testing and/or integration testing with external resources. As a result, we don’t want to risk breaking such an environment with early-stage changes that are more prone to bugs. Local hosting and testing websites become extremely important and useful in such cases.
There are a few different ways to set up local website testing. One common method is to use a local development server, such as XAMPP, which can be installed on a computer and configured to run a website. In this blog on local website testing, we will use the same to access the website on localhost.
Advantages of Local Website Testing
There are several advantages to using local website testing.
- Accelerated developer feedback: Local website testing greatly improves the feedback cycle as developers can quickly make changes to the code and check the results. This improves the development, leading to a better user experience and a more refined final product. Overall it highly improves the efficiency and effectiveness of the development process and allows the delivery of a high-quality website in a shorter time by reducing the risk of any major issues after launch.
- Speed of Execution: It allows developers to quickly test their changes without waiting for the code to be deployed on testing environments. This saves a lot of time and helps them to iterate faster during the development cycle.
- Cost-effective: Testing a website locally is highly cost-effective as it lessens or even eliminates the time required for testing on a live server, saving hosting and associated services costs.
- Greater Control and Ease to Debug: A developer has better control over the environmental configurations when performing local website testing. Also, they have access to various debugging tools on their computers, like the developer’s console.
This allows them to replicate and debug the issues better to fix them, which might not be that easier on a live server due to limited access and control.
- Integration with CI/CD pipeline: Local website testing can be used in conjunction with Continuous Integration and Continuous Development (CI/CD) pipeline to ensure that changes to the website are thoroughly tested before they are deployed.
CI/CD is a software development practice that automatically builds, tests, and deploys changes to a server.
It can be integrated into the CI/CD pipeline as a separate step, allowing developers to test the website on different configurations and environments, such as different operating systems and browsers. This can help ensure that the website is compatible with many users and devices.
- Great fit for Agile: Local website testing can be a valuable tool in an Agile development environment because it allows developers to test changes to their website and receive feedback quickly.
Agile development is an iterative, collaborative approach that emphasizes flexibility, rapid iteration, and fast feedback.
It adds the advantage of allowing devs and QAs to work in parallel and provide better results.
Test your locally hosted websites on 3000+ real browsers and OS. Try LambdaTest Now!
Configuring Tunnel for Local Website Testing
Having understood the basics and advantages of local website testing, let us now move to the implementation part and see how we can perform it on our local computer.
In this blog, we will use the LambdaTest platform to test the locally hosted website.
LambdaTest cloud Selenium Grid supports testing of the local websites using the LambdaTest tunnel app. This tunnel allows you to test the website on over 3000+ real browser and OS combinations by connecting the local systems to LambdaTest servers via SSH-based integration.
Subscribe to the LambdaTest YouTube Channel and stay updated with the latest tutorial around automated browser testing, Cypress E2E testing, Mobile App Testing, and more.
This tunnel helps you test plain HTML, CSS, PHP, Python, or similar web files saved on your local system over combinations of operating systems, browsers, and screen resolutions available on LambdaTest. This tunnel follows various protocols, such as Web Socket, HTTPS, SSH(Secure Shell), etc., to help you establish a secure and unique tunnel connection through corporate firewalls between your system and LambdaTest cloud servers.
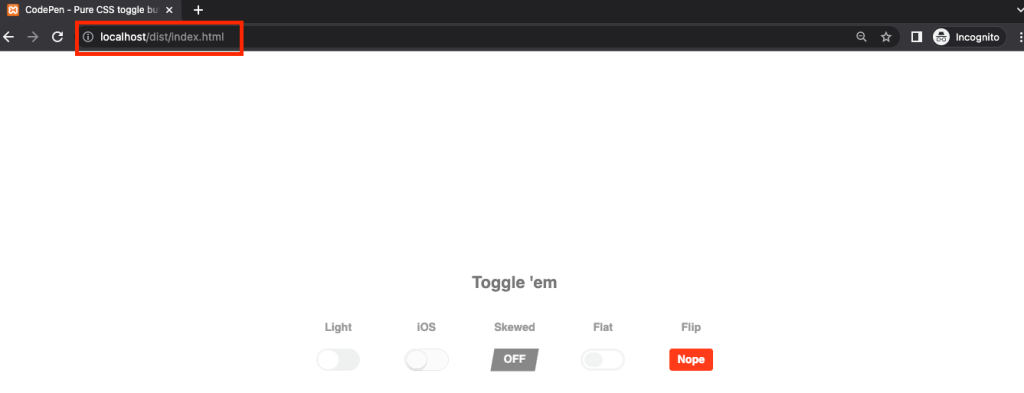
Before setting up the tunnel and seeing how it works, we must host a local website or webpage. In this blog, we are referring to this CodePen project.
How to host a local website?
To set up and verify it by launching the webpage, follow these steps
Step 1: Open the link mentioned above, export the project, and unzip the downloaded *.zip.
Step 2: Make sure to turn on XAMPP or any other web hosting tool you use. If you are using XAMPP, start the Apache service under Actions.
Step 3: Copy and Paste the Content from the unzipped folder in Step 1, inside the XAMPP htdocs folder, to access the website on this URL: http://localhost.
With this, the setup for the local website is done. Next, we move to the Tunnel configuration and see how we can use the same to perform automated testing of the local website.
How to configure the tunnel?
This blog covers configuring the LamdbaTest tunnel connection and testing locally hosted web pages from a macOS (Big Sur) perspective. The configuration remains the same for all previous versions.
LambdaTest also supports tunnel configuration and testing of local websites on Windows and Linux machines.
Step 1: Create your account on the LambdaTest platform and login into the dashboard.
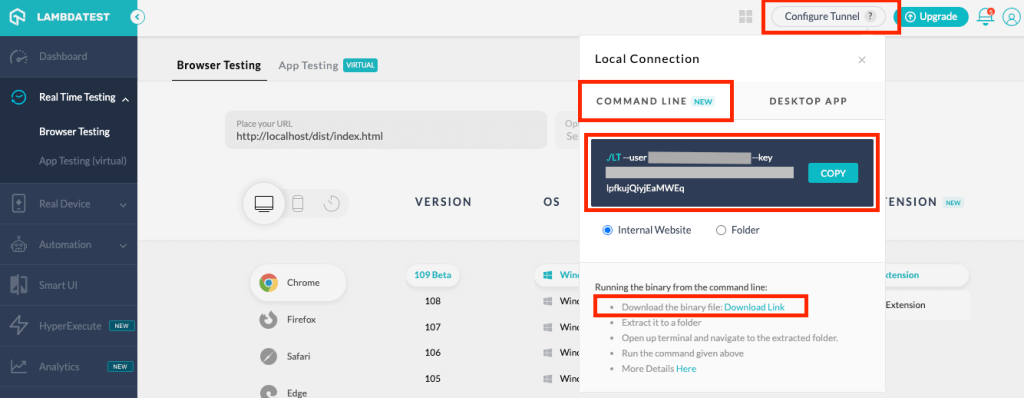
Step 2: Click Configure Tunnel on the top right and select COMMAND LINE. Then, download the binary file by clicking on Download Link. This binary helps establish a secure tunnel connection to the LambdaTest cloud servers.
Step 3: Navigate to your downloads folder and extract the downloaded zip.
Step 4: Copy the command to execute the downloaded binary from the dashboard. The command would look like this. You can mention an optional tunnelName in the command to identify which tunnel you want to execute your test case in case of multiple tunnels.
LT --user {user's login email} --key {user's access key} --tunnelName {user's tunnel name}
Step 5: Execute the command to start the tunnel and make the connection. On successful tunnel connection, you will see a prompt “You can start testing now”. Please note that the tunnel has been named as LambdaTest.
Step 6: After this, move back to the LambdaTest Dashboard to verify the tunnel before we write automation code for local website testing using Selenium with Java.
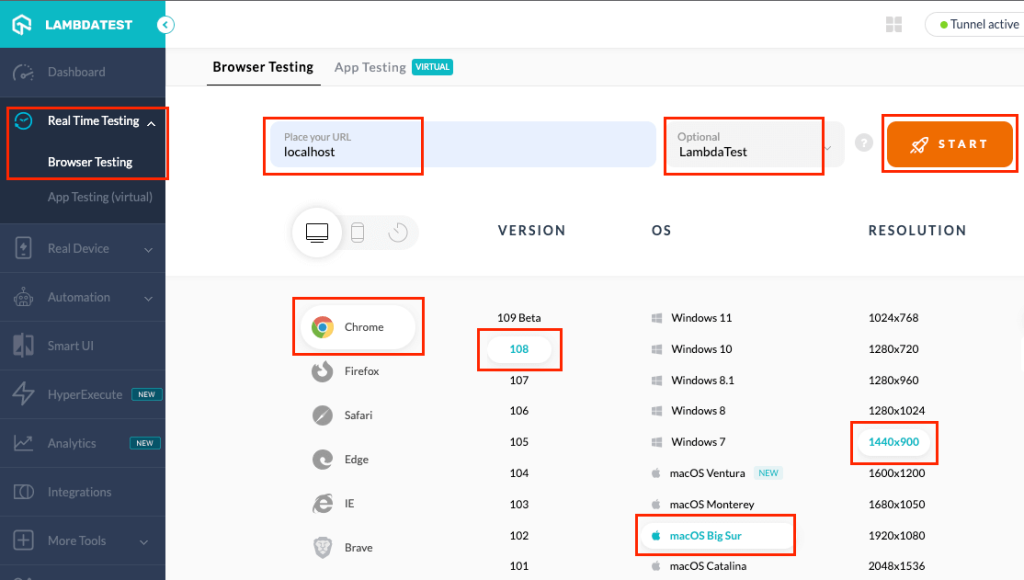
Step 7: Navigate to Real Time Testing, select Browser Testing, enter the localhost URL you want to test, and select the tunnel name. You can select the test configuration of your choice from various major browsers & their versions to perform a test session. After selecting the configuration, click on the START button.
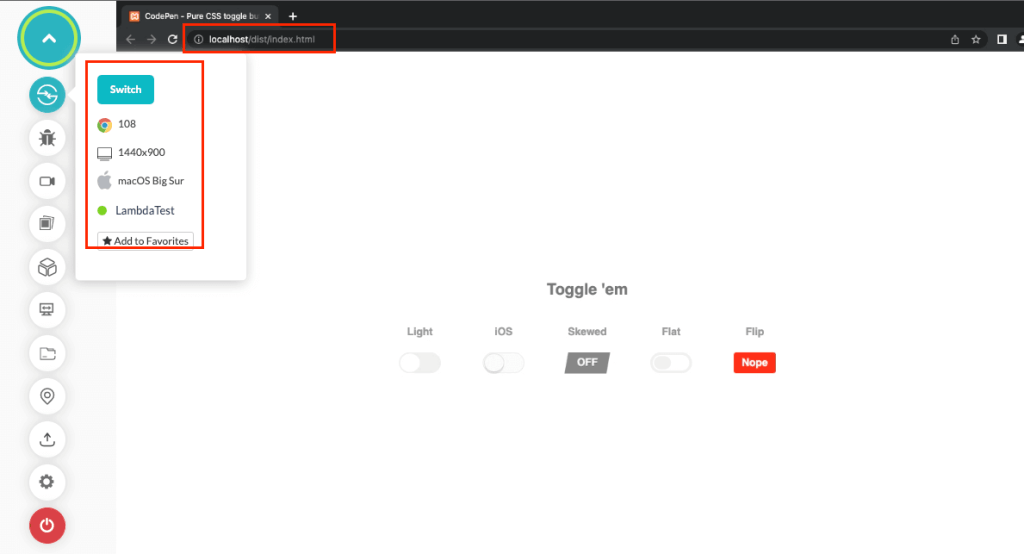
Step 8: At this point, you should get navigated to your localhost URL. This shows that the setup is verified, and we can write the automation code.
Demonstration: Local Website Testing using Selenium and Java
Having completed the tunnel setup, let us now try to implement an automated test script for the same local website using Selenium and Java.
We would execute the script on the Lambda Test Selenium cloud grid through the tunnel we have already configured.
Test scenario for demonstration – navigate to localhost using the tunnel and click on the first toggle button.
A sample test script for local website testing using Selenium with Java would be like the one below.
package test.java;


import java.net.MalformedURLException;
import java.net.URL;
import java.util.HashMap;


import org.openqa.selenium.By;
import org.openqa.selenium.WebDriver;
import org.openqa.selenium.chrome.ChromeOptions;
import org.openqa.selenium.remote.RemoteWebDriver;
import org.testng.annotations.AfterTest;
import org.testng.annotations.BeforeTest;
import org.testng.annotations.Test;


public class TestLocalWebsiteUsingTunnel {


   WebDriver driver = null;
   String user_name = System.getenv("LT_USERNAME") == null ? "LT_USERNAME" : System.getenv("LT_USERNAME");
   String access_key = System.getenv("LT_ACCESS_KEY") == null ? "LT_ACCESS_KEY"
           : System.getenv("LT_ACCESS_KEY");


   @BeforeTest
   public void testSetUp() throws Exception {
       ChromeOptions browserOptions = new ChromeOptions();
       browserOptions.setPlatformName("Windows 10");
       browserOptions.setBrowserVersion("108.0");
       HashMap<String, Object> ltOptions = new HashMap<String, Object>();
       ltOptions.put("username", user_name);
       ltOptions.put("accessKey", access_key);
       ltOptions.put("project", "Local Website Testing using Selenium JAVA");
       ltOptions.put("build", "Local Website Testing");
       ltOptions.put("tunnel", true);
       ltOptions.put("selenium_version", "4.0.0");
       ltOptions.put("w3c", true);
       browserOptions.setCapability("LT:Options", ltOptions);


       try {
           driver = new RemoteWebDriver(
                   new URL("https://" + user_name + ":" + access_key + "@hub.LambdaTest.com/wd/hub"), browserOptions);
       } catch (MalformedURLException exc) {
           exc.printStackTrace();
       }
   }


   @Test(description = "Demonstration of Automated Local Website Testing using LambdaTest Tunnel")
   public void testLocalWebsite() throws InterruptedException {
       driver.get("https://localhost");
       driver.findElement(By.cssSelector("[for='cb1']")).click();
   }


   @AfterTest
   public void tearDown() {
       if (driver != null) {
           driver.quit();
       }
   }
}
Code Walkthrough
Step 1: The first step would be to create an instance of the RemoteWebDriver as we will be executing the code on the Selenium cloud grid.
Step 2: As already mentioned, since we are using LambdaTest cloud grid and tunnel for local website testing, we would need to add credentials of the same in the environment variables.
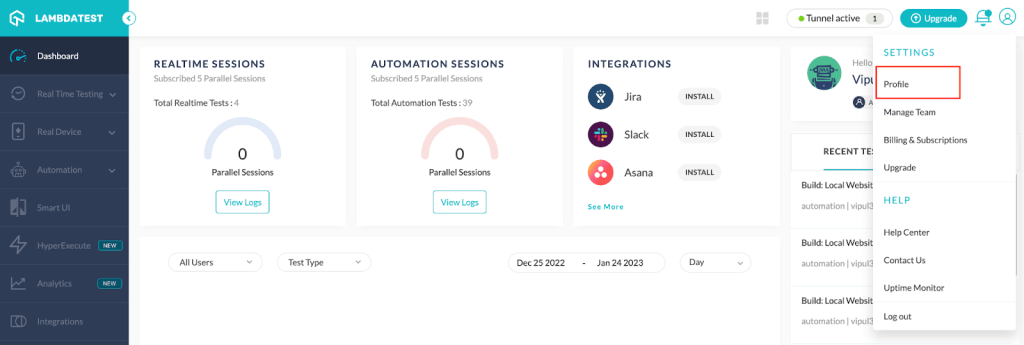
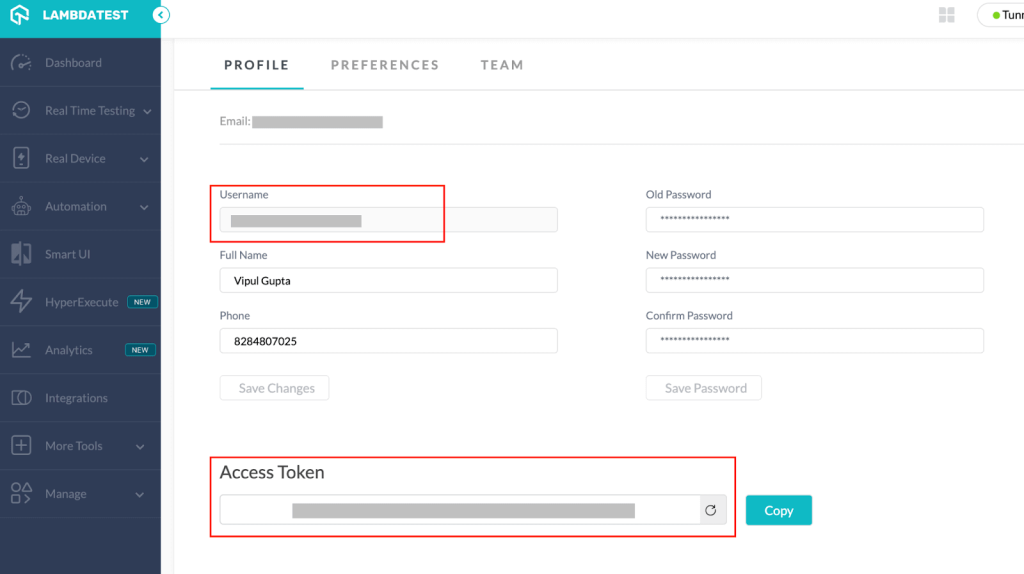
If you do not have your credentials, navigate to the LambdaTest Dashboard, click on the Profile icon in the top-right corner of your screen, then click on Profile.
You will find your username and access key here.
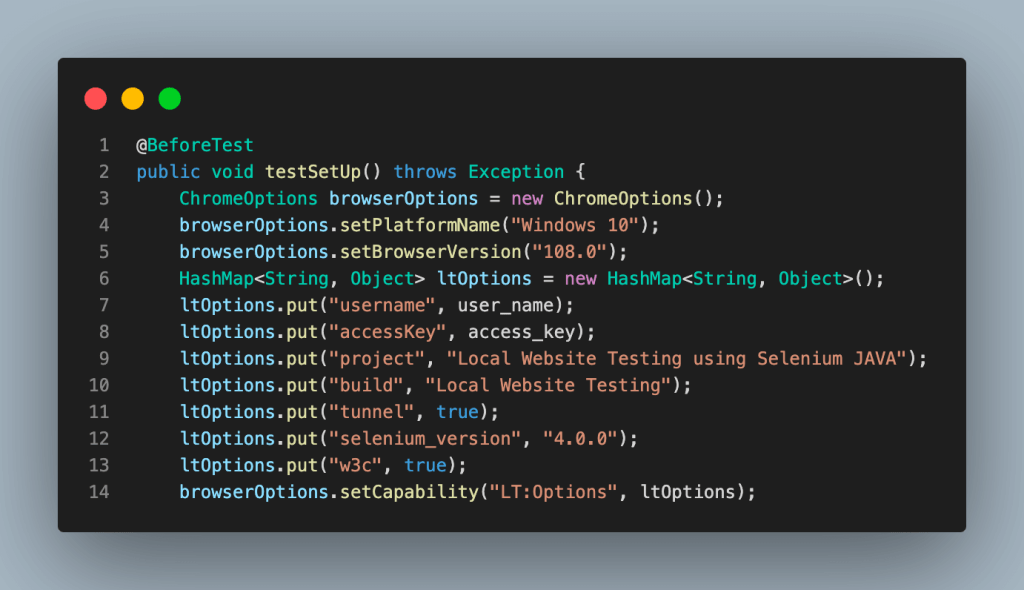
Step 3: Next, we add a function as testSetUp() to set the initial browser capabilities that will be passed on to the LambdaTest grid to define the browser and OS configurations. This method will be annotated with @BeforeTest annotation in TestNG as we want to execute it before each test case run.
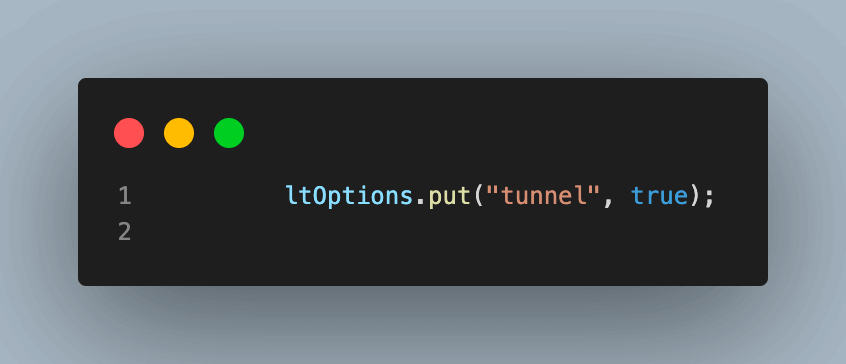
The most important thing to note here is the following code to set the tunnel as true. This code tells the LambdaTest grid that this automation script is part of localhost website testing and that tunnel configuration is to be used for execution.
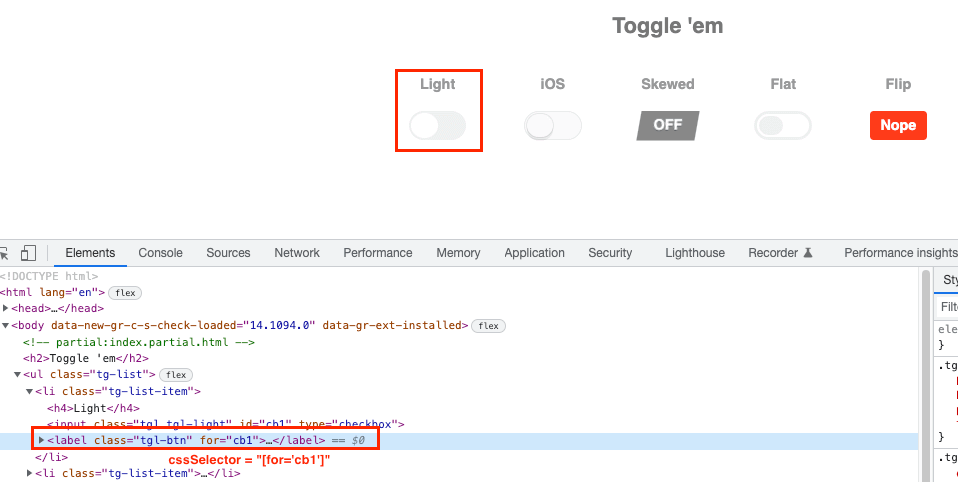
Step 4: After setting the initial capabilities and tunnel configuration, we add the test case function testLocalWebsite() inside, telling the driver to navigate to localhost and click on the first toggle button.
For this click, we are using the CSS Selector of the web element.
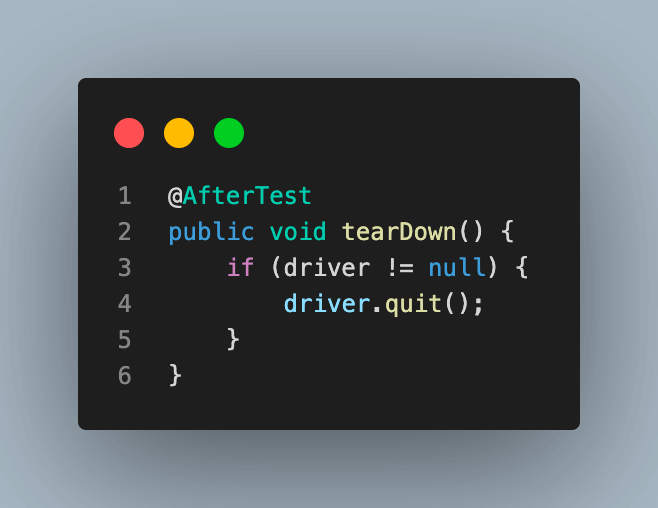
Step 5: After executing every test script, we must close the browser. To perform the same, another function as tearDown() is added and annotated with @AfterTest to execute it after every test execution.
Test Execution
So far, we have understood local website testing and how to make relevant configurations to perform the same on the LambdaTest platform using the tunnel. Now, we will execute the test script and see what the test execution looks like on the LambdaTest Dashboard.
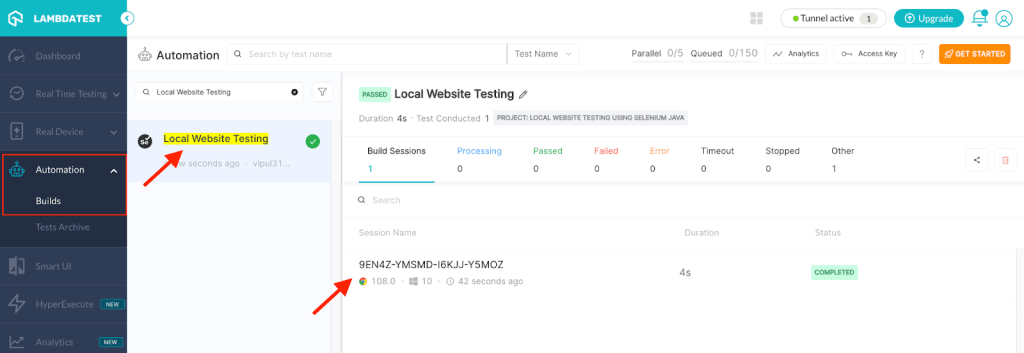
Since we have used TestNG annotations, the test script can be executed as TestNG run. Upon execution, you will see results like below on Dashboard.
Navigate to Automation > Build to see the execution results.
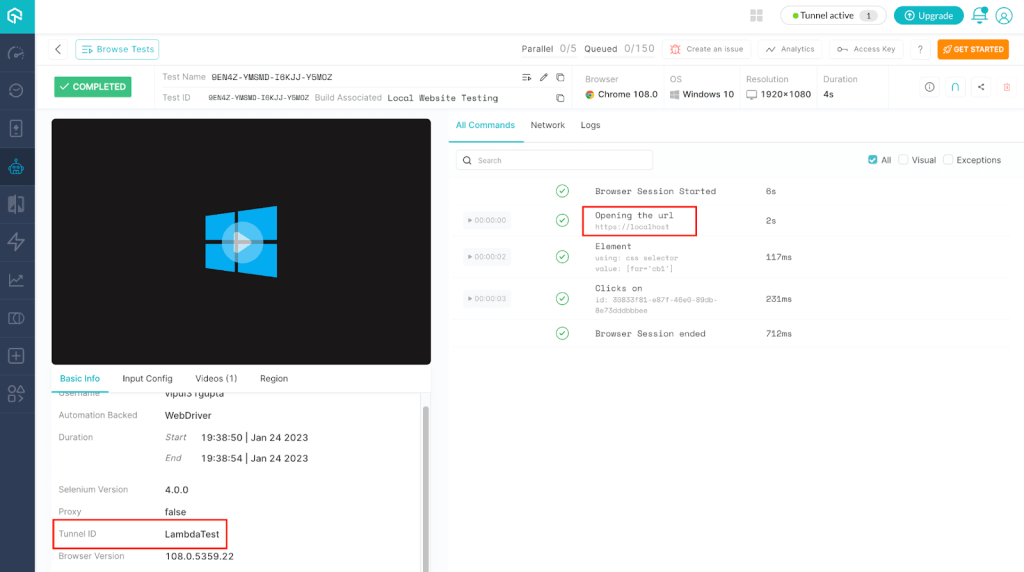
To view the details of execution, click on the session name on the right side. You can note that the URL to test navigated is localhost, and Tunnel ID is the same as the tunnelName, i.e., LambdaTest, which we mentioned while starting the tunnel in the configuration section.
Conclusion
In this blog on how to perform local website testing using Selenium and Java, we have learned about local website testing and why it is so important in the software development world and implemented the same on the LambdaTest platform using an automation test script.
Overall, local website testing is an effective solution for developers who want to ensure that their website is thoroughly tested and free of bugs and issues before it goes to production.
Happy Local Testing!!
Published on Java Code Geeks with permission by Vipul Gupta, partner at our JCG program. See the original article here: How To Perform Local Website Testing Using Selenium And Java Opinions expressed by Java Code Geeks contributors are their own. |


