Modal dialog (popup) from Android widget example
In this example we are going to see how you can create an Android widget in the home screen that can open a pop up dialogue box. As you know, Android Widgets are small applications that can basically do two things. Launch a new Activity when pressed, or display information that get updated at a decided time interval.
1. Introduction
Widgets make use of RemoteViews to display their user interface. RemoteViews can be executed by another process with the same permissions as the original application. This way the Widget runs with the permissions of its defining application. This is form the official Android Documentation : ” RemoteView is a class that describes a view hierarchy that can be displayed in another process. The hierarchy is inflated from a layout resource file, and this class provides some basic operations for modifying the content of the inflated hierarchy.”
The user interface of a Widget is defined by an BroadcastReceiver. This BroadcastReceiver inflates the layout into the RemoteViews of the Widget. Then RemoteViews is delivered to Android, which updates the user interface at the home screen application.
Widgets have limited functionality and styles compared to Activities. So you may need to thing some workarounds to do more complex stuff, like we want to do. And so to launch a pop up dialogue from our widget here’s what we do: When the widget is clicked we simply launch a new Activity with android:theme="@android:style/Theme.Dialog" property set in the configuration of the Activity in AndroidManifest.xml.
To sum up the basic steps, we are going to:
- Create an Android Widget.
- Create an
Intentthat when sent to theBroadcastReceiverit marks the launching of the new Activity. - Register a
ClickListenerto the widget. Thus when the widget is pressed the aboveIntentwill be sent to theBroadcastReceiver. - When this
Intentis received, a newActivitythat will look like a pop up dialog box, will be lauched.
Let’s see how it’s done.
2. Create a new Android Widget
For this tutorial, we will use the following tools in a Windows 64-bit platform:
- JDK 1.7
- Eclipse 4.3 Kepler
- Android SKD 4.3
2.1 Create a new Android Project
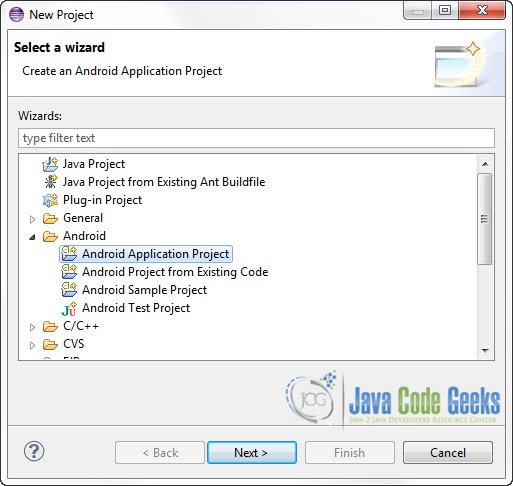
Open Eclipse IDE and go to File -> New -> Project -> Android -> Android Application Project.
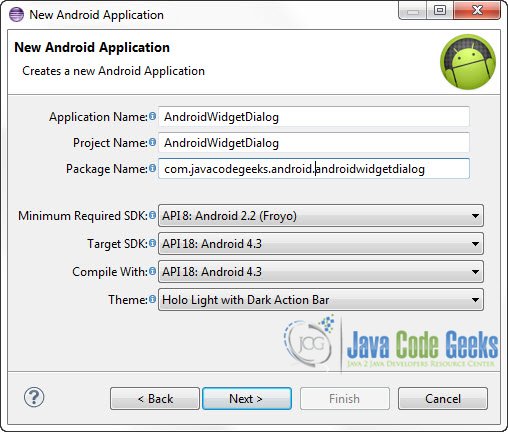
You have to specify the Application Name, the Project Name and the Package name in the appropriate text fields and then click Next.
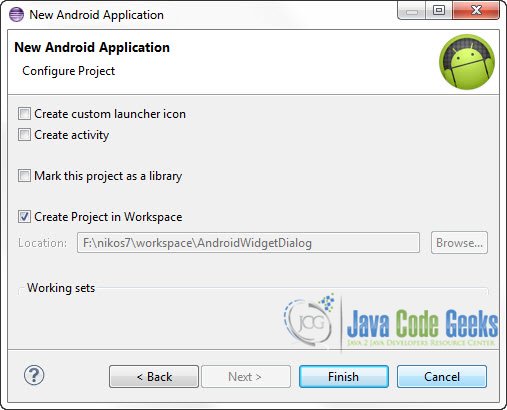
In the next window un check “Create activity” option as we will create the PopUpActivity later.
Click “Finish”.
2.2 Define a custom background shape for the widget
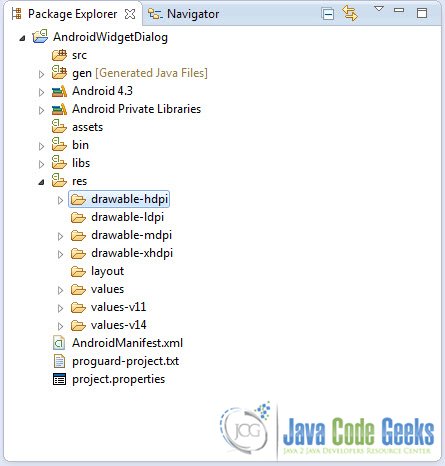
Go to the package explorer and open a /res/drawable-* folders.
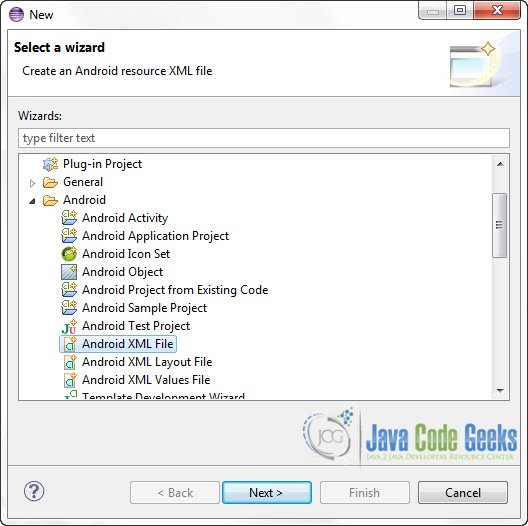
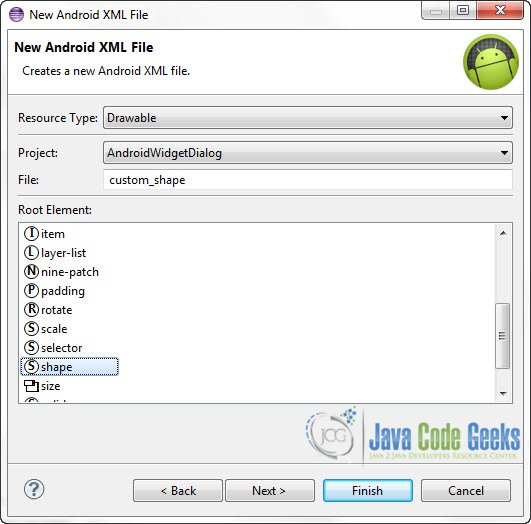
Right Click on one of the folders (I’ve picked /res/drawble-hdpi) -> New -> Other -> Android -> Android XML File
From the “Root Element” list select shape and the give the file the name custom_shape.xml:
Now, open that file and paste the following code , describing the layout of a simple shape.
custom_shape.xml:
<?xml version="1.0" encoding="UTF-8"?>
<shape xmlns:android="http://schemas.android.com/apk/res/android"
    android:shape="rectangle" >

    <gradient
        android:angle="90"
        android:endColor="#333"
        android:startColor="#333" />

    <corners
        android:bottomLeftRadius="2dp"
        android:bottomRightRadius="2dp"
        android:topLeftRadius="2dp"
        android:topRightRadius="2dp" />

    <stroke
        android:width="2dp"
        android:color="#333" />

</shape>
2.3 Define a simple layout for the widget
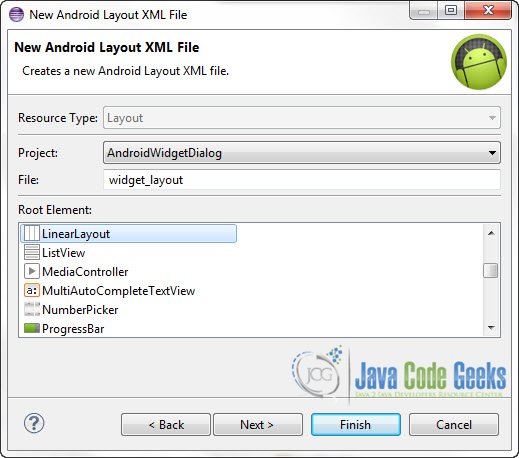
Navigate to res/layout folder on the Package Explorer. Right Click on the folder -> New -> Other -> Android -> Android XML Layout File. Create the file with name widget_layout.
And paste the following code:
widget_layout.xml:
<?xml version="1.0" encoding="utf-8"?>
<LinearLayout xmlns:android="http://schemas.android.com/apk/res/android"
    android:id="@+id/linearLayout"
    android:layout_width="match_parent"
    android:layout_height="match_parent"
    android:layout_margin="8dip"
    android:background="@drawable/custom_shape" >

    <TextView
        android:id="@+id/myText"
        style="@android:style/TextAppearance.Medium"
        android:layout_width="match_parent"
        android:layout_height="match_parent"
        android:layout_gravity="center"
        android:layout_margin="4dip"
        android:gravity="center_horizontal|center_vertical"
        android:text="Press Me"
        android:textColor="#FFF" >

    </TextView>

</LinearLayout>
2.4 Create the AppWidgetProvider XML description file.
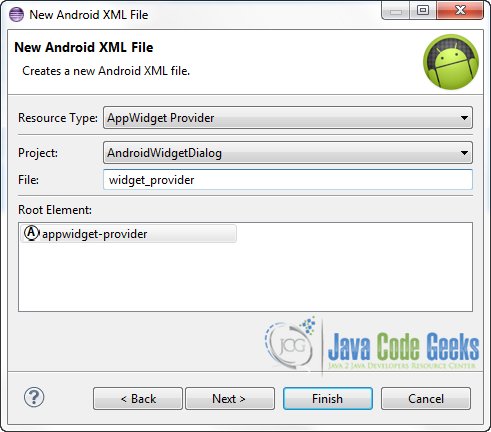
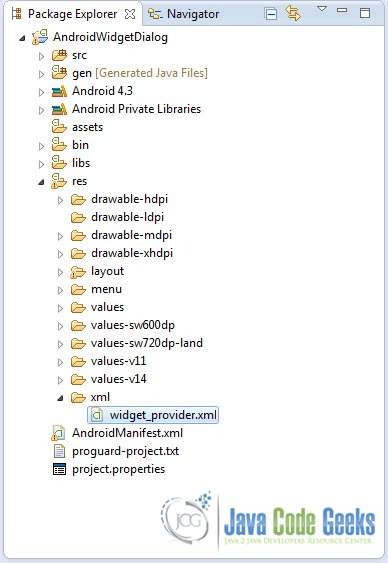
Go to File -> New -> Other -> Android -> Android XML File. From the “Resource Type” list select “AppWidget Provider” and name the file widget_provider.xml.
You will find the file under the newly created /res/xml folder:
Open the file and paste the following code, which is basically meta data for the AppWidgetProvider.
widget_provider.xml:
<?xml version="1.0" encoding="utf-8"?>
<appwidget-provider xmlns:android="http://schemas.android.com/apk/res/android"
    android:initialLayout="@layout/widget_layout"
    android:minHeight="50dp"
    android:minWidth="120dp" >

</appwidget-provider>
2.5 Create the AppWidgetProvider class
Now create a new class that extends AppWidgetProvider, under com.javacodegeeks.android.androidwidgetdialog package. This will be the BroadcastReceiver of the widget.
AndroidWidget.java:
package com.javacodegeeks.android.androidwidgetdialog;

import android.app.PendingIntent;
import android.appwidget.AppWidgetManager;
import android.appwidget.AppWidgetProvider;
import android.content.ComponentName;
import android.content.Context;
import android.content.Intent;
import android.widget.RemoteViews;

public class AndroidWidget extends AppWidgetProvider {

	private static final String SHOW_POPUP_DIALOG_ACTION = "com.javacodegeeks.android.showpopupdialog";

	@Override
	public void onUpdate(Context context, AppWidgetManager appWidgetManager,
			int[] appWidgetIds) {

		ComponentName thisWidget = new ComponentName(context,
				AndroidWidget.class);

		// Obtain all instances of our widget
		// Remember that you can have as many instances of the same widget as you want on the home screen

		int[] allWidgetInstancesIds = appWidgetManager.getAppWidgetIds(thisWidget);
		for (int widgetId : allWidgetInstancesIds) {

			RemoteViews remoteViews = new RemoteViews(context.getPackageName(),
					R.layout.widget_layout);

			// Create an intent that when received will launch the PopUpActivity
			Intent intent = new Intent(context, AndroidWidget.class);
			intent.setAction(SHOW_POPUP_DIALOG_ACTION);

			PendingIntent pendingIntent = PendingIntent.getBroadcast(context,
					0, intent, PendingIntent.FLAG_UPDATE_CURRENT);

			// Set up the onClickListener of the widget
			// Now, when the widget is pressed the pendingIntent will be sent

			remoteViews.setOnClickPendingIntent(R.id.myText, pendingIntent);

			appWidgetManager.updateAppWidget(widgetId, remoteViews);

		}

		super.onUpdate(context, appWidgetManager, appWidgetIds);

	}

	@Override
	public void onReceive(final Context context, Intent intent) {

		// If the intent is the one that we've defined to launch the pop up dialog
		// then create and launch the PopUpActivity
		if (intent.getAction().equals(SHOW_POPUP_DIALOG_ACTION)) {

			Intent popUpIntent = new Intent(context, PopUpActivity.class);
			popUpIntent.setFlags(Intent.FLAG_ACTIVITY_NEW_TASK);
			context.startActivity(popUpIntent);

		}

		super.onReceive(context, intent);

	}

}
As you can see we use a PendingIntent instance. A PendingIntent is a description of an Intent and target action to perform with it. When you give a PendingIntent to another application, you are granting it the right to perform the operation you have specified with the same permissions and identity. And thus, you should be careful about how you use the PendingIntent. In this example we’ve obtained the PendingIntent instance calling getBroadcast method. This method will retrieve a PendingIntent that will perform a broadcast, like calling Context.sendBroadcast().
Now the flow of the execution goes like this:
- As defined, the
onUpdatemethod is executed only once, when the widget is installed on the home screen. You can set up a time interval to execute theonUpdatemethod by defining theandroid:updatePeriodMillisproperty on thewidget_provider.xmlfile. So when,onUpdatemethod is executed, first we retrieve all the instance ids of the widget that the user has installed on the home screen. - Then we create a new
Intentwith actioncom.javacodegeeks.android.showpopupdialog. Retrieve a new broadcastingPendingIntent - Register an
OnClickPendingIntentlistener to theRemoteViewof each widget. - Now when the user clicks on the Widget, the
Intentwith actioncom.javacodegeeks.android.showpopupdialogwill be broadcast. This is the Intent created in line 32 of the above code (used also to create thePendingIntentinstance). - The Intent will be received and the
onReceivewill be executed. If theIntentreceived hascom.javacodegeeks.android.showpopupdialogaction thePopUpActivityclass will be launched.
Now let’s see the code of the PopUpActivity.
3. Create the PopUpActivity
PopUpActivity is a simple Activity class that will be launched as a Dialogue box.
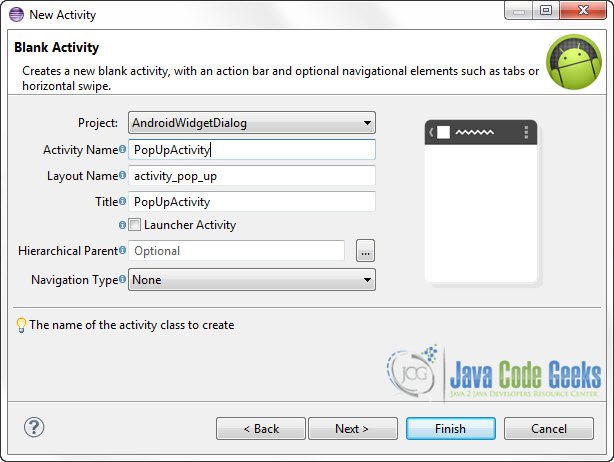
Go to the Package Explorer and Right click on the com.javacodegeeks.android.androidwidgetdialog package -> New -> Other -> Android -> Android Activity.
Set the name to “PopUpActivity”. As you can see the layout file of this activity will be automatically created with name “activity_pop_up.xml”.
To set the layout of the activity open /res/layout/activity_pop_up.xml file and paste the following code.
activity_pop_up.xml:
<?xml version="1.0" encoding="utf-8"?>
<LinearLayout xmlns:android="http://schemas.android.com/apk/res/android"
    xmlns:tools="http://schemas.android.com/tools"
    android:layout_width="220dp"
    android:layout_height="wrap_content"
    android:gravity="center_horizontal"
    android:orientation="vertical" >

    <TextView
        android:id="@+id/mytxt"
        android:layout_width="fill_parent"
        android:layout_height="wrap_content"
        android:layout_marginBottom="10dp"
        android:layout_marginLeft="0dp"
        android:layout_marginRight="0dp"
        android:layout_marginTop="5dp"
        android:gravity="center_horizontal"
        android:textColor="#FFF"
        android:textSize="13sp" />

    <Button
        android:id="@+id/closBtn"
        android:layout_width="wrap_content"
        android:layout_height="wrap_content"
        android:text="Close" />

</LinearLayout>
This is the code of the PopUpActivity class.
PopUpActivity.java:
package com.javacodegeeks.android.androidwidgetdialog;

import java.util.Random;

import android.app.Activity;
import android.os.Bundle;
import android.view.Menu;
import android.view.View;
import android.view.View.OnClickListener;
import android.view.Window;
import android.widget.Button;
import android.widget.TextView;

public class PopUpActivity extends Activity {

	@Override
	protected void onCreate(Bundle savedInstanceState) {
		super.onCreate(savedInstanceState);
		requestWindowFeature(Window.FEATURE_NO_TITLE);
		setContentView(R.layout.activity_pop_up);

		String dialogText = "Dialog Box : " + (new Random().nextInt(100));
		TextView txt = (TextView) findViewById(R.id.mytxt);
		txt.setText(dialogText);

		Button dismissbutton = (Button) findViewById(R.id.closBtn);
		dismissbutton.setOnClickListener(new OnClickListener() {
			@Override
			public void onClick(View v) {
				PopUpActivity.this.finish();
			}
		});
	}

}
Nothing spacial in the above code. We simple set the value of the mytxt TextView. And we register a ClickListener for the dismiss button. When the button is pressed the PopUpActivity will be terminated.
4. AndroidManifest.xml Configuration
This is a very important step of the tutorial. Open AndroidManifest.xml file and paste the following code:
AndroidManifest.xml:
<?xml version="1.0" encoding="utf-8"?>
<manifest xmlns:android="http://schemas.android.com/apk/res/android"
    package="com.javacodegeeks.android.androidwidgetdialog"
    android:versionCode="1"
    android:versionName="1.0" >

    <uses-sdk
        android:minSdkVersion="8"
        android:targetSdkVersion="18" />

    <application
        android:allowBackup="true"
        android:icon="@drawable/ic_launcher"
        android:label="@string/app_name"
        android:theme="@style/AppTheme" >

        <receiver
            android:name=".AndroidWidget"
            android:icon="@drawable/ic_launcher"
            android:label="Android Custom Widget" >
            <intent-filter>
                <action android:name="com.javacodegeeks.android.showpopupdialog" />
                <action android:name="android.appwidget.action.APPWIDGET_UPDATE" />
            </intent-filter>

            <meta-data
                android:name="android.appwidget.provider"
                android:resource="@xml/widget_provider" />
        </receiver>

        <activity
            android:name="com.javacodegeeks.android.androidwidgetdialog.PopUpActivity"
            android:label="@string/title_activity_pop_up"
            android:theme="@android:style/Theme.Dialog" >
        </activity>
    </application>

</manifest>
As you can see we’ve set up a receiver, that registers our code>AppWidgetProvider for our application, that can receive broadcasts
- <action android:name=”com.javacodegeeks.android.showpopupdialog” />
- <action android:name=”android.appwidget.action.APPWIDGET_UPDATE” />
The first one is the Intent that we’ve registered ourselves. The second one is an Intent send by Android. We also provide the meta data to the the AppWidgetProvider, pointing to the widget_provider.xml resource file we’ve created earlier.
The important bit is in line 34, where we define the theme of the application as android:theme="@android:style/Theme.Dialog". This will create an activity with a pop up dialogue theme
Let’s see how it looks like on the emulator.
5. Run the Apllication
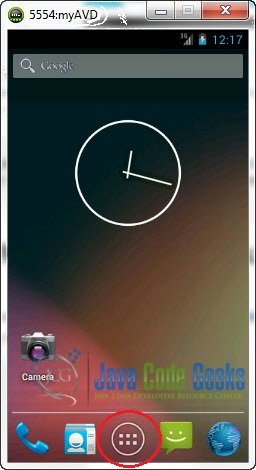
When your run the application and the emulator launches go to the Apps button on the home screen :
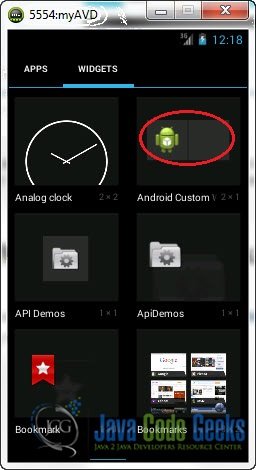
The tap on “Widgets”. Drag and drop your Widget to the home screen
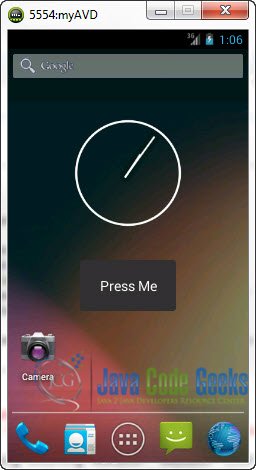
Here it is:
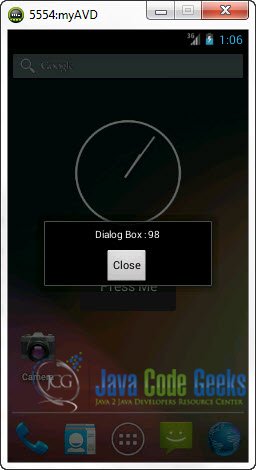
Now when you click on the Widget:
That’s it.
Download the Eclipse Project
This was an Android example on how to create Modal dialog (popup) from Android widget. Download the Eclipse Project of this tutorial: AndroidWidgetDialog.zip




It’s a little weird seeing Eclair this day in age
This was very useful. Thanks!
Thank you, much :)
How can i get a pop up window on my custom dialog?? On clicking a bottom in dialog…. i get my popup in main activity not the dialog!!