Deploying Identity Server over a JDBC Based User Store
With this post I am to demonstrate how to configure WSO2 Identity Server with a JDBC user store. For the demonstration I am using a MySQL user store, but same procedure applies to any other JDBC user store as well. My environment is,
- OS – Ubuntu 12.10
- Java – 1.6
- WSO2 IS 4.5.0
- Setting up MySQL database
- User Store Configuration in IS – Primary
- User Store Configuration in IS – Secondary
(I am referring to extracted wso2is folder as CARBON_HOME in this post)
Setting up MySQL database
We need MySQL running at first. This post will be helpful in setting up the MySQL database, if it’s not already done. Once MySQL is running we have to set up the database as required by the Identity Server. The server packs the necessary sql scripts within itself, which can be located at CARBON_HOME/dbscripts.
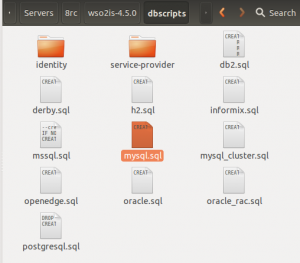
Let’s login to MySQL server and execute the following,
Create a database,
mysql> create datbase JDBC_demo_user_store;
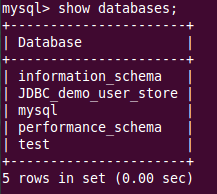
Check out the creation,
mysql> show databases;
Then use the sql script and set up the database,
mysql> use JDBC_demo_user_store;
mysql> source <path_to>/wso2is-4.5.0/dbscripts/mysql.sql;
This will run the queries in the SQL scripts and set up the required tables.
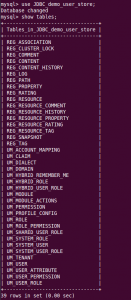
Now if we enter the commands following outputs will be shown.
mysql> show tables;
Now we are done with setting up the database. We can go ahead and ask Identiy Server to use it.
Note: Before going into the following steps we also need to add the mysql-jdbc connector to Identity Server. You can download it from here and drop it into CARBON_HOME/repository/components/lib.
User Store Configuration in IS – Primary
Identity Server uses embedded H2 database to keep permission details etc. and the data source details of it resides in CARBON_HOME/repository/conf/datasources/master-datasources.xml. We can add data-source details of our new JDBC user store here as well. Here is the master-datasources.xml file according to my set-up.
<datasource>
            <name>JDBC_demo_user_store</name>
            <description>The datasource used for JDBC_demo_user_store</description>
            <jndiConfig>
                <name>jdbc/JDBC_demo_user_store</name>
            </jndiConfig>
            <definition type="RDBMS">
                <configuration>
                    <url>jdbc:mysql://localhost:3306/JDBC_demo_user_store</url>
                    <username>root</username>
                    <password>pushpalanka2</password>
                    <driverClassName>com.mysql.jdbc.Driver</driverClassName>
                    <maxActive>50</maxActive>
                    <maxWait>60000</maxWait>
                    <testOnBorrow>true</testOnBorrow>
                    <validationQuery>SELECT 1</validationQuery>
                    <validationInterval>30000</validationInterval>
                </configuration>
            </definition>
</datasource>
The Primary configuration for user store resides at CARBON_HOME/repository/conf/user-mgt.xml file. By default this is pointing to a embedded ReadLDAPUserStoreManager. Now we are to change it to be a JDBCUserStoreManager. So let’s comment out the default one and uncomment JDBCUserStoreManager. Now we will have a user-mgt.xml file similar to this. If we want, we can modify these properties as we want, according to the context.
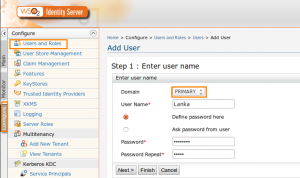
Now the configurations are over. Let’s start the server with bin/wso2server.sh. Once started if we go ahead and add user to the ‘Primary’ domain.
Now if we go and check the UM_USER table created in our database, it will list user as well.
User Store Configuration in IS – Secondary
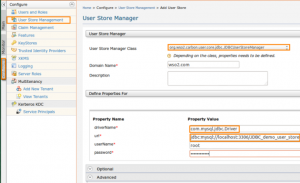
Now let’s see how we can use that same MySQL user store as a secondary user store in IS. This is pretty easy that we can do the whole thing via UI, without any modification to the above default configurations in master-datasources.xml or user-mgt.xml. We have to add driver name, URL, user name and password here as mandatory properties which we previously gave at master-datasources.xml.
Once added it will be shown in the available user stores list. It intuitive to define a user store manager in UI, but if you want more details, you can refer this post. If we want we can also edit the optional properties too. The advanced section carries the SQL statements required for JDBC user store manager.
Advanced Option: If we are editing database structure(sql script), we need to update these SQL queries according to that schema, using this Advanced option.
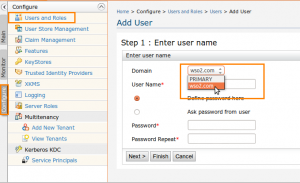
Now if we go and try add a new user, we will see this secondary domain as well.
We can see the users getting added in the database as same as it was in the Primary user store, if we select this domain and add the users.

