Step by step auto code generation for POJO domain java classes and hbm using Eclipse Hibernate plugin
Overview:
In this tutorial we’ll use Eclipse Hibernate tool to auto generate domain objects and the corresponding hbm xml files. If your are working in a large or medium size projects and if you have more than 5+ tables to start with, you may find this plugin is a terrific tool to auto generate the mapping domain objects java files and the corresponding *.hbm.xml files easily. You can easily use them in your projects. For very small project having 2 or 3 tables you may want to manually create those files however if you have huge number of fields in a table or multiple tables to deal with then this tool is a lifesaver and timesaver.
Tools Used:
1. Eclipse Indigo Java EE IDE for Web Developers
2. Hibernate 3
3. Hibernate Tools Eclipse Plugin Version 3.5.1
4. Mysql JDBC jar (mysql-connector-java-5.1.23)
Step -1: Install Hibernate plugin for Eclipse
Install hibernate plugin from jboss site based on your Eclipse version. I used Eclipse Indigo version. In Eclipse in menu bar, go to Help-> Install New Software and for Indigo go to http://download.jboss.org/jbosstools/updates/indigo/ to download the Hibernate plugin and install it.
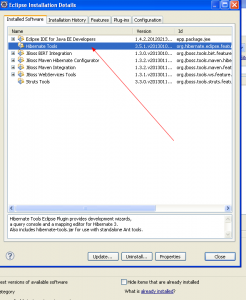
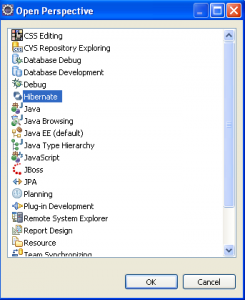
Once this is installed you will find it in the ‘Installed Software’ section as well as you will see a new perspective in Eclipse.
Eclipse perspective for Hibernate-
Step 2: Configure the plugin to connect to the database to generate the code
For example I already created one dynamic web application PersonalPhotoAlbumApp where I already copied the required jar files in the WEB-INF/lib folder. If you have a different project you can keep the jars(hibernet related required jar files and mysql connector jar) in project folder or external folder but keep in mind it should be in a recognized classpath.
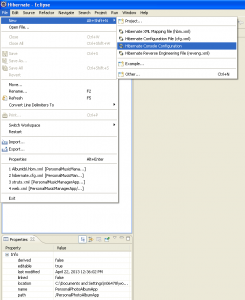
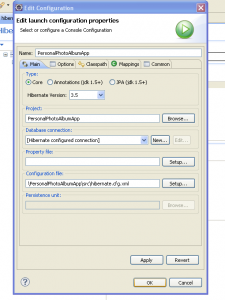
Once you have created the project switch to Hibernate perspective. Then go to File -> New -> ‘Hibernate Console Configuration’ . This console configuration will be needed by your plugin later for code generation based on database table mapping.
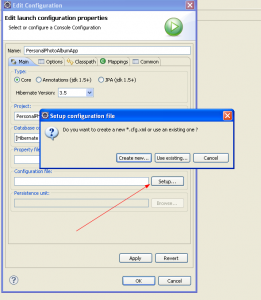
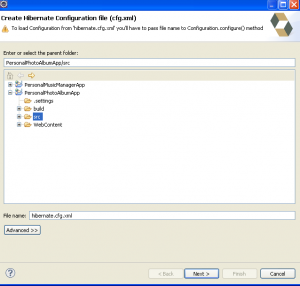
Click on ‘Setup’ button to create a new hibernate.cfg.xml file which will store your database connection information to be used by the plugin. To generate domain objects or hbm file you don’t need the hibernate.cfg.xml file as you can select different database configuration from the drop down. For simplicity I followed this step.
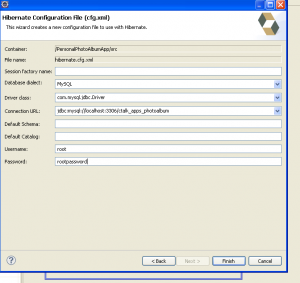
Select the name and path to store the hibernate.cfg.xml file in the Java/J2EE project. Fill up the required connection information to connect to database.
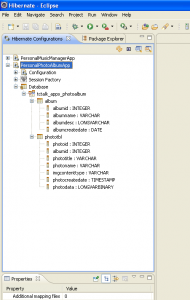
If everything goes fine you will get the following screen below and you can see the tables. I have two tables namely ‘album’ and ‘phototbl’ in my database ‘tctalk_apps_photoalbum’ which you can see the tool is showing. If you get any error in connecting database check the *.cfg.xml file to see if there is any wrong or type in the information you filled up.
Step 3: Create hibernate reverse Engineering configuration file
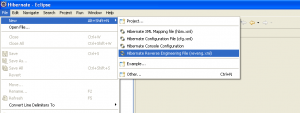
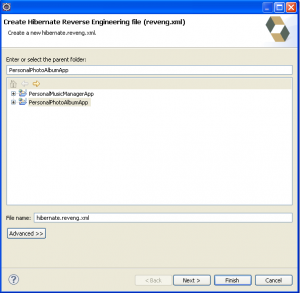
Follow the steps to create the reveng.xml in your project which will help the tool to reverse engineer to generate the domain java objects (POJO classes) and the corresponding *.hbm.xml files (this stores table fields and required mapping with the fields of the POJOs).
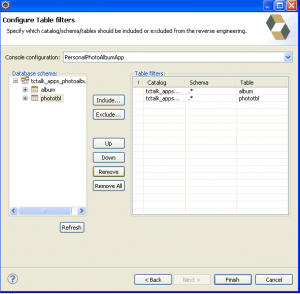
Click ‘Refresh’ if you don’t see your database schema and tables in left panel. Select the table you want domain code to be generated and click ‘Include’ to add in the right panel.
Step 4: Create Hibernate Code generation configuration
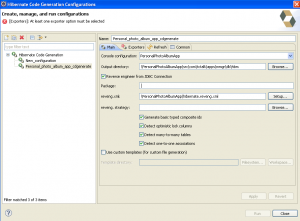
This configuration will use the reveng.xml to generate the java code for the domain objects/POJOs and the *.hbm.xml files and will keep in the output folder you will identify. Follow the steps given below.
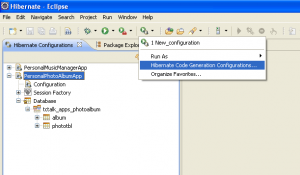
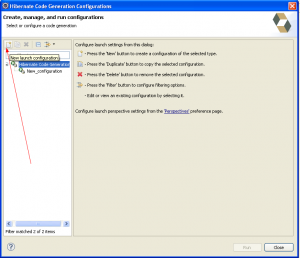
Click on the tiny hibernate specific run icon in the toolbar to select ‘Hibernate Code Generation Configuration’ option from menu.
Select ‘New Launch Configuration’ to create a new one. The icon is very tiny with a ‘+’ symbol.
You need to select the package where you want the domain POJO java classes to be generated along with the *.hbm.xml files. Also select the reveng.xml you created in previous step.
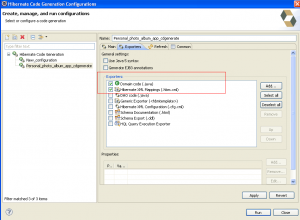
Click on the next tab ‘Exporters’ beside ‘Main’ to check the checkboxes for ‘Domain Code’ and ‘Hibernate XML Mappings (.hbm.xml)’.
Click on ‘Run’ and you can see it is running in the status bar.
Step 5 (optional step): Separating out POJO classes and hbm files for better maintainability
The below steps are optional. This step is just to beautify the project folder and package structure for better maintainability. You may skip this step and go to step 6 directly if you are okay with th POJOs and hbm files in same folder and start happy coding. If you think you need to keep different package for java POJO classes and separate folder for the *.hbm.xml files then follow this step.
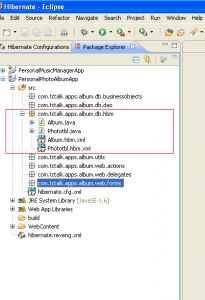
Open the package you selected as the output folder and you will see the auto generated classes and the hbm xml files.
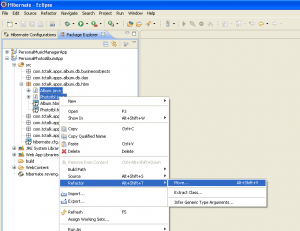
Select all the java POJO classes and right click and select Refactor -> Move to move them to their desired package. In our case I wanted them to be in the businessobjects package so I move them there.
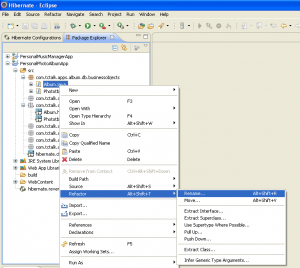
Once the java classes are moved I selected each of them and renamed them to append BO to mark them as business object classes.
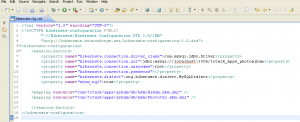
Since the hbm files are in different package and the java business object classes are in different folder, hibernate needs to know this. Otherwise it won’t find them. For doing this we need to add tag in the hibernate.cfg.xml file correspond to each POJO class and their corresponding hbm.xml file.
also open the *.hbm.xml file and change the with full package name of the class. Say for AlbumBO class I changed the class path in the Album.hbm.xml file as
01 02 03 04 05 06 07 08 09 10 11 12 13 14 15 16 17 18 19 20 21 | <?xml version="1.0"?><!DOCTYPE hibernate-mapping PUBLIC "-//Hibernate/Hibernate Mapping DTD 3.0//EN"<!-- Generated Apr 22, 2013 1:26:40 PM by Hibernate Tools 3.4.0.CR1 --><hibernate-mapping> <class name="com.tctalk.apps.album.db.businessobjects.AlbumBO" table="album" catalog="tctalk_apps_photoalbum"> <id name="albumid" type="java.lang.Integer"> <column name="albumid" /> <generator class="identity" /> </id> <property name="albumname" type="string"> <column name="albumname" length="55" not-null="true" /> </property> <property name="albumdesc" type="string"> <column name="albumdesc" length="65535" not-null="true" /> </property> <property name="albumcreatedate" type="date"> <column name="albumcreatedate" length="10" not-null="true" /> </property> </class></hibernate-mapping> |




Excellent article! I’d just like to note that there’s a great RAD tool out called Jigy Generator that automatically spits you out a fully configured spring project which can already connect to your database, authenticate users, handle file uploads, etc. It even creates dao’s, domain objects and validators in your project by reverse engineering your database. This way you don’t have to get mired in the low level details of spring and hibernate… It Just Works! You can download the project at https://www.getjigy.com/works/downloads.html
Could you please let me know how I can rename the entities which is generated by Hibernate tool.
ex: my table name is ECDS_Chemist. I want the bean to be created as Chemist. how can I do that.
Please let me know. thank you!
Ranjinie
Ranjinie, you can use Annotations instead of hbm.xml files.
Just use:
@Entity
@Table(name=”ECDS_Chemist”)
public class Chemist {
….
}
and so on.
If you prefer to use you xml files, just do like:
during you class definition on XML
Really nice and helpful tutorial. But I am facing some issues while configuring hibernate tools on eclipse. It always says “reading schema error:null”
Hibernate Version : 4.3.7
eclipse : Luna Service Release 1 (4.4.1)
database: oracle 11g r2
try typing username, schema and password in upper case, I solved this way
Type “dbo” while configuring hibernate.cfg.xml. You can take a look at my website for an example : https://elitrex.wordpress.com/2015/05/02/reading-schema-errornull-hibernatests-3-6-4/
really helpful..!!!
Hi Suvoraj,
Thank you very much for the guide!
I have done this some years ago… but forgot how to do it. This guide is excellent to get back on track on performing reverse engineering using Hibernate Tools.
Extra tip: if you want to generate JPA annotations, simply “tick” the EJB3 and Java5 options in the Exporters options.
Cheers,
Eduardo
Thank you for this great article!
The Hibernate repository for Luna has changed slightly, there is no http://download.jboss.org/jbosstools/updates/luna present so far, but I found Hibernate Tools using http://download.jboss.org/jbosstools/updates/stable/luna/ under “JBoss Data Services Development”.
An other way for simple and rapid code generation is to use the Telosys Tools Eclipse plugin
It allows to generate any kind of files (not only POJO or HBM, but also web pages, database doc, etc)
and all the templates are customizable.
cf https://marketplace.eclipse.org/content/telosys-tools
Hi,
Thanks for this descriptive and brilliant article. Helped me a lot in understanding.
Thanks for the code.Its very helpful.
than u so much sir
Really very very helpful article. Thanks!!!