Step by Step Web Service guide

What is Service Oriented Architecture?
Service Oriented Architecture is a software design principle and architectural design pattern to represent self contained unit of functionalities called service. SOA promotes design principles involving loose coupling, reusablility and coarse grained services. In Enterprise Architecture terms SOA benefits by delivering agility and reacting quickly to business needs, boosting return on investments by lowering the integration costs, reducing development cost by reusing components. The Enterprise Aarchitect’s promote the use of Enterprise Service Bus as an integration layer for large scale enterprise online applications.
E.g. A very good example will be Account Statement of your transactions, Product pricing information, image processing service, Map service, location service etc.
What are Webservices?
Web Services are just a form of implementation of service oriented architecture which can communicate between disparate systems in a platform independent manner.The service providers define an interface described by the WSDL and messages are exchanged with the service consumers using SOAP messages. The messages can be transmitted over HTTP, FTP or SMTP protocols.
Webservices can be of SOAP based or REST.
In today’s step by step guide we will explore how to create a SOAP based web service and a consumer which will consume the web service. We will use JAX-WS(Java API for XML Web Services) API for creating the web service.
Software:
Weblogic Application Server 12c
Eclipse Oepe 12c
Weblogic Webservice Tool – This will automatically create all the required code and WSDL files and let the developers focus on the business logic.
Step 1:
In your Eclipse create a new Dynamic Web Project.
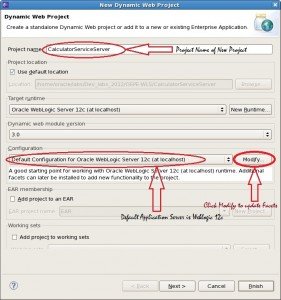
Click modify and add the facets related to Weblogic Webservice components.
Step 2:
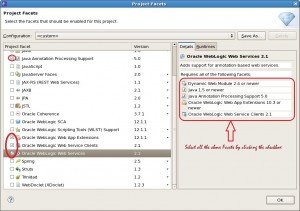
Click on the checkboxes to make sure all the dependent modules are also included as mentioned in the screenshot.
Step 3:
Default Context root is CalculatorServiceServer and content directory of the web module is WebContent. Click Finish.
Step 4:
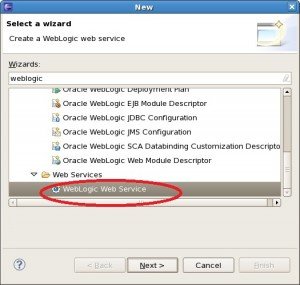
Now right click on the newly created project and add Weblogic Web Service module to your project.
Step 5:
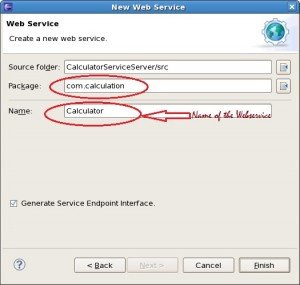
Create a new web service. Add the package details and give a name to the webservice.
Step 6:
The webservice tool in Eclipse will create the Service Endpoint interface (contract) with a default web method of hello(). We can replace the default method with the required method – add(). It is a best practice to create an interface that declares the methods which are mapped to the web service operations. This interface is known as Service Endpoint Interface (SEI). Whenever we see the annotation @WebService it denotes that the interface is a SEI.
Step 7:
CalculatorImpl.java is created as a JWS (Java Web Service) class.
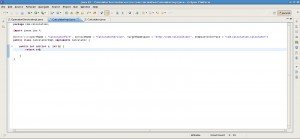
Replace the default code present in the CalculatorImpl.java. Add the implementation details to the add().
Step 8:
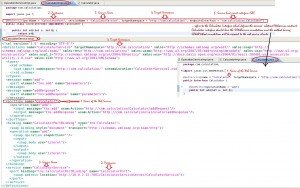
The below diagram explains the mapping between the webservice implementation annotated with @webService and the wsdl mapping.
Javax.jws.WebService tells to the application server that this class needs to be treated as a webservice. The various attributes of the javax.jws.Webservice are:
- name – Name of the webservice and maps to <wsdl:portType> element in the WSDL file.
- targetNameSpace – The XML namespace used for the WSDL and XML elements generated from this Web Service.
- serviceName – serviceName of the web service. Default value is jws file name with the suffix of ‘service’.
- wsdlLocation – URL of the absolute wsdl file.
- endpointInterface – This is based on the exsisting webservice service endpoint’s (SEI).
In the above picture the webservice name in the Calculator interface is mapped to webservice name mentioned in the portType element in the WSDL.
The portName, serviceName, target Namespace and service end point interace (SEI) from CalculatorImpl.java is mapped to CalculatorService.wsdl file.
Step 9:
Now it’s time to run the webservice in the Weblogic 12c Server by right clicking the project and select Run on Sever and add the CalculatorServiceServer project to the Weblogic server and configure them.
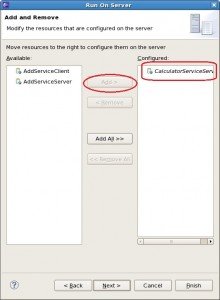
Step 10:
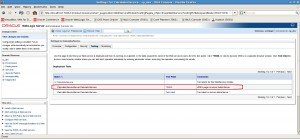
The webservice is now deployed in the server and exposed to the clients for consuming. This can be accessed and controlled from the weblogic server console.
The wsdl file can be viewed and tested from the location as shown in the screenshot.
Step 11:
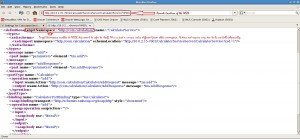
The wsdl file with the remote location address.
http://10.0.2.15:7001/CalculatorServiceServer/CalculatorServer?WSDL
Step 12:
The below diagram shows CalculatorService.wsdl file and explains all the key elements of the WSDL file. WSDLs are service contract with the clients and service providers.
Definition – The outermost element of the WSDL file is the <definitions>. This is the container for all other elements defined in the wsdl document. In summary this is the root element.
- <types> – describes all the datatypes used and relevant for the message exchange between client and server. It is an optional field. The types section refers to the XSD (XML schema definition) which defines the data types. If this section is empty then only simple data types will be used by the web service.
- <messages> – defines the data being exchanged between the provider and consumer of the webservice. Messages are created from the data types.
- <portType> – represents the web service as named operations. Each operation can have one or more messages.
- <binding> – defines how messages are transmitted. It is available over HTTP GET, HTTP POST, SOAP (on top of HTTP protocol). From the binding section the WSDL definitions go from abstract to concrete providing concrete details about the web service. The binding element must specify the implementation details of the webservice defined abstractly in the portType.
- <service> – specifies on the endpoint, clients can access the web service from this path.
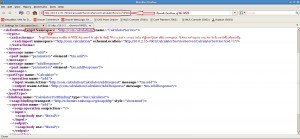
Step 13:
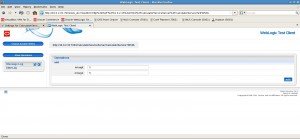
We can test the webservice with the help of Weblogic Test client.
Step 14:
Weblogic test client shows successful result of the add operation and gives the request and response SOAP message.
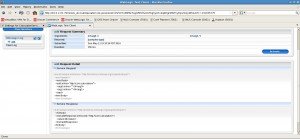
Step 15:
Now I want to create a servlet which will act as a webservice client which will consume the Calculator webservice which we have created in the previous steps.
Create a new Dynamic Web project – CalculatorServiceClient and add the facets Oracle Weblogic Web Service clients.
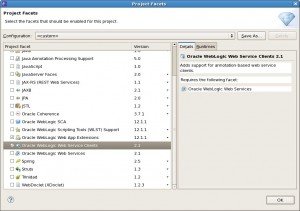
Step 16:
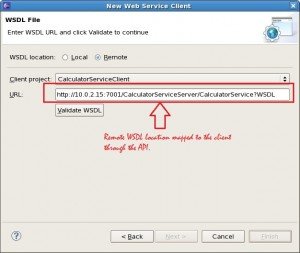
Create a new Web service client by right clicking the CalculatorServiceClient project -> Select New -> Select other -> Search Weblogic Web service client from the wizards. Now enter the reference to the WSDL file. In this case we will use the remote definition of the WSDL file. Before clicking please ensure to validate the WSDL file.
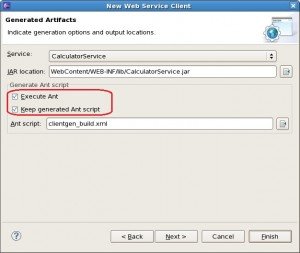
On click of next the CalculatorServiceServer codes are exported in the CalculatorService.jar. On clicking next specify the location of the Runtime WSDL location. I have used Copy WSDL into client jar option.
Step 17:
Now create a Servlet class which will invoke the Webservice.
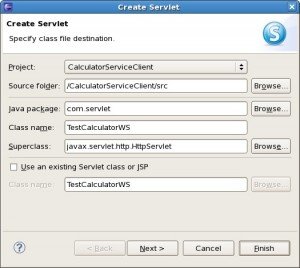
Step 18:
Let’s look at the client Servlet code.
protected void doGet(HttpServletRequest request, HttpServletResponse response) throws ServletException, IOException {
		CalculatorService service = new CalculatorService();
		Calculator addservice = service.getCalculatorPort();
		int sum = addservice.add(1, 6);
		response.setContentType("text/html");
		PrintWriter out = response.getWriter();
		out.println("<h1> SUM=" + sum + "</h1>");
		System.out.println("result sum-" + sum);
}
The output of the servlet displays all the result of the add operation.
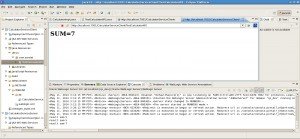
I hope you have enjoyed the article. Please post your review comments and feedback and share the knowledge using the social media buttons.
Download the complete code:
| Reference: | Step by Step Web Service guide from our JCG partner Mainak Goswami at the Idiotechie blog. |



thank you for Sharing Content here and giving reply for to US.
i got one Business case, that I have to Develop one Web Service and That Web Service Will have to as SOAP(JAX-RS) Web Service and as well as REST full web Service, to get the Solution i am referring JAX-RS Spec and SOAP(JAX-RS) Spec, But i could n’t able to find the Solution . So can you help me Here.
Thanking you.
Jax rs is rest. Not soap. Jaxws is soap