Fully working prototypes with Spring Boot and H2
We do use a lot of h2 with spring especially for unit tests. However instead of unit tests we might want to have a fully functional prototype with data to display.
H2 is the perfect candidate for that, it works great with spring, it has good syntax compatibility with most databases out there and it also provides you with a ui to check your data.
Imagine the scenario of an interview assignment. You want your example to work out of the box with as minimum as possible configuration for the reviewer. The plan is to have an application up and running with some data. Before accessing the application we might as well want to add some data to it. Then we need to have a proper way to display the data added without adding extra code.
The first step is to go to the spring initializr and add the Web and H2 dependencies. Also we shall add the jdbc property.
The end result will give a build.gradle file like this.
buildscript {
	ext {
		springBootVersion = '2.0.6.RELEASE'
	}
	repositories {
		mavenCentral()
	}
	dependencies {
		classpath("org.springframework.boot:spring-boot-gradle-plugin:${springBootVersion}")
	}
}

apply plugin: 'java'
apply plugin: 'eclipse'
apply plugin: 'org.springframework.boot'
apply plugin: 'io.spring.dependency-management'

group = 'com.gkatzioura.springbooth2'
version = '0.0.1-SNAPSHOT'
sourceCompatibility = 1.8

repositories {
	mavenCentral()
}

dependencies {
	implementation('org.springframework.boot:spring-boot-starter-jdbc')
	implementation('org.springframework.boot:spring-boot-starter-web')
	runtimeOnly('com.h2database:h2')
	testImplementation('org.springframework.boot:spring-boot-starter-test')
}
Since we added the jdbc property we can have some schema scripts executed once the application is started. Thus we need to create a schema.sql file containing the sql statements which create the schema.
CREATE TABLE application_user (ID INT, USER_NAME VARCHAR(50), PASSWORD VARCHAR(255));
INSERT INTO application_user (ID,USER_NAME, PASSWORD) values (1,'test','password-hash');
The next step is to enable the h2 console. We will go with the yaml approach however you can do it either using a properties file or environmental variables.
spring:
  h2:
    console:
      enabled: true
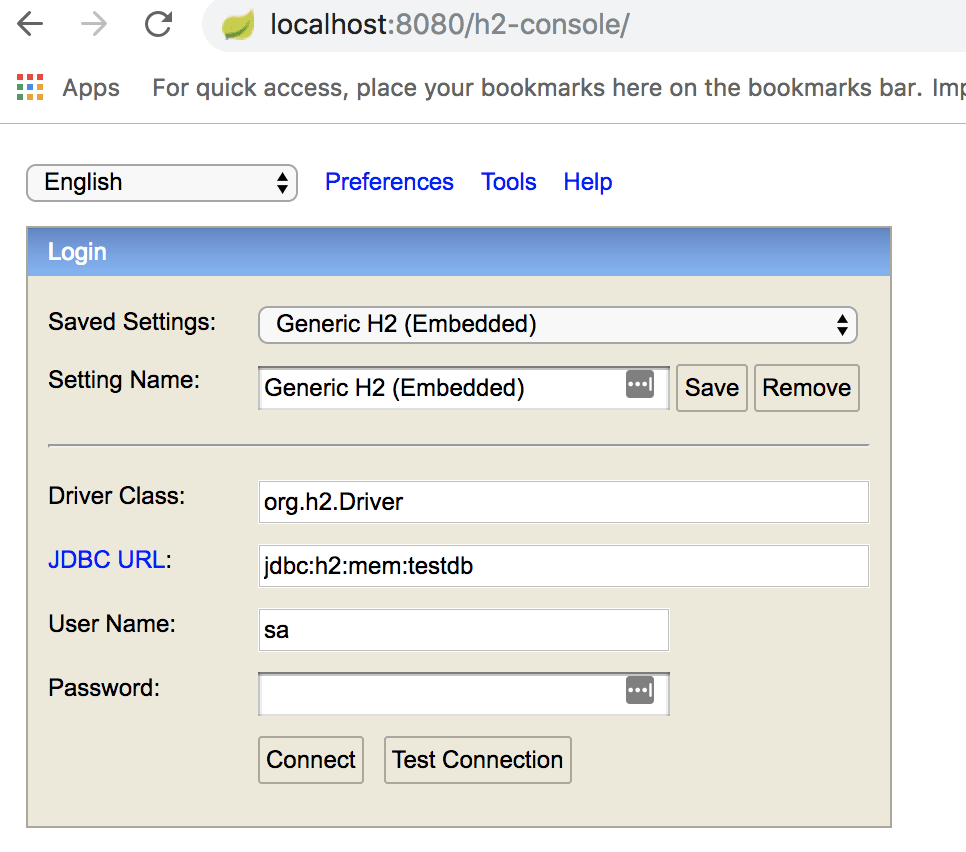
Now once we get our spring application running we can navigate at the http://localhost:8080/h2-console endpoint.
We shall be presented with the default credentials needed
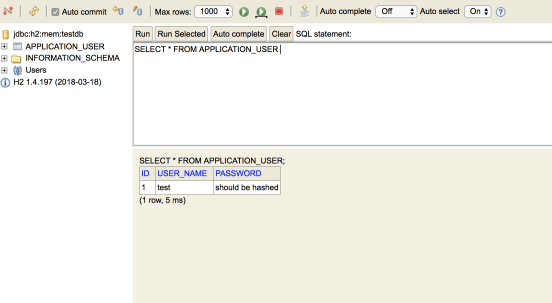
Once we have logged in, we can query for the user we had inserted on our startup sql script.
That’s it! This can make wonders for prototypes, interview assignments and blog posts like this!
| Published on Java Code Geeks with permission by Emmanouil Gkatziouras, partner at our JCG program. See the original article here: Fully working prototypes with Spring Boot and H2 Opinions expressed by Java Code Geeks contributors are their own. |


