Spring Security One-Time Token Login Example
One-time token (OTT) authentication is a secure mechanism often used when a user needs temporary access without a permanent password. This method is common for passwordless logins, email verification, and secure API authentication. Let us delve into understanding Spring Security one-time token login in this comprehensive example.
1. What is a One-time Token login? When should we use it?
A One-time Token (OTT) login is a secure authentication mechanism that allows users to log in using a unique, temporary token sent via email, SMS, or other communication channels. Unlike traditional username/password authentication, this method provides a passwordless login experience, enhancing security and user convenience. When a user requests authentication, a one-time token is generated and sent to them. Once used, the Spring Security framework internally marks the token as expired, preventing reuse and ensuring security. This approach is widely used in various scenarios, including:
- Passwordless authentication: Commonly known as Magic Link login, where users receive a secure link to authenticate without entering a password.
- Account verification: Used for confirming user identity during registration or sensitive account changes.
- Temporary access control: Grants short-term access to applications or APIs without requiring permanent credentials.
Spring Security’s one-time token login mechanism streamlines authentication while reducing security risks associated with password-based systems.
2. Code Example
Follow these steps to build a basic Spring Boot application with form-based one-time token authentication, using the default Spring Security configuration.
2.1 Adding Spring Dependencies
Add the following dependencies to the pom.xml files:
01 02 03 04 05 06 07 08 09 10 11 12 13 14 15 16 17 18 19 20 21 22 23 | <!-- Spring Boot Security Starter: Provides authentication and authorization support --><dependency> <groupId>org.springframework.boot</groupId> <artifactId>spring-boot-starter-security</artifactId></dependency><!-- Spring Boot Thymeleaf Starter: Enables Thymeleaf templating support --><dependency> <groupId>org.springframework.boot</groupId> <artifactId>spring-boot-starter-thymeleaf</artifactId></dependency><!-- Spring Boot Web Starter: Provides support for building web applications --><dependency> <groupId>org.springframework.boot</groupId> <artifactId>spring-boot-starter-web</artifactId></dependency><!-- Thymeleaf Extras for Spring Security 6: Enables security features in Thymeleaf templates --><dependency> <groupId>org.thymeleaf.extras</groupId> <artifactId>thymeleaf-extras-springsecurity6</artifactId></dependency> |
2.2 Creating Security Configuration Class
Create a Security Configuration class to set up the Security Filter Chain and integrate One-Time Token authentication.
01 02 03 04 05 06 07 08 09 10 11 12 13 14 15 16 17 18 19 20 21 22 23 24 25 26 27 28 29 30 31 32 33 34 35 36 37 38 39 | package com.example.configuration;import org.springframework.context.annotation.Bean;import org.springframework.context.annotation.Configuration;import org.springframework.security.config.Customizer;import org.springframework.security.config.annotation.web.builders.HttpSecurity;import org.springframework.security.config.annotation.web.configuration.EnableWebSecurity;import org.springframework.security.core.userdetails.User;import org.springframework.security.core.userdetails.UserDetails;import org.springframework.security.provisioning.InMemoryUserDetailsManager;import org.springframework.security.web.SecurityFilterChain;@Configuration@EnableWebSecuritypublic class SecurityConfiguration { @Bean SecurityFilterChain securityFilterChain(HttpSecurity http) throws Exception { http .authorizeHttpRequests( auth -> auth .requestMatchers("/ott/sent").permitAll() .requestMatchers("/login/ott").permitAll() .anyRequest().authenticated() ) .formLogin(Customizer.withDefaults()) // Using form based authentication .oneTimeTokenLogin(Customizer.withDefaults()); return http.build(); } @Bean InMemoryUserDetailsManager inMemoryUserDetailsManager() { UserDetails user = User .withUsername("admin@gmail.com") .password("{noop}password") .build(); return new InMemoryUserDetailsManager(user); }} |
2.2.1 Code Explanation
The SecurityConfiguration class is a Spring Security configuration class that enables web security using @EnableWebSecurity and defines security rules using a SecurityFilterChain bean. It allows unauthenticated access to /ott/sent and /login/ott while requiring authentication for all other requests. It uses form-based authentication and one-time token login. Additionally, an in-memory user store is configured with a single user (admin@gmail.com) and a plaintext password (password) using InMemoryUserDetailsManager.
2.3 Creating a Handler Class
Develop a handler class that generates a magic link, which is then emailed to the user. This link serves as a login URL, embedding a one-time authentication token for secure access.
01 02 03 04 05 06 07 08 09 10 11 12 13 14 15 16 17 18 19 20 21 22 23 24 25 26 27 28 29 30 31 32 33 34 35 36 37 38 39 40 41 42 43 | package com.example.handler;import jakarta.servlet.ServletException;import jakarta.servlet.http.HttpServletRequest;import jakarta.servlet.http.HttpServletResponse;import lombok.extern.slf4j.Slf4j;import org.springframework.security.authentication.ott.OneTimeToken;import org.springframework.security.web.authentication.ott.OneTimeTokenGenerationSuccessHandler;import org.springframework.security.web.authentication.ott.RedirectOneTimeTokenGenerationSuccessHandler;import org.springframework.security.web.util.UrlUtils;import org.springframework.stereotype.Component;import org.springframework.web.util.UriComponentsBuilder;import java.io.IOException;@Component@Slf4jpublic class MagicLinkSuccessHandler implements OneTimeTokenGenerationSuccessHandler { private static final String REDIRECT_URL = "/ott/sent"; private final OneTimeTokenGenerationSuccessHandler handler = new RedirectOneTimeTokenGenerationSuccessHandler(REDIRECT_URL); // Magic link construction @Override public void handle(HttpServletRequest request, HttpServletResponse response, OneTimeToken oneTimeToken) throws IOException, ServletException { UriComponentsBuilder builder = UriComponentsBuilder.fromHttpUrl(UrlUtils.buildFullRequestUrl(request)) .replacePath(request.getContextPath()) .replaceQuery(null) .fragment(null) .path("/login/ott") .queryParam("token", oneTimeToken.getTokenValue()); String magicLink = builder.toUriString(); log.info("Magic link: " + magicLink); // Todo: Skipped sending email for the user. this.handler.handle(request, response, oneTimeToken); }} |
2.3.1 Code Explanation
The MagicLinkSuccessHandler class is a Spring component that implements the OneTimeTokenGenerationSuccessHandler interface to handle successful one-time token (OTT) generation events. Upon generating an OTT, it constructs a “magic link” URL pointing to the /login/ott endpoint, appending the token as a query parameter. This link is intended to facilitate passwordless authentication, allowing users to log in by clicking the link. The class logs the generated magic link and delegates further handling to a RedirectOneTimeTokenGenerationSuccessHandler, which redirects users to the /ott/sent page.
Notably, while the code includes a placeholder for sending the magic link to the user’s email, this functionality is marked as a “Todo” and is not implemented in the provided snippet. Implementing this email-sending functionality is essential for delivering the magic link to users, enabling them to authenticate seamlessly without a password. This approach aligns with Spring Security’s support for one-time token login mechanisms, offering a user-friendly and secure authentication method.
2.4 Create a Controller Class
Create a controller class that will handle user interactions.
01 02 03 04 05 06 07 08 09 10 11 12 13 14 15 16 17 18 19 20 21 22 | package com.example.controller;import org.springframework.stereotype.Controller;import org.springframework.ui.Model;import org.springframework.web.bind.annotation.GetMapping;import java.security.Principal;@Controllerpublic class PageController { @GetMapping public String index(Principal principal, Model model) { model.addAttribute("user", principal.getName()); return "index"; } @GetMapping("/ott/sent") public String ottSent() { return "ott-sent"; }} |
2.4.1 Code Explanation
The PageController class is a Spring MVC controller responsible for handling user requests and rendering views. The index method maps to the root URL (/) and retrieves the authenticated user’s name from the Principal object, adding it to the model before returning the index view. The ottSent method handles requests to /ott/sent and returns the ott-sent view. This setup ensures that authenticated users see personalized content on the index page, while a separate page is provided for confirming the sending of a one-time token (OTT).
2.5 Create the Thymeleaf Templates
Since we are using Spring’s default configuration for form login, pages like login and logout will be automatically handled by Spring Boot, eliminating the need for manual configuration of these boilerplate pages.
2.5.1 OTT Page
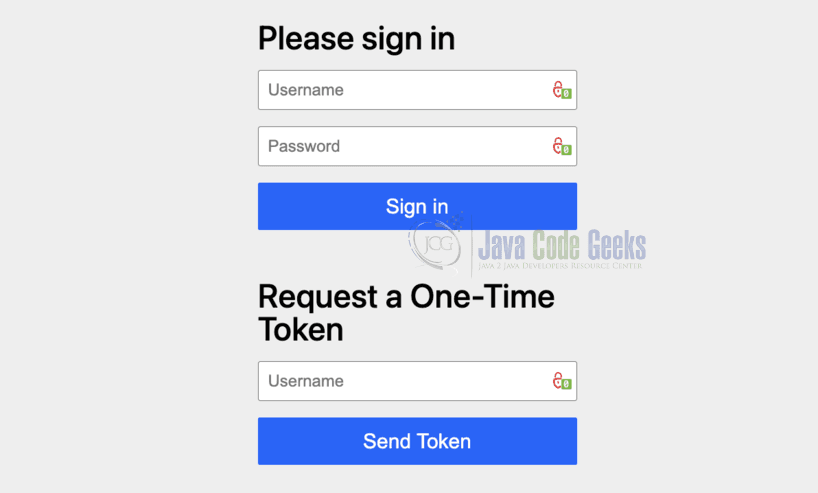
When the login screen appears, it will display both the username/password login fields and the OTT login box. If the user logs in using a username and password, they will be authenticated and redirected to the welcome index page, where their username will be displayed. If the user opts for the OTT login, they will see a confirmation page and a magic link will be sent to their email. For simplicity, this link will be logged to the console instead of sending an email.
01 02 03 04 05 06 07 08 09 10 11 12 13 | <!DOCTYPE html><html lang="en"><head> <meta charset="UTF-8"> <title>Ott</title></head><body><div> <h1>OTT sent</h1> <p>Your one time token has been sent.</p></div></body></html> |
2.5.2 Index Page
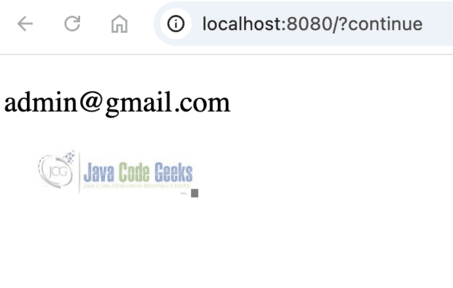
After authentication, this HTML page will be displayed, showing the user’s principal.
01 02 03 04 05 06 07 08 09 10 11 12 | <!DOCTYPE html><head> <meta charset="UTF-8"> <title>Index</title></head><body> <div> <p style="font-size: 30px" th:text="${user}"></p> </div></body></html> |
2.6 Create the Main class
This class serves as the entry point to the Spring application.
01 02 03 04 05 06 07 08 09 10 11 12 13 14 15 | package com.example;import lombok.extern.slf4j.Slf4j;import org.springframework.boot.SpringApplication;import org.springframework.boot.autoconfigure.SpringBootApplication;@SpringBootApplication@Slf4jpublic class SpringOneTimeTokenApplication { public static void main(String[] args) { SpringApplication.run(SpringOneTimeTokenApplication.class, args); log.info("Application started successfully."); }} |
3. Run the application
Start the Spring Boot application and navigate to http://localhost:8080. The login page will be displayed, which is automatically provided by the Spring Security configuration.

You are free to choose your preferred login method. Here, we will enter the username and click the “Send Token” button. After clicking the button, a one-time token will be sent to the user’s email. For this article, we will check the logs to view the generated magic URL.
1 | 2025-03-19T12:28:24.876+05:30 INFO 11854 --- [spring-one-time-token] [nio-8080-exec-6] c.e.handler.MagicLinkSuccessHandler : Magic link: http://localhost:8080/login/ott?token=0dd47b5f-31f5-4b36-ad9a-a2a3dd48ed40 |
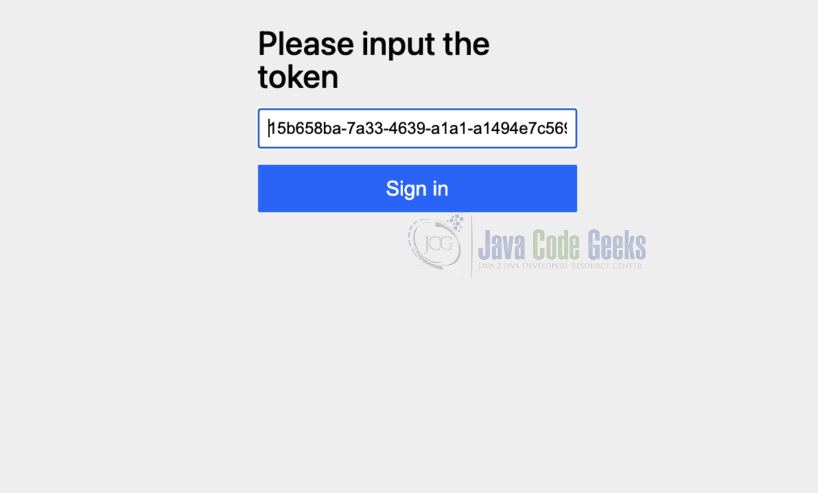
The user can click on this URL and then proceed by clicking the sign-in link.

After clicking, the username will be displayed to the user.

4. Conclusion
One-time token authentication is a secure and effective method for passwordless authentication. It enhances security by ensuring tokens are used only once and within a specified time. Using Spring Boot and Spring Security, we implemented a simple but effective OTT system. You can extend this by integrating with email/SMS services for token delivery.


